Adding issues and evidence
This page contains:
- Issues vs Evidence
- Fields
- Rich text, the right way
- Find / add Issues and Evidence
- A concrete example
- Final note about Issue / Evidence separation
One of the key concepts in any security assessment is the vulnerability, weakness or finding.
We separate the information about each finding in two concepts:
- The Issue
- Contains general information about the problem, such as: Title, Description, Recommendation, CVEs, Reference URLs, etc.
- The Evidence
- Details that change from one instance of the problem to the next: port number, specific versions, output of tools (e.g. the list of SSL ciphers, etc.)
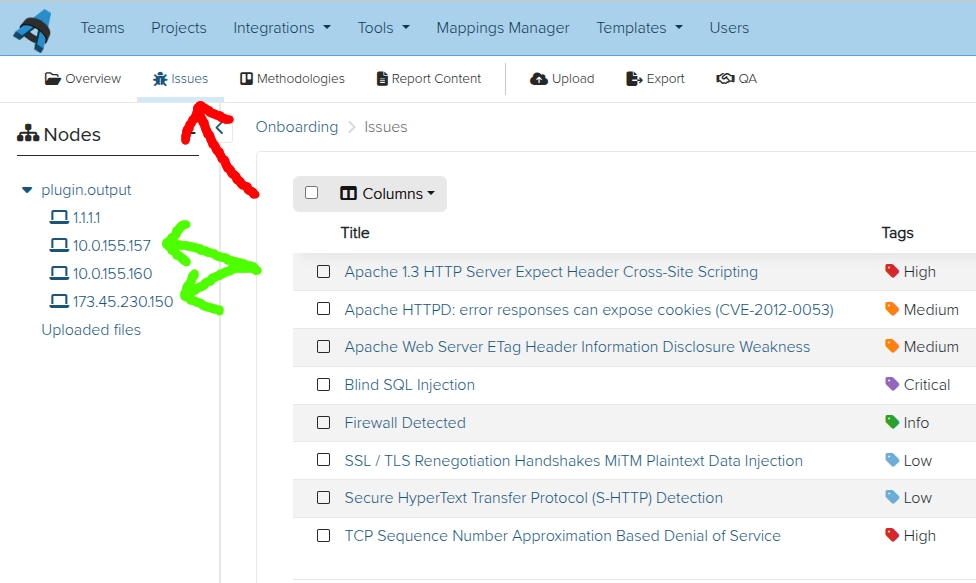
Find / add Issues and Evidence:
- All the Issues in the project can be found under the All issues link near the top of the sidebar.
- Each piece of Evidence can be found in the corresponding node of the tree.
Fields
As of v3.7.0 of Dradis, we have both a Fields view and a Source view for the editor pane. In the Fields view you can add fields with the + Add field button to have the structure automatically applied.

In the Source view you can use the #[ ... ]# syntax to define fields in your content. For example, the content below has Title and Description fields.

You're free to use any fields you want. Fields are useful to structure your content, and they will be useful when generating a report (see the Export results section).
Rich text, the right way
You can use some Textile markup in your content. You can type in the formatting manually, or use the editor menu to insert the formatting for you by clicking the appropriate icon. The preview pane on the right will show what the rendered results will look like as you type:
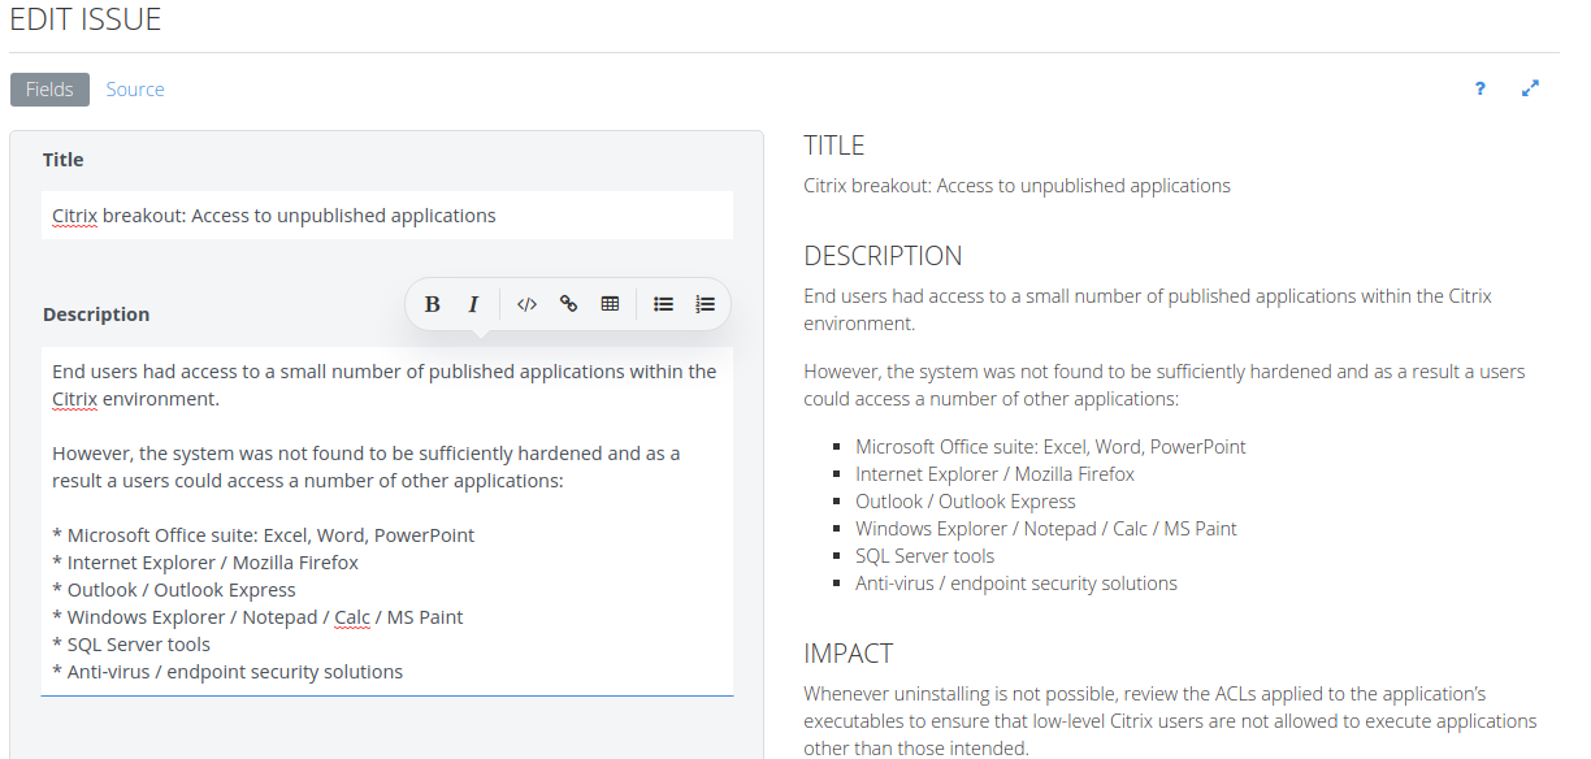
There are also Inline help and Full-screen mode buttons in the editor toolbar on the right.
Dradis supports some but not all Textile markup in your content. For more information on the text styles we support and how to include screenshots in your report, please see the Text styles and screenshots page of the Custom Word Reports guide.
A concrete example
Say you find an Out-of-date Apache vulnerability that affects 2 different hosts (port tcp/80 in host 10.0.0.1 and ports tcp/80 and tcp/443 in 10.0.0.2).
You will have one Issue describing that an outdated version of Apache was found, and three pieces of Evidence with the details of each instance of the problem.
Add the Issue
First lets add the Issue. Click on All issues on the sidebar, and on the + sign to add a new issue:
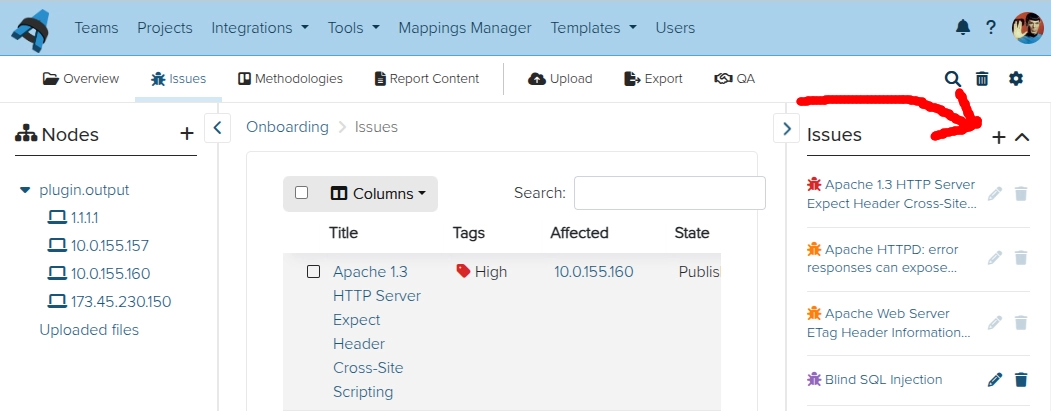
Provide the issue details:

Now create the nodes that will represent the affected servers:
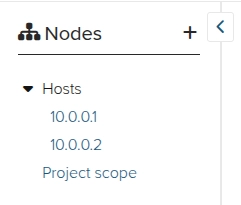
Add the Evidence from the Node
Next, the evidence. We start with 10.0.0.1:
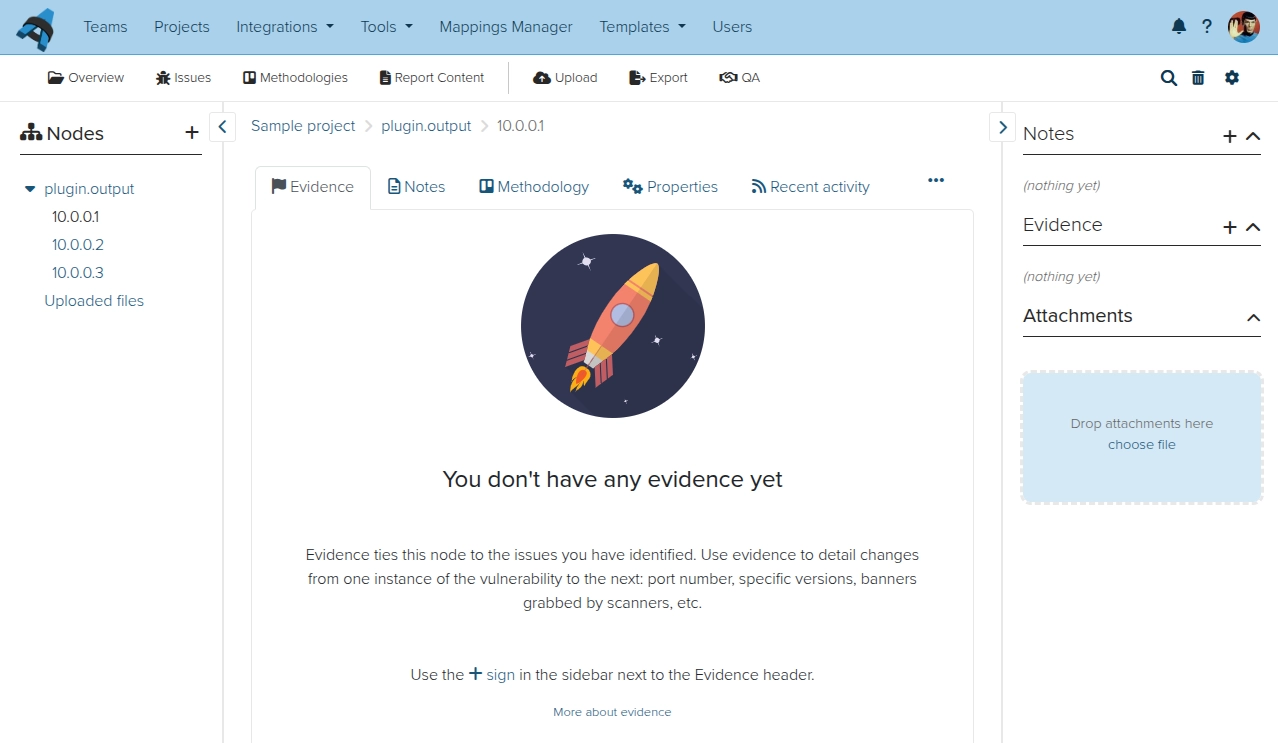
And provide some content. Make sure you select the right Issue from the drop down:
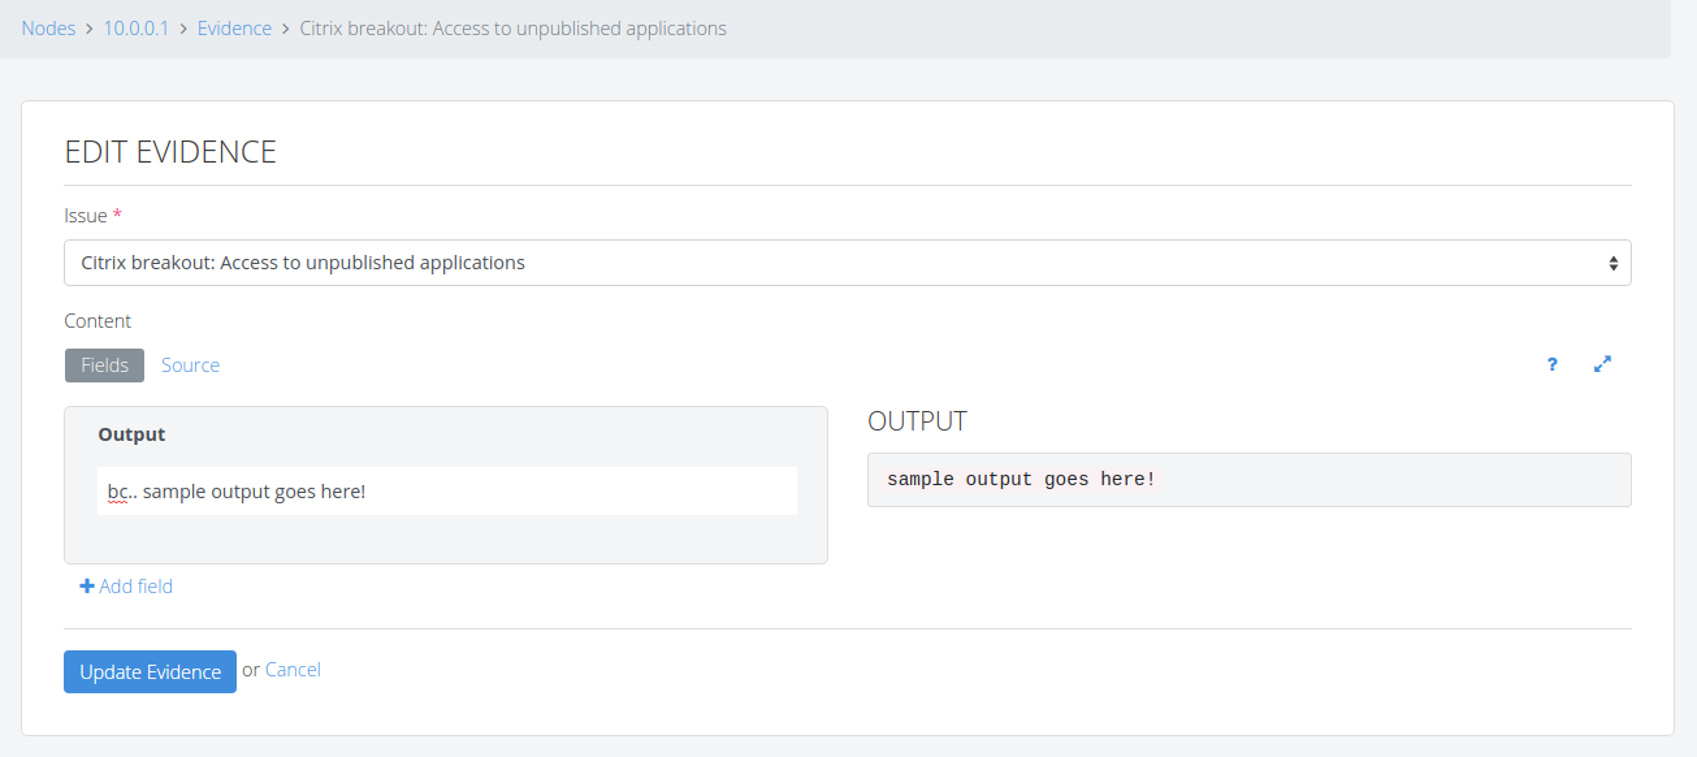
Repeat the same process to add the evidence for 10.0.0.2. Remember that you'll need to add two pieces of evidence:
- One for
tcp/80 - One for
tcp/443
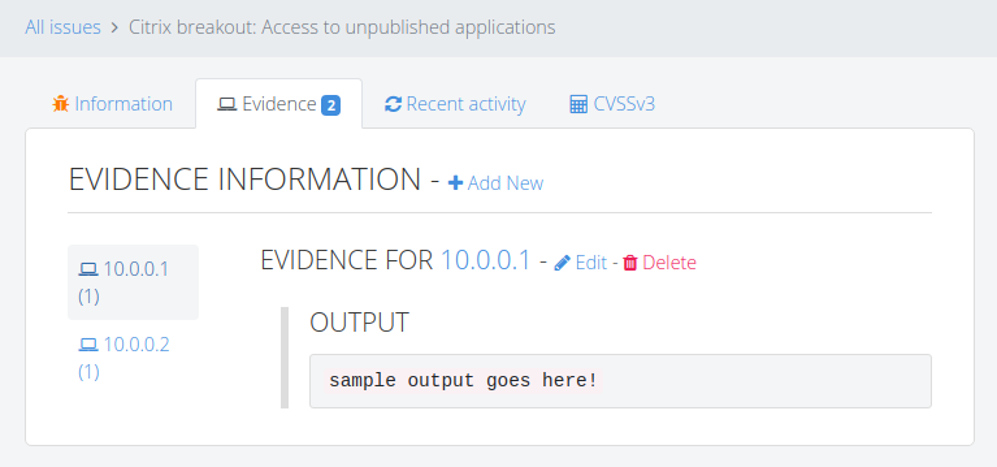
When you go back to All issues, you can now see all the information about the vulnerability along with the specifics for the three different instances identified:
Add Evidence from the Issue
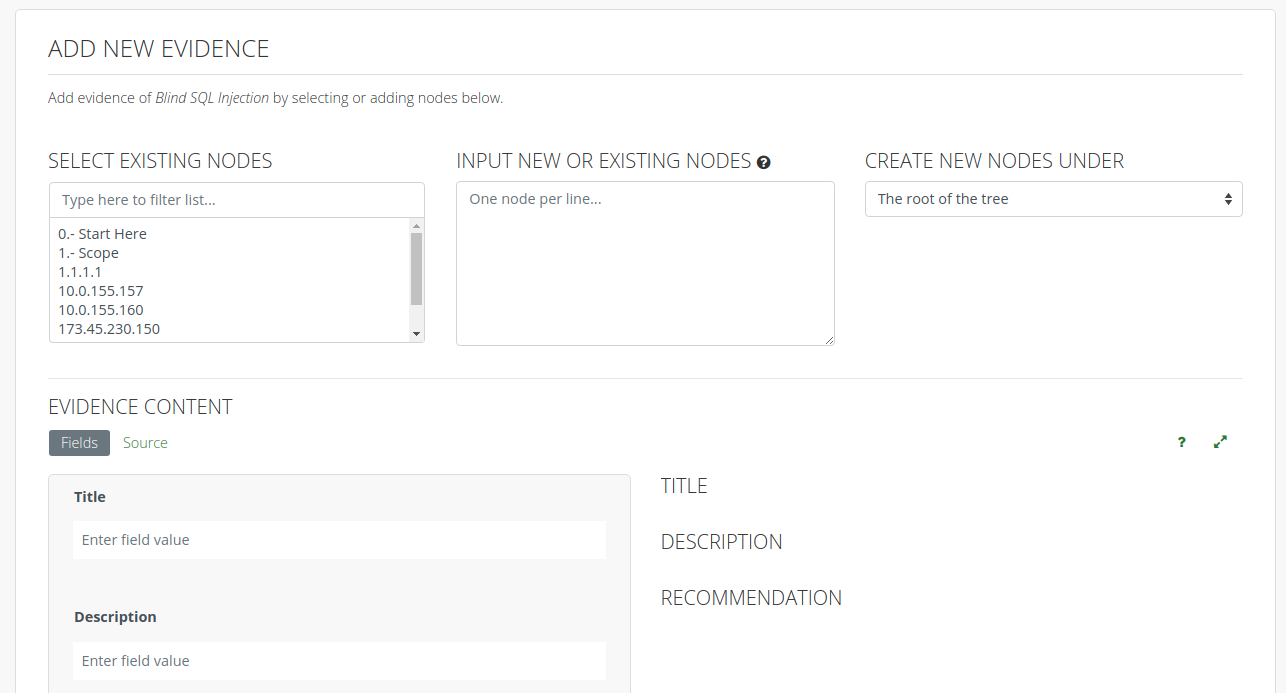
We've already seen how to add Evidence from the affected host. You can also add Evidence directly from the Issue instead. Open the Evidence tab on any Issue in your project and click New Evidence and select the default fields, a Note template, or a blank Evidence document.
You will be taken to a new view with columns on the left to select multiple existing Nodes on your project, and are able to create multiple instances of Evidence at the same time. Alternatively you can copy/paste a list of hosts (each on a separate line) into the middle column to create new Nodes in your project, each with an instance of Evidence tied to this Issue. You can also choose where to place your new Nodes.
Underneath you can fill out the fields of your Evidence as you would otherwise.
Move Evidence
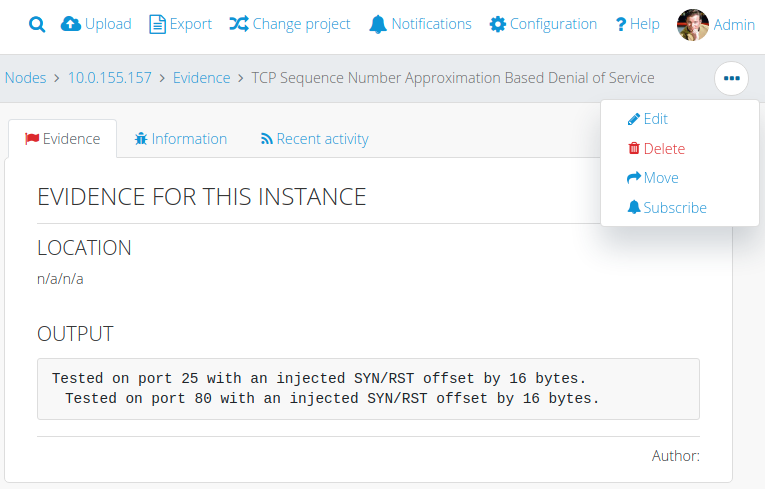
You can move Evidence from one Node to another if necessary. To do so, go the Evidence you want to move, click on the dots menu, then from the dropdown select Move.
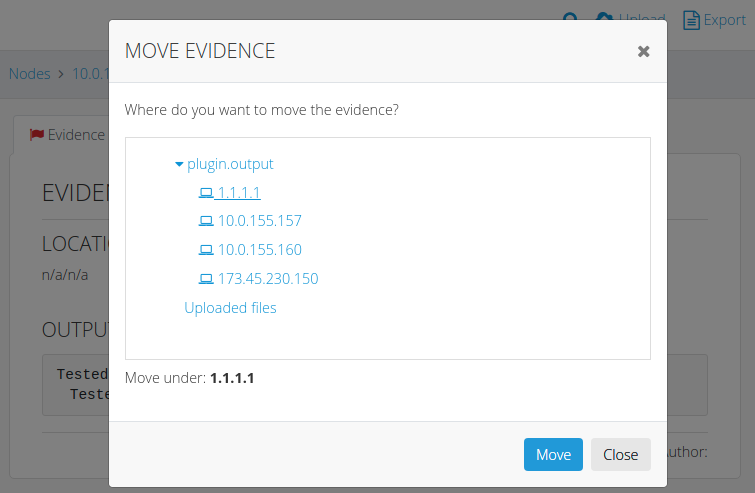
Select the Node to which you want to move this piece of Evidence and click the blue Move button.
Final note about Issue / Evidence separation
Over the years, we've found this is the most general way to report your findings. But, as with everything else in Dradis, this is up to you.
You are free to split information in Issue / Evidence, or you can include all the information in your Issue. It depends on how you want to present the results in your report.
For example, if the scope of the test is a single host, you may not want to bother with splitting Issue from Evidence.
Next help article: Liquid Dynamic Content →