Burp Suite with Dradis
Step-by-step guide to importing Burp Suite scan results into Dradis. Includes screenshots, field mappings, tips for handling request/response data, and common troubleshooting.

Burp Suite is a cybersecurity tool platform with a range of solutions for attacking web applications. Integrate Burp with Dradis to incorporate the security findings as issues and evidence in a vulnerability or pentest report.
Using the Burp Suite integration, you'll save time and reduce the effort typically associated with writing a security report manually. Not to mention, the Burp integrations creates a comprehensive view of the security posture when used alongside other popular scanning tools and services in Dradis.
The Burp Suite® name, if trademarked, is the intellectual property of the vendor. Uses of the Burp Suite® name in this page are for identification purposes only and do not imply an endorsement by the trademark owner. Dradis is not endorsed or owned by, or affiliated with, the Burp Suite® vendor.

Henk-Jan Angerman
Security Consultant at SecwatchAvailable for
Vendor
Support Documentation
Burp Suite produces rich web application scan results — request/response pairs, detailed vulnerability descriptions, confidence ratings, and CWE classifications — but its built-in reporting options don't integrate with the rest of your pentest workflow. Dradis imports Burp's XML export directly, turning each issue type into a structured finding with the original HTTP evidence preserved, so you can combine Burp results with scanner output from other tools and generate a unified client report without manually transcribing findings.
.xml format (Burp Scanner XML)| Detail | Value |
|---|---|
| Dradis Plugin | Dradis::Plugins::Burp::Xml (XML) or Dradis::Plugins::Burp::Html (HTML) |
| Supported File Formats | .xml (Burp Scanner XML), .html (Burp Scanner HTML) |
| Available In | Community Edition and Professional |
| Data Imported | Issues, Evidence (with HTTP requests/responses), Nodes (hosts) |
| Typical Import Time | ~3 seconds for 10 findings, ~15 seconds for 100+ |
When you import a Burp XML file, the Dradis Burp plugin parses each <issue> element and creates three types of objects:
Nodes: Each unique host (identified by the <host> element's ip attribute) becomes a Node in Dradis. If the IP attribute is empty, the host URL is used instead. The node's hostname property is set from the host URL (e.g., https://www.example.com). Host nodes appear under the Scanner output parent node in the sidebar.
Issues: Each unique Burp issue type (identified by the <type> element) becomes a single Issue in Dradis. If Burp finds the same vulnerability type on multiple pages or hosts, Dradis creates one Issue and links it to each location through Evidence. The Issue contains the vulnerability metadata: name, severity, confidence, background description, remediation guidance, and vulnerability classifications (CWE references). For issues reported by Burp extensions (type 134217728), the plugin uses the issue name as the unique identifier instead.
Evidence: For every occurrence of an issue on a specific host, Dradis creates an Evidence entry linking the Issue to the Node. Evidence captures the path, location, request/response data, and per-instance severity and confidence. This is where Burp's unique strength lives — the actual HTTP traffic that proves the vulnerability exists.
| Dradis Field | Burp XML Source | Template Variable |
|---|---|---|
| Title | <name> |
{{ burp[issue.name] }} |
| Severity | <severity> |
{{ burp[issue.severity] }} |
| Background | <issueBackground> |
{{ burp[issue.background] }} |
| RemediationBackground | <remediationBackground> |
{{ burp[issue.remediation_background] }} |
| Detail | <issueDetail> |
{{ burp[issue.detail] }} |
| RemediationDetails | <remediationDetail> |
{{ burp[issue.remediation_detail] }} |
| References | <references> |
{{ burp[issue.references] }} |
| Classifications | <vulnerabilityClassifications> |
{{ burp[issue.vulnerability_classifications] }} |
| Dradis Field | Burp XML Source | Template Variable |
|---|---|---|
| Host | <host> |
{{ burp[issue.host] }} |
| Path | <path> |
{{ burp[issue.path] }} |
| Location | <location> |
{{ burp[issue.location] }} |
| Severity | <severity> |
{{ burp[issue.severity] }} |
| Confidence | <confidence> |
{{ burp[issue.confidence] }} |
| Request | <request> (base64-decoded) |
{{ burp[issue.request] }} |
| Response | <response> (base64-decoded) |
{{ burp[issue.response] }} |
| Request 1 | Additional <request> |
{{ burp[issue.request_1] }} |
| Response 1 | Additional <response> |
{{ burp[issue.response_1] }} |
| Request 2 | Additional <request> |
{{ burp[issue.request_2] }} |
| Response 2 | Additional <response> |
{{ burp[issue.response_2] }} |
| Request 3 | Additional <request> |
{{ burp[issue.request_3] }} |
| Response 3 | Additional <response> |
{{ burp[issue.response_3] }} |
The Burp plugin exposes these fields for use in custom templates (available via the Mappings Manager in Dradis Pro):
Issue fields (issue.*):
| Field | Description |
|---|---|
issue.name |
Vulnerability type name (e.g., "Cross-site scripting (reflected)") |
issue.type |
Burp internal type ID number |
issue.serial_number |
Unique serial number for this issue instance |
issue.severity |
Severity level: High, Medium, Low, or Information |
issue.confidence |
Confidence rating: Certain, Firm, or Tentative |
issue.host |
Target host URL |
issue.path |
URL path where the issue was found |
issue.location |
Specific location descriptor (e.g., "parameter name") |
issue.background |
General vulnerability background description |
issue.detail |
Instance-specific vulnerability detail |
issue.remediation_background |
General remediation guidance |
issue.remediation_detail |
Instance-specific remediation detail |
issue.vulnerability_classifications |
CWE and other classification references |
issue.references |
External reference links |
issue.request |
HTTP request that triggered the finding (base64-decoded) |
issue.response |
HTTP response containing the vulnerability evidence (base64-decoded) |
issue.request_1 through issue.request_3 |
Additional request/response pairs when multiple exist |
issue.response_1 through issue.response_3 |
Additional response data for multi-step findings |
In Burp Suite Professional:
Dradis::Plugins::Burp::Xml importer (though Dradis also supports Burp HTML via a separate plugin)..xml file.In Burp Suite Community Edition, the export works similarly through Target > Site map > right-click > Report selected issues, though scanner features are limited compared to Pro.
Log into Dradis and open your project. Click the Upload tab in the navigation bar.
You'll see the Upload Output Files form with three sections: tool selection, record state, and file selection.
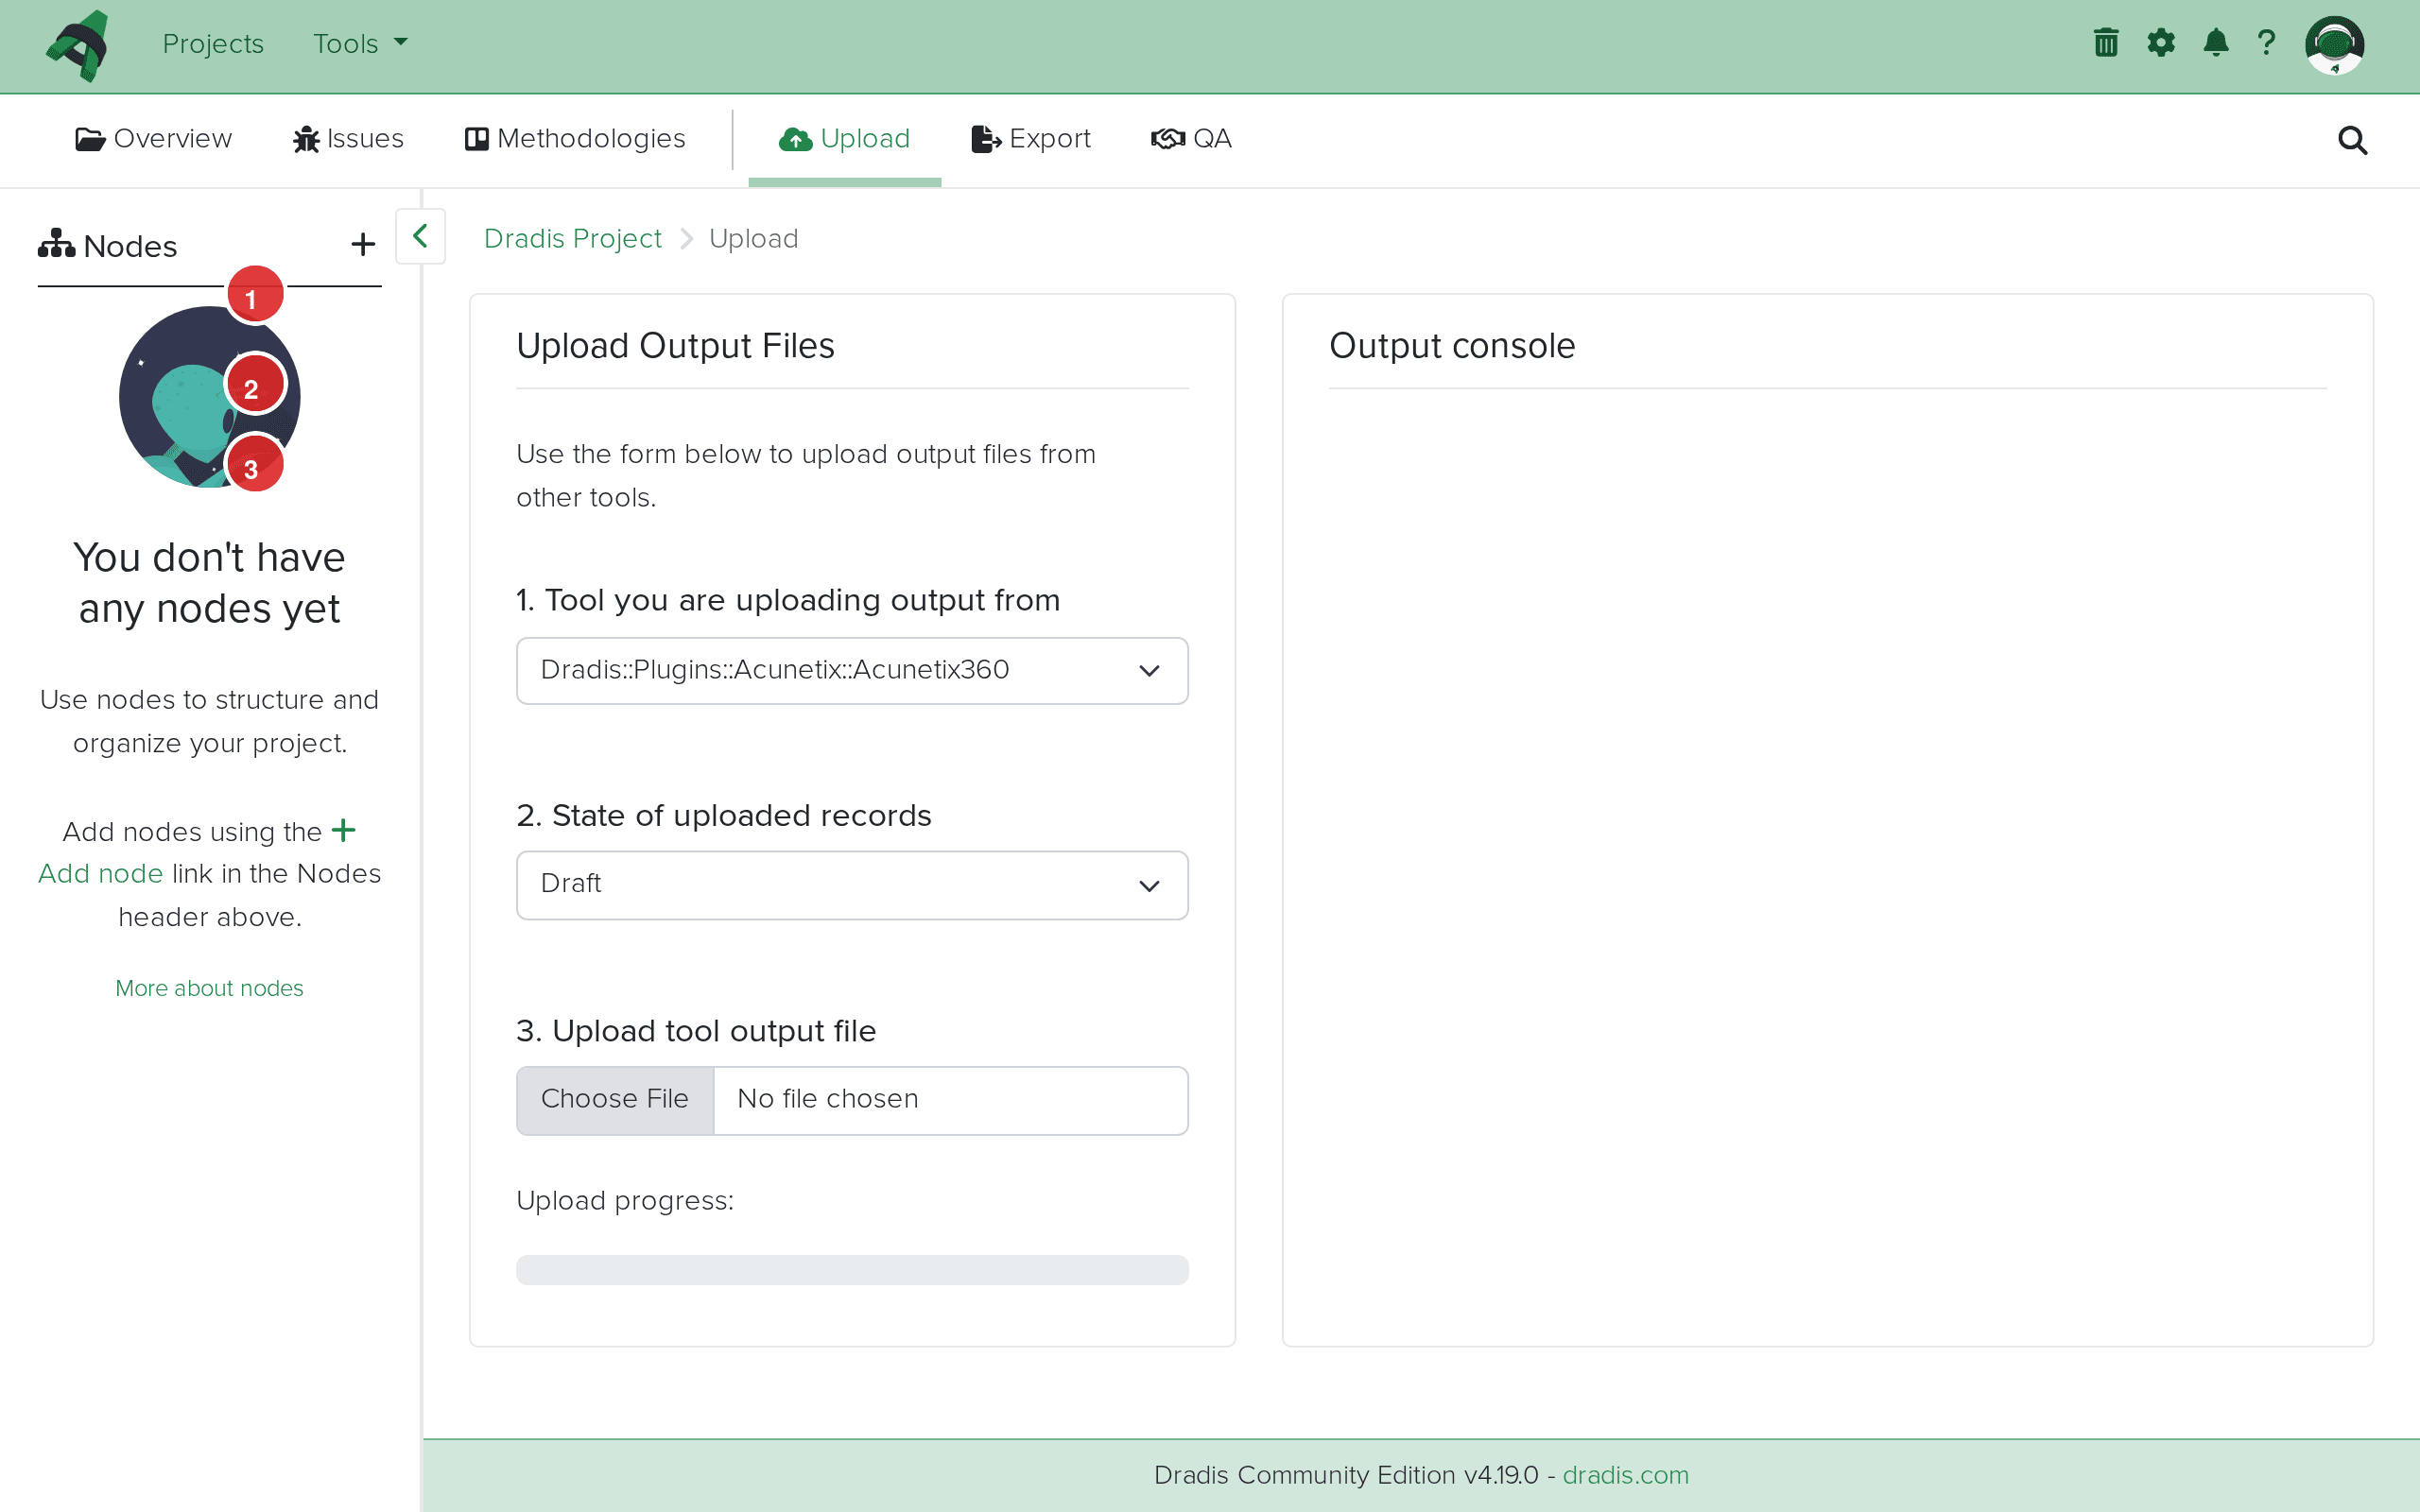 The Upload interface in Dradis. Select the tool (1), set the record state (2), and choose your file (3).
From the Tool you are uploading output from dropdown, select Dradis::Plugins::Burp::Xml. Note that Dradis offers two Burp importers: Burp::Xml for XML exports and Burp::Html for HTML exports. Choose the one matching your export format.
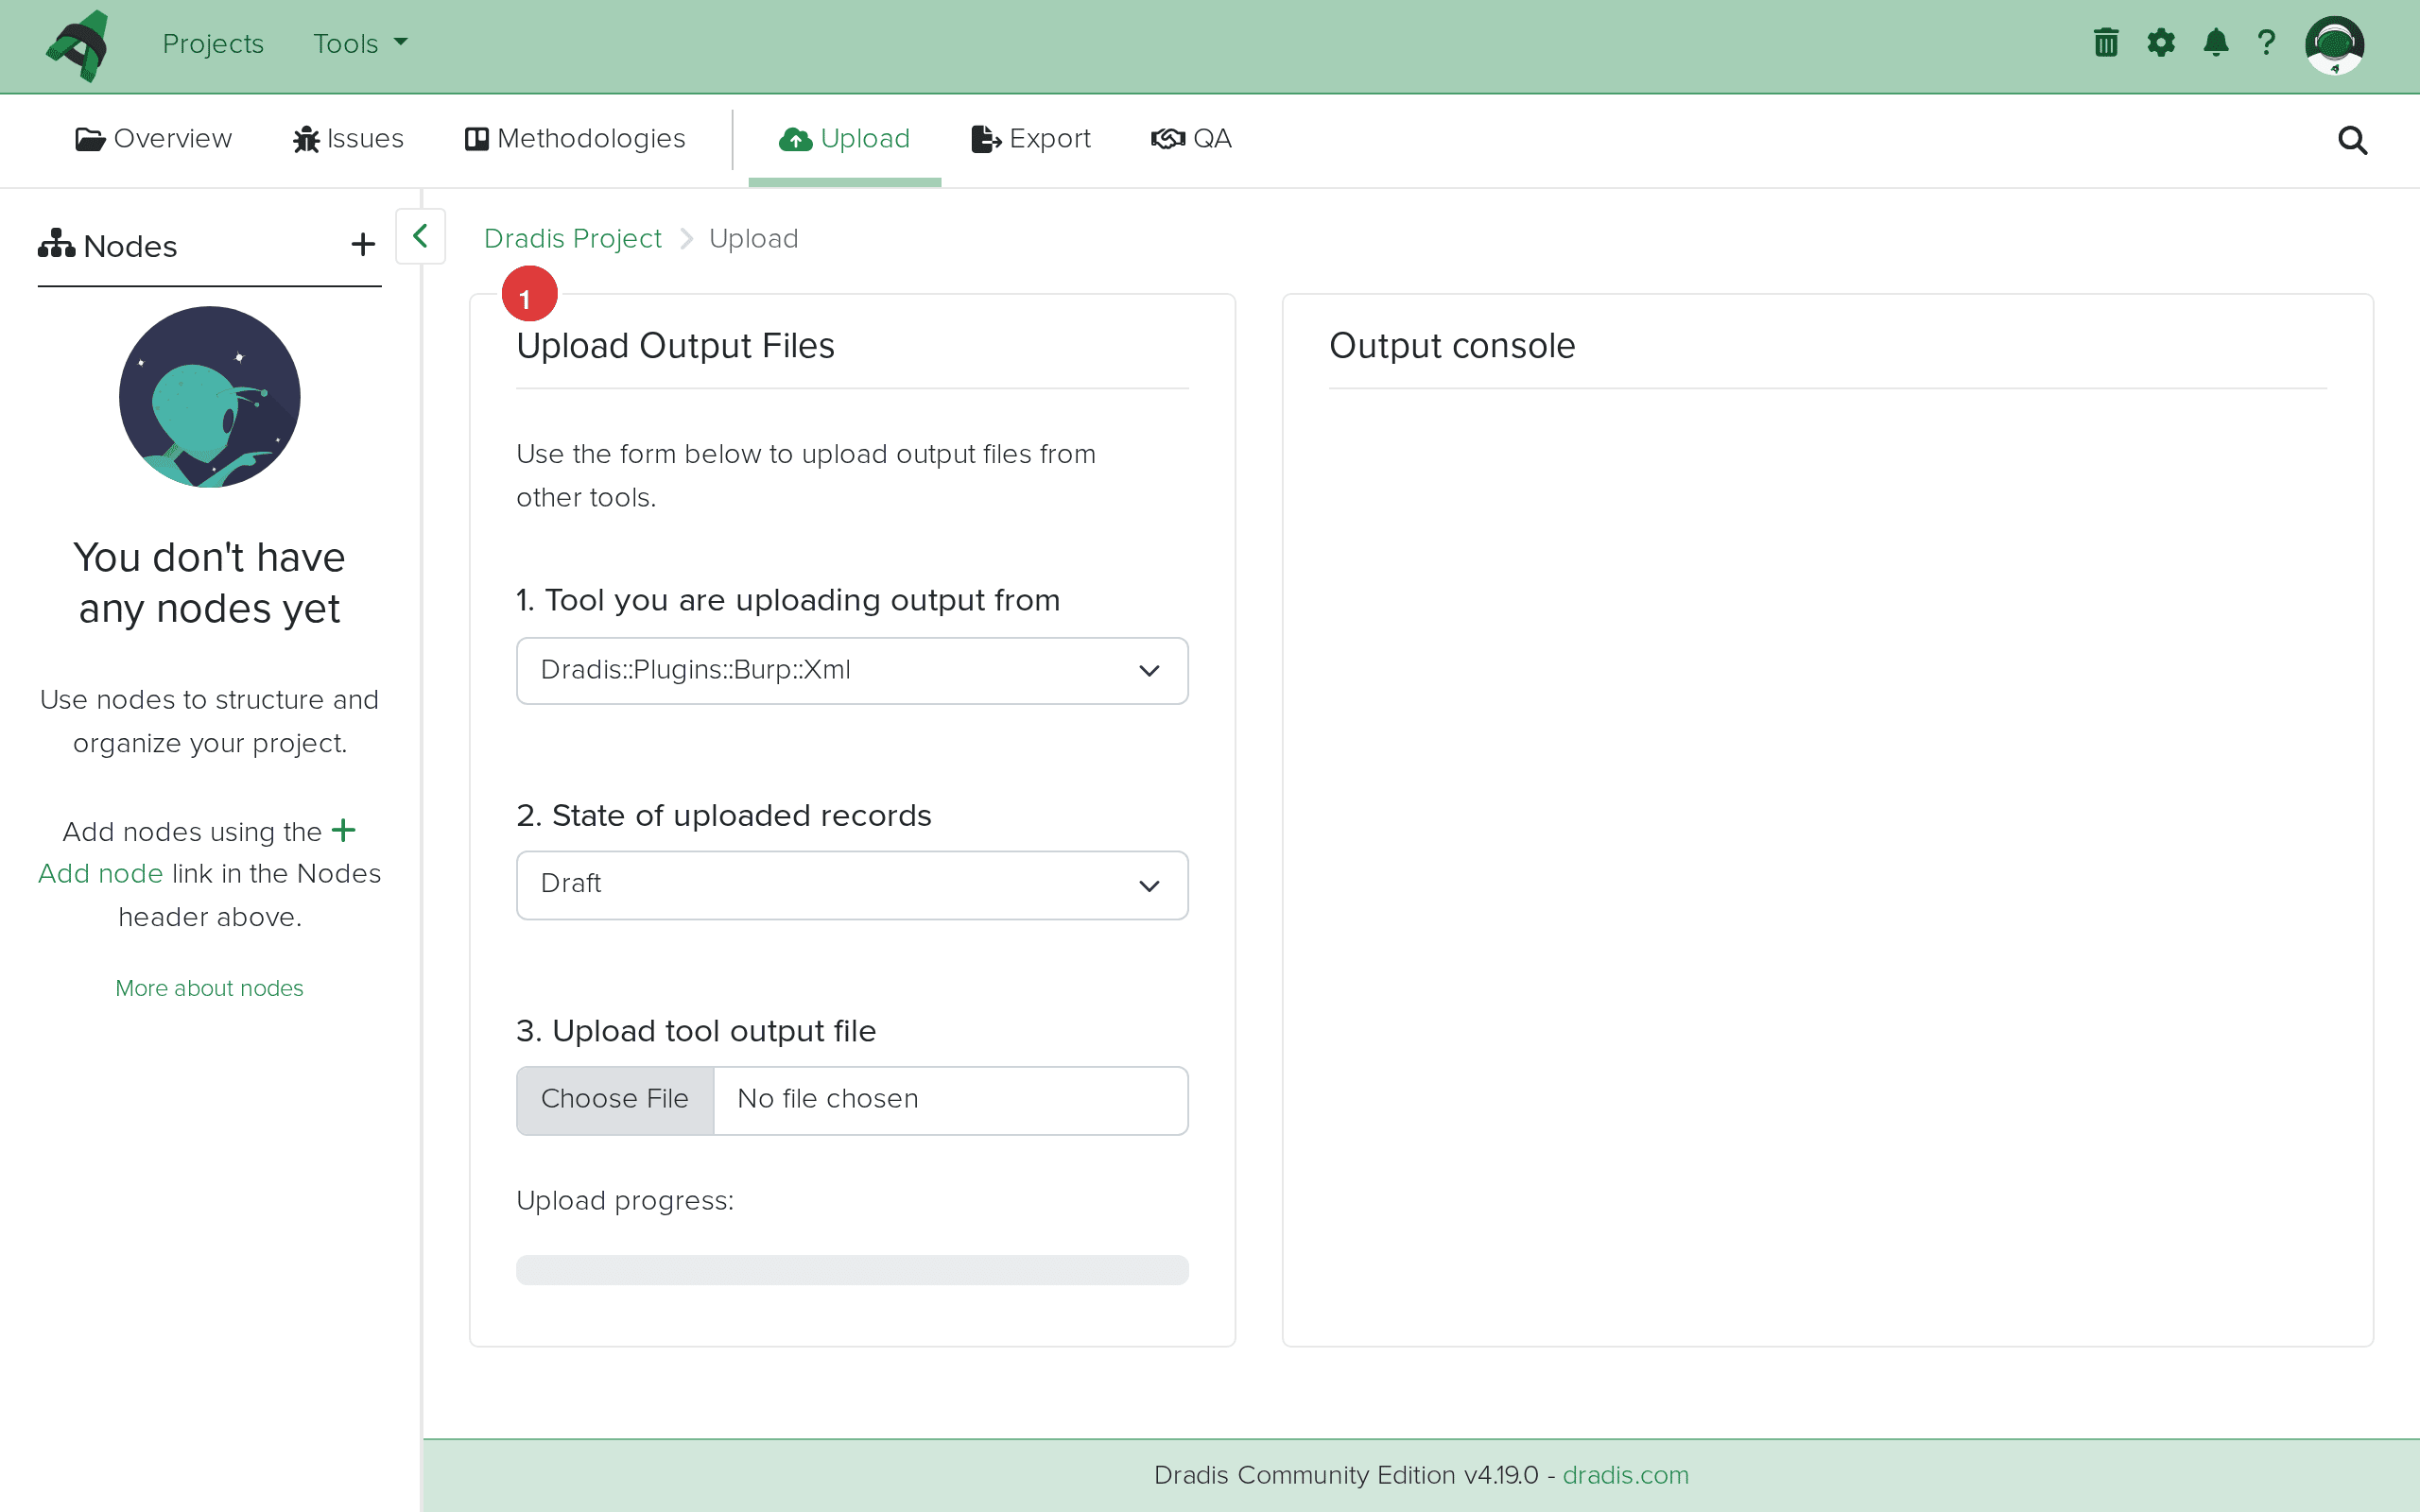 Select Dradis::Plugins::Burp::Xml (1) from the tool dropdown for XML exports.
Click Choose File and select your .xml file. The upload begins automatically once you select the file.
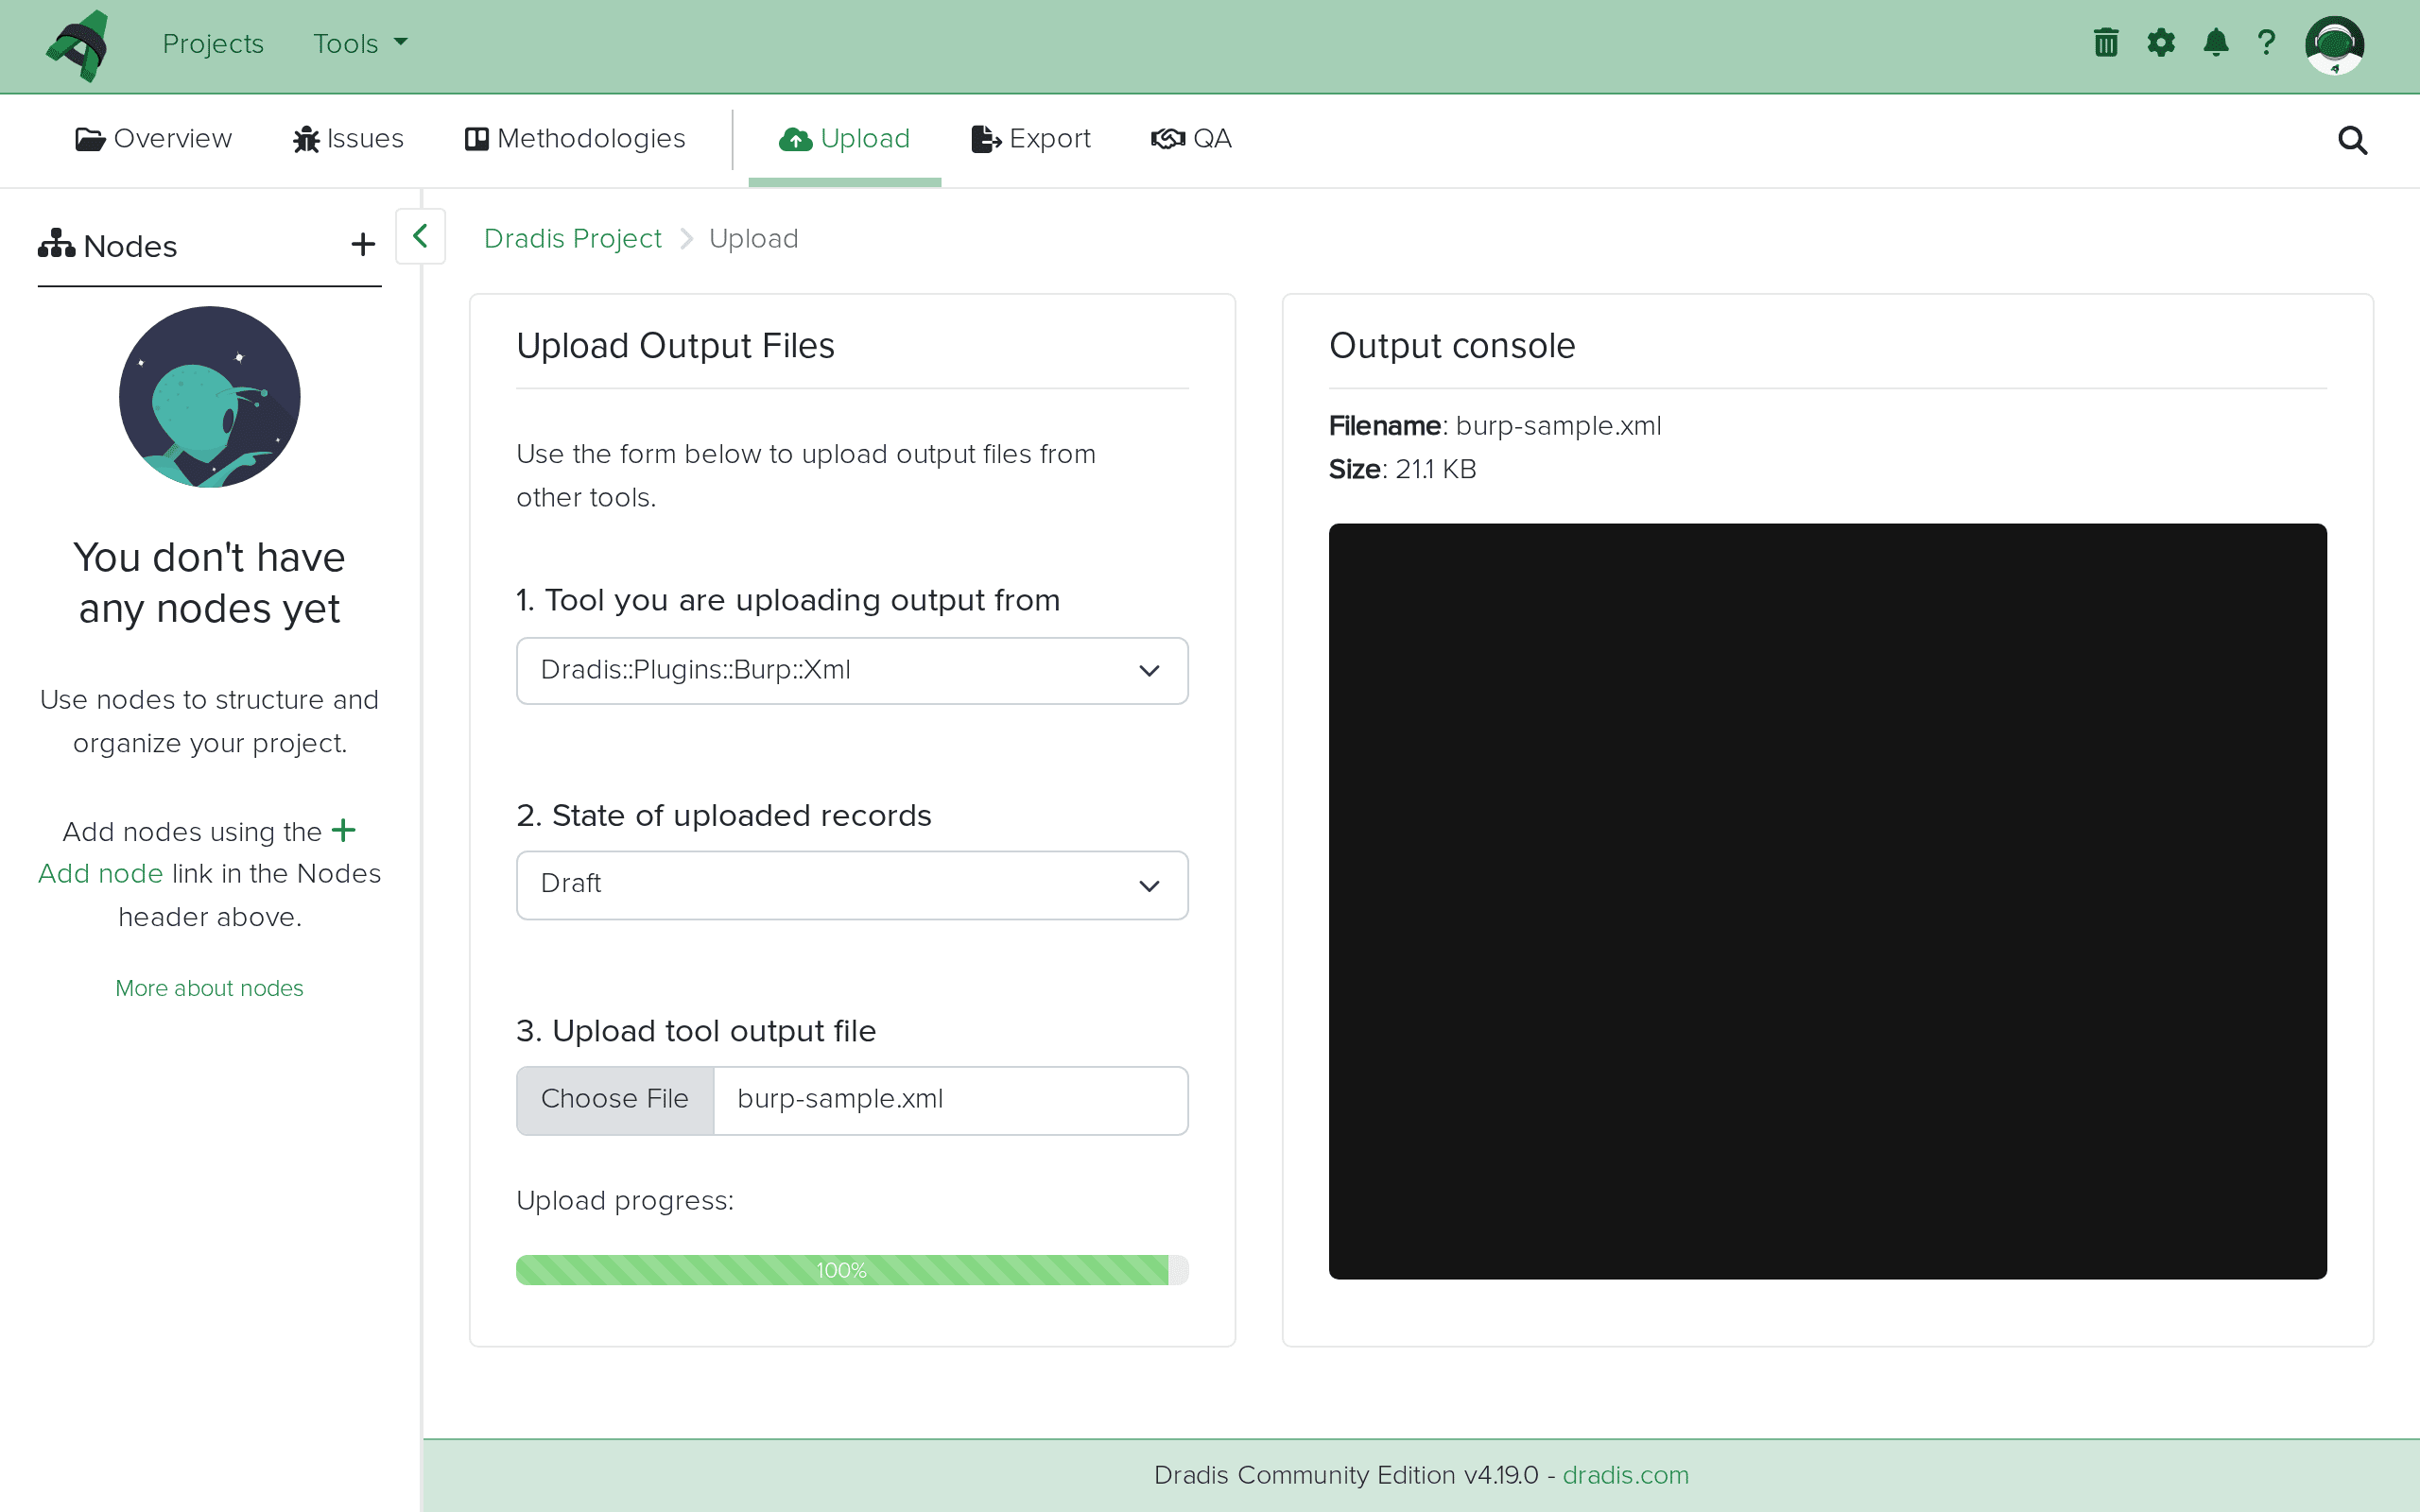 Your Burp XML file is ready to upload.
The Output console streams the import progress in real time. You'll see entries like:
affects: 203.0.113.10
Adding Cross-site scripting (reflected) (2097920)
adding evidence for this instance to 203.0.113.10.
Adding Cross-origin resource sharing: arbitrary origin trusted (2098944)
affects: 203.0.113.20
adding evidence for this instance to 203.0.113.20.
...
Burp Scanner results successfully imported
Each "Adding" line means a new Burp issue type was encountered. "adding evidence for this instance" means an Evidence entry was created linking the Issue to a specific host.
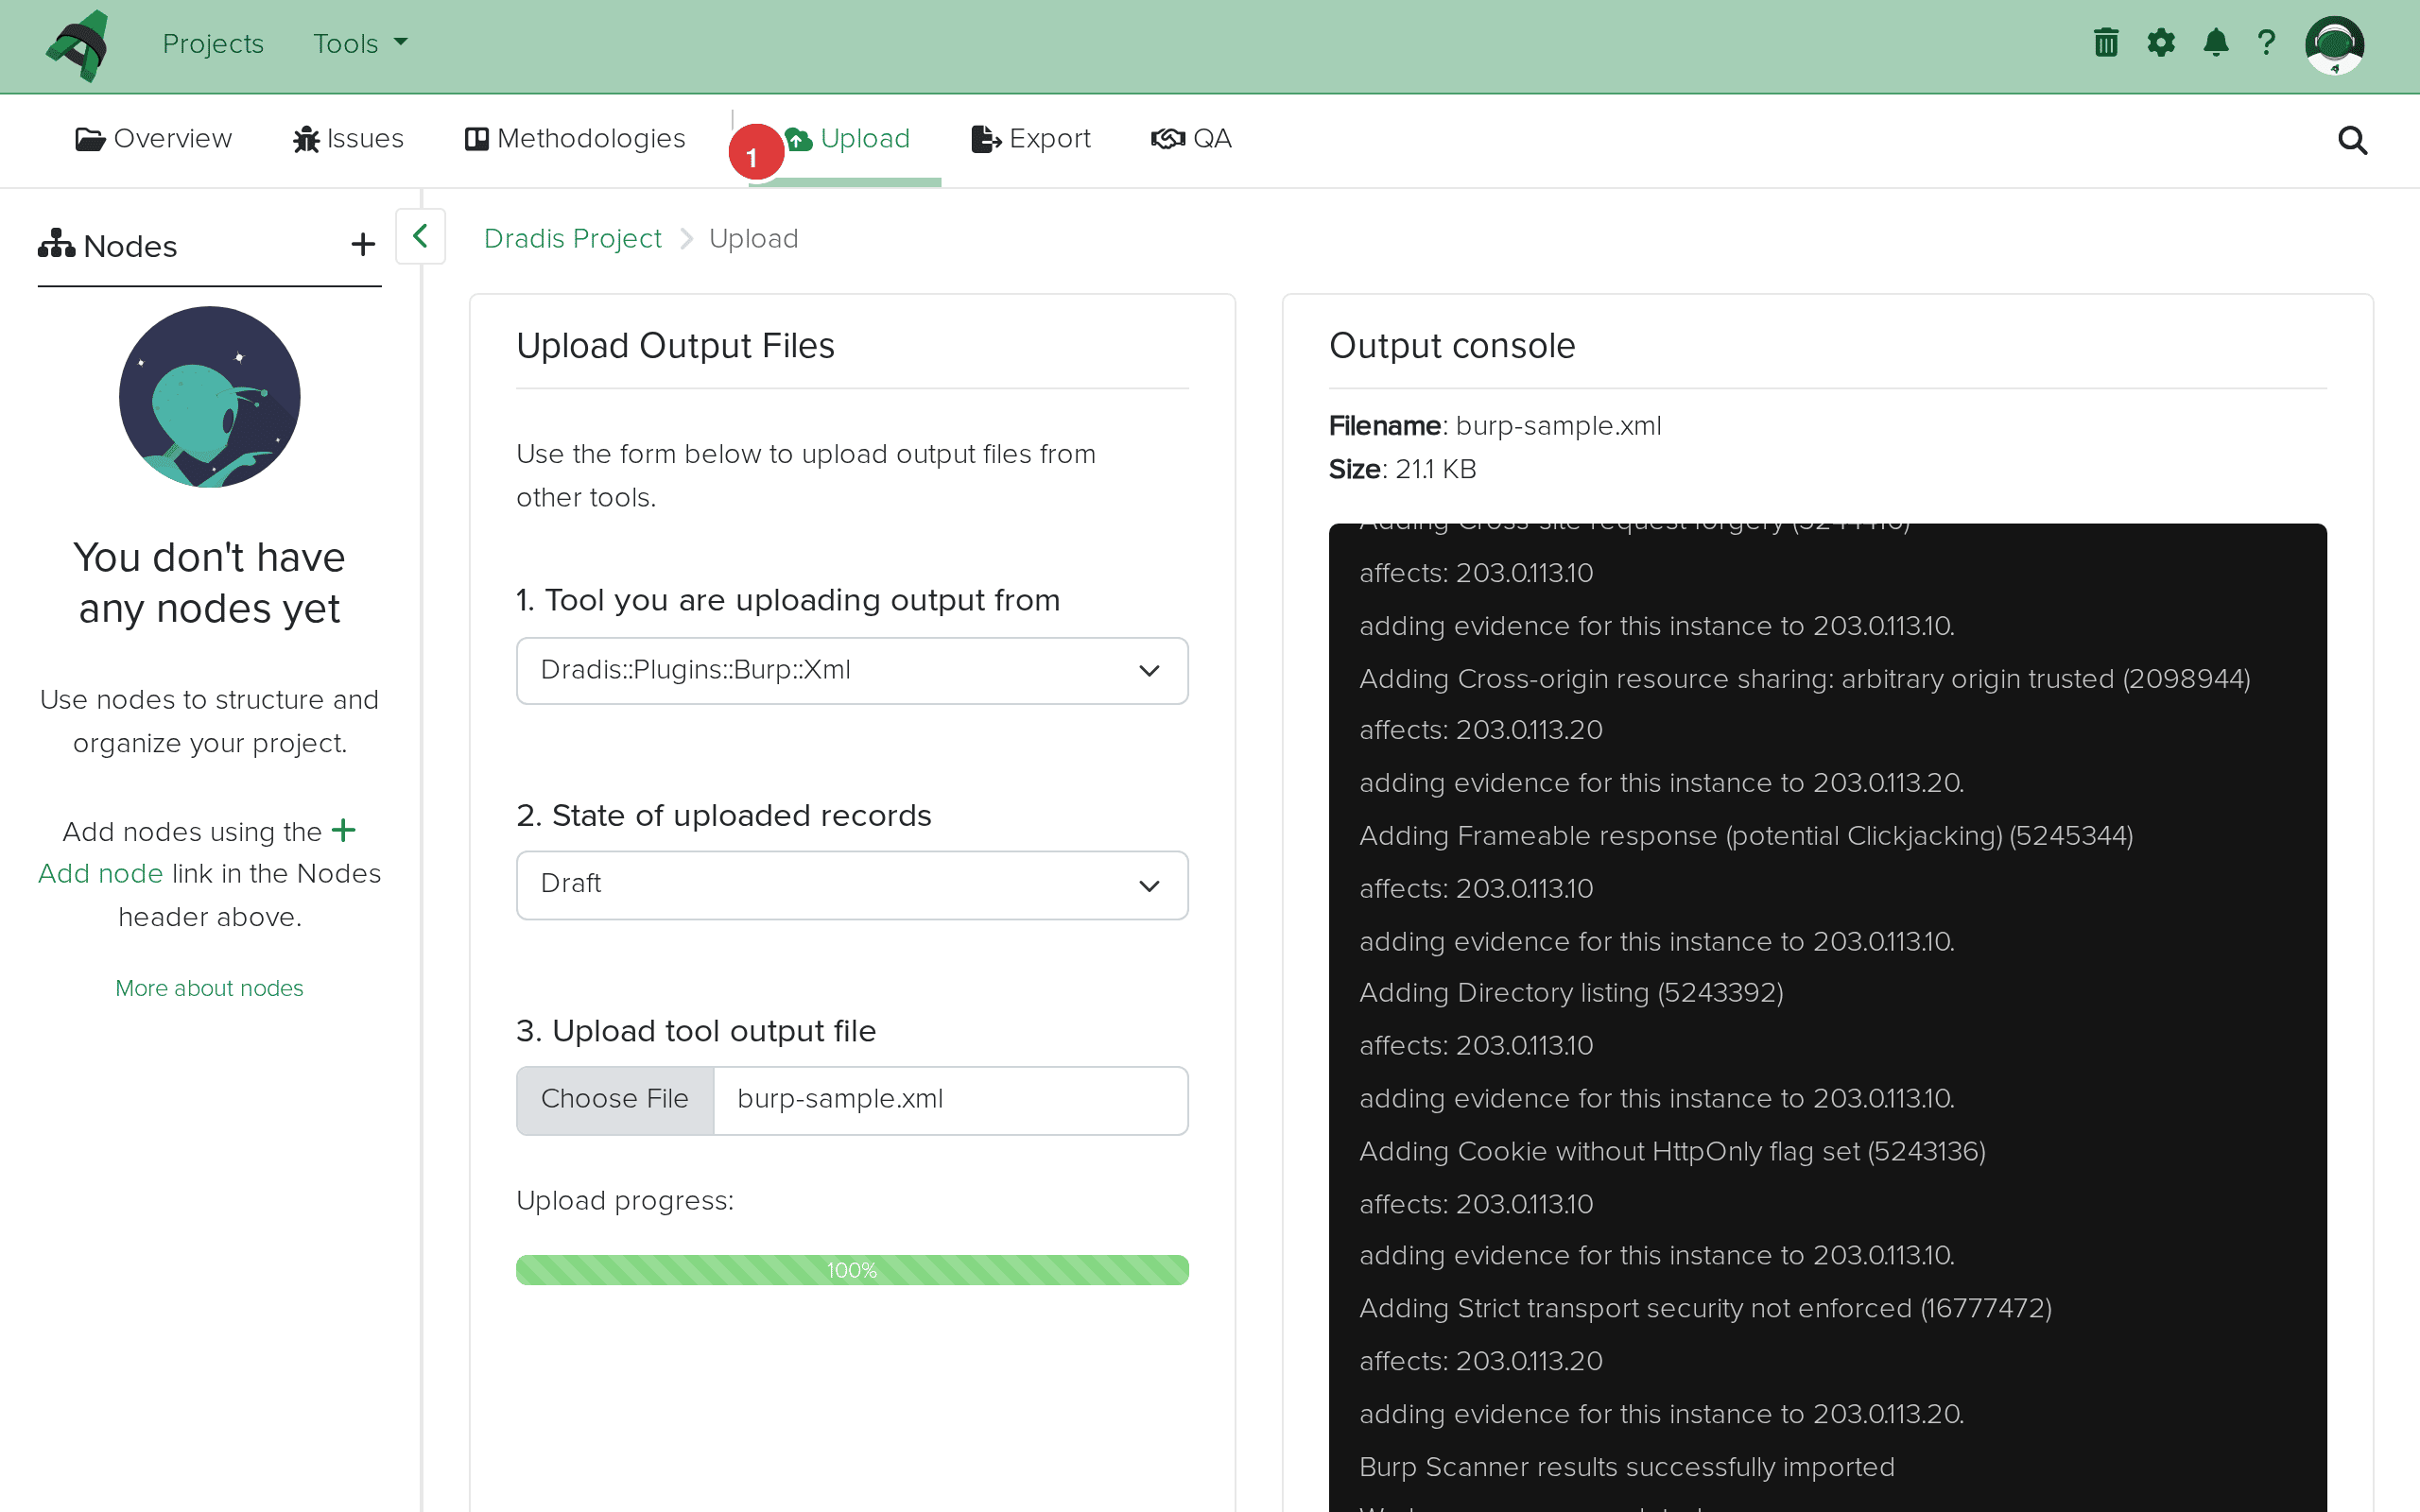 Import complete. The Output console (1) shows each issue added with its Burp type ID. "Burp Scanner results successfully imported" confirms success.
Click the Issues tab to see all imported Burp findings. Each unique Burp issue type becomes one Issue, displayed with its title, affected hosts, tags, and state.
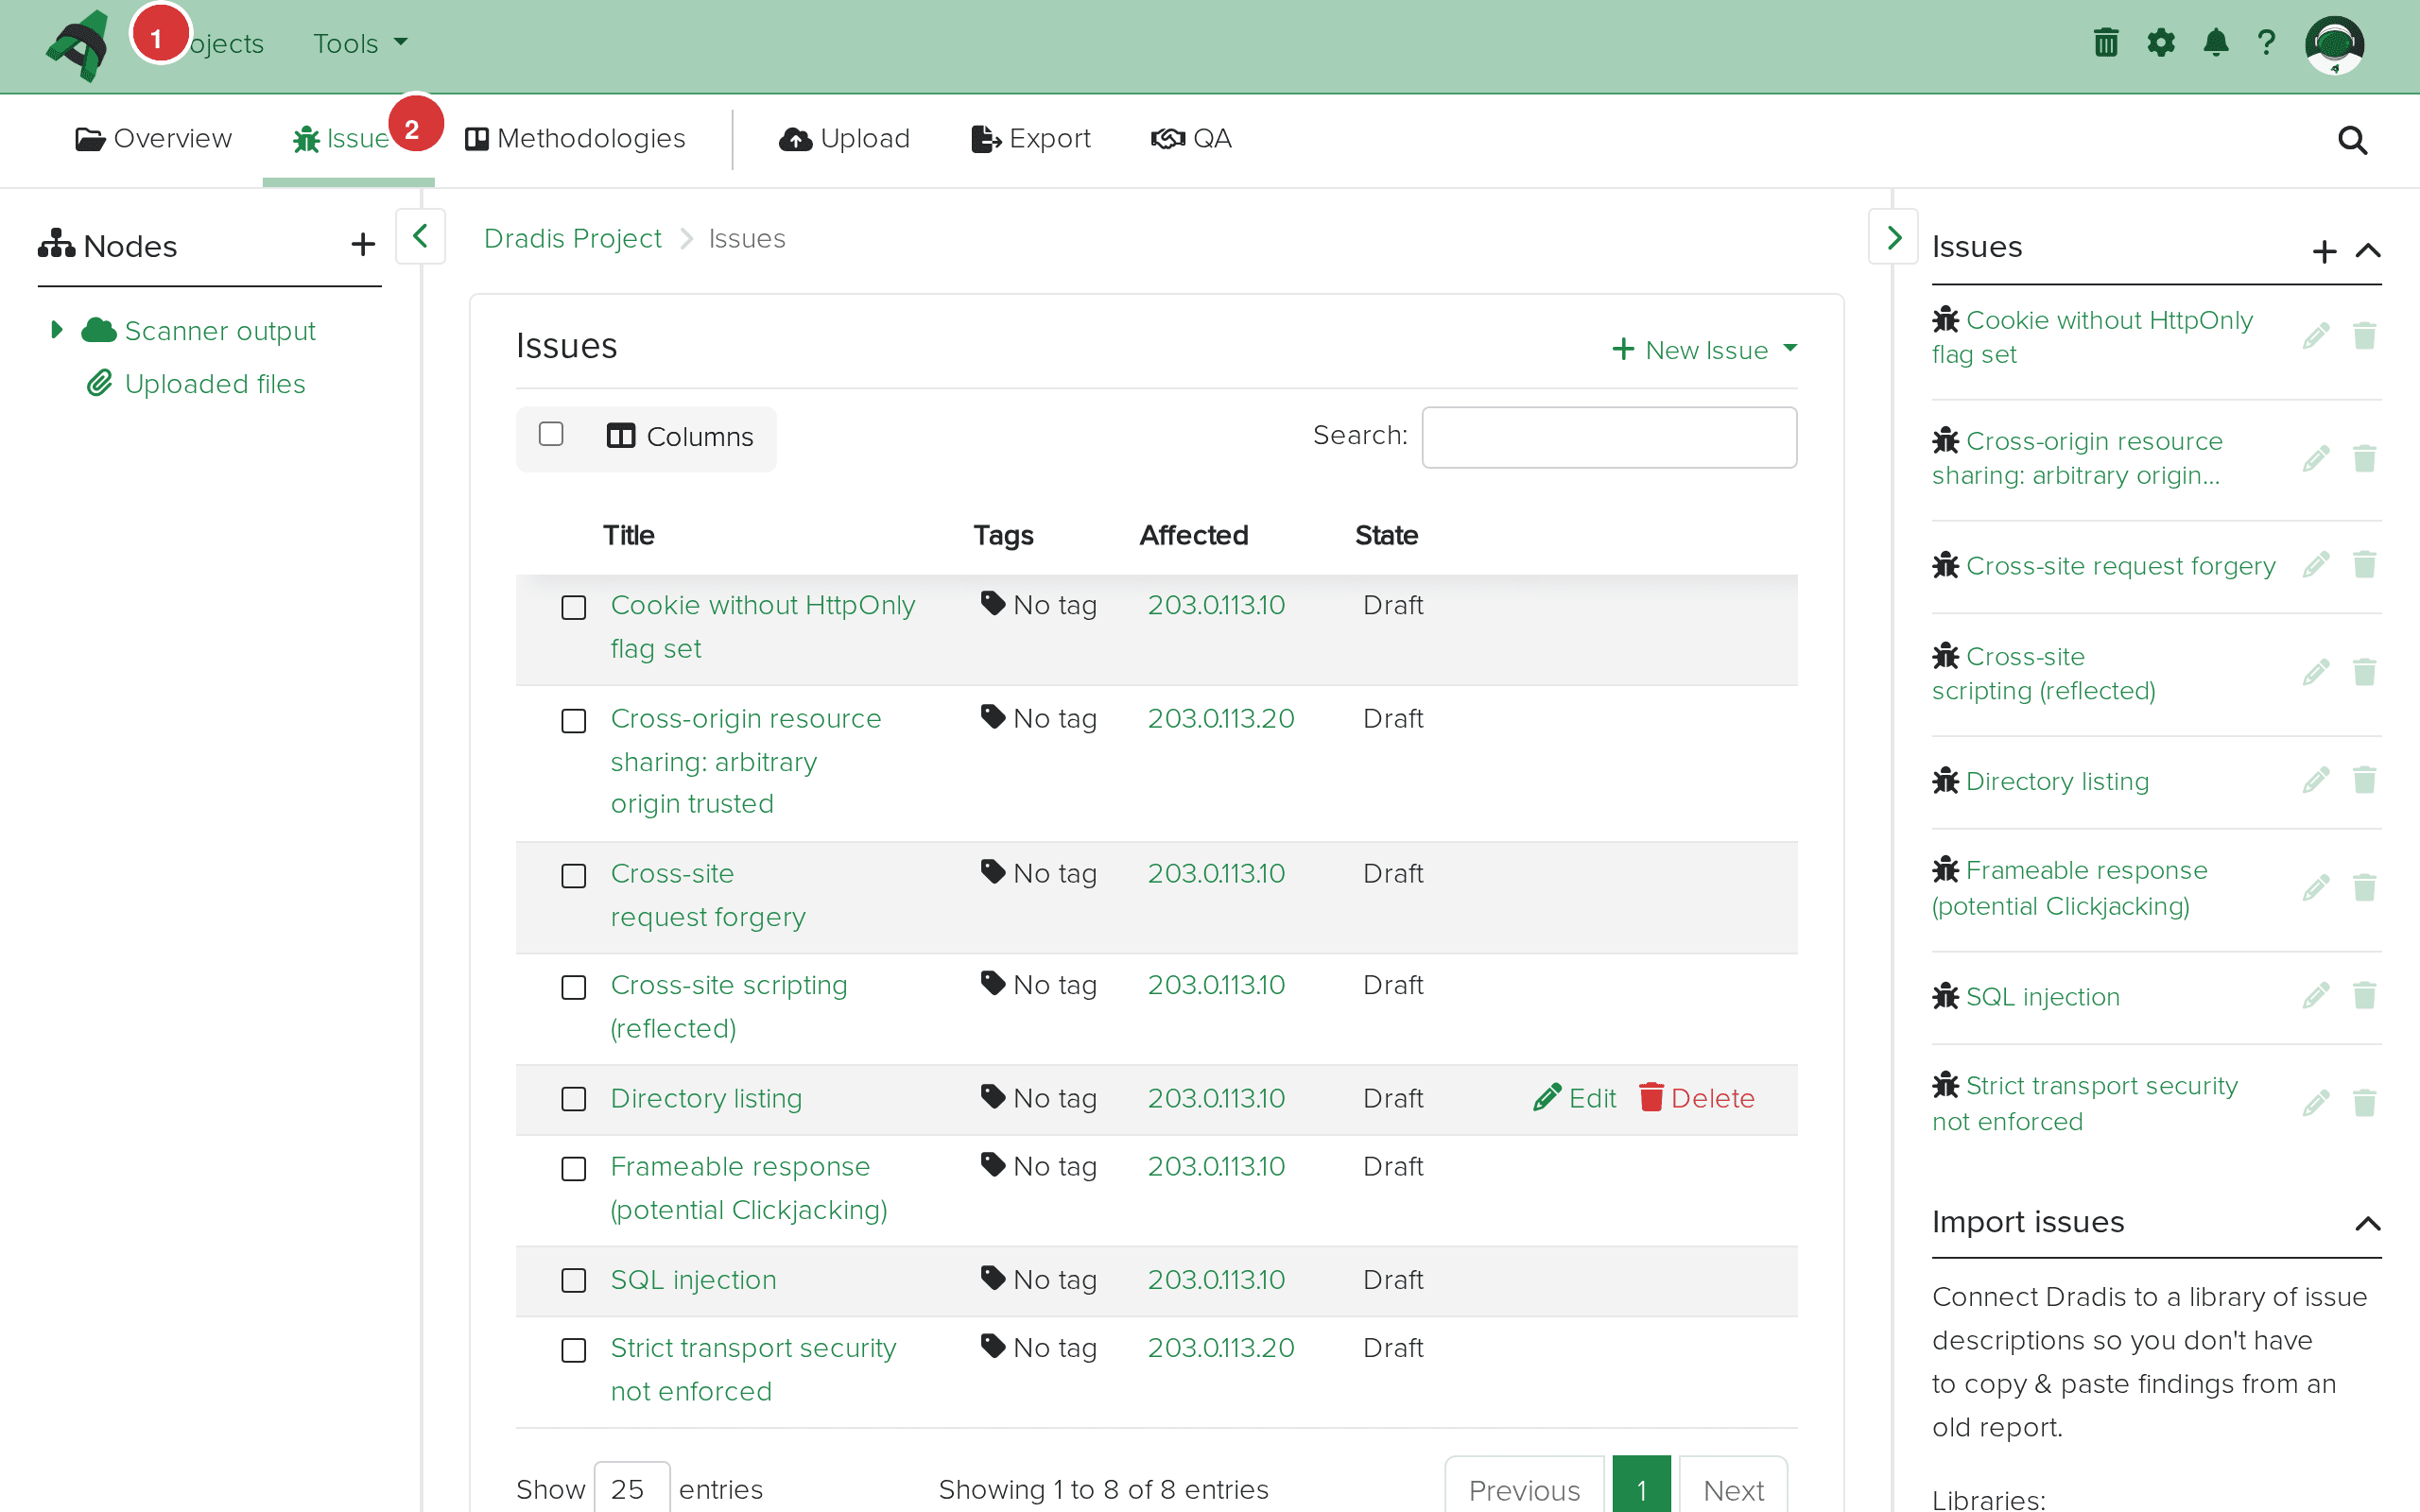 The Issues tab (1) shows all imported findings. The table (2) displays each issue with its title, the hosts it affects, and the current state.
Click any Issue to see its full detail view. The fields map directly from the Burp XML: Title from <name>, Severity from <severity>, Background from <issueBackground>, and so on. The vulnerability classifications with CWE links are preserved.
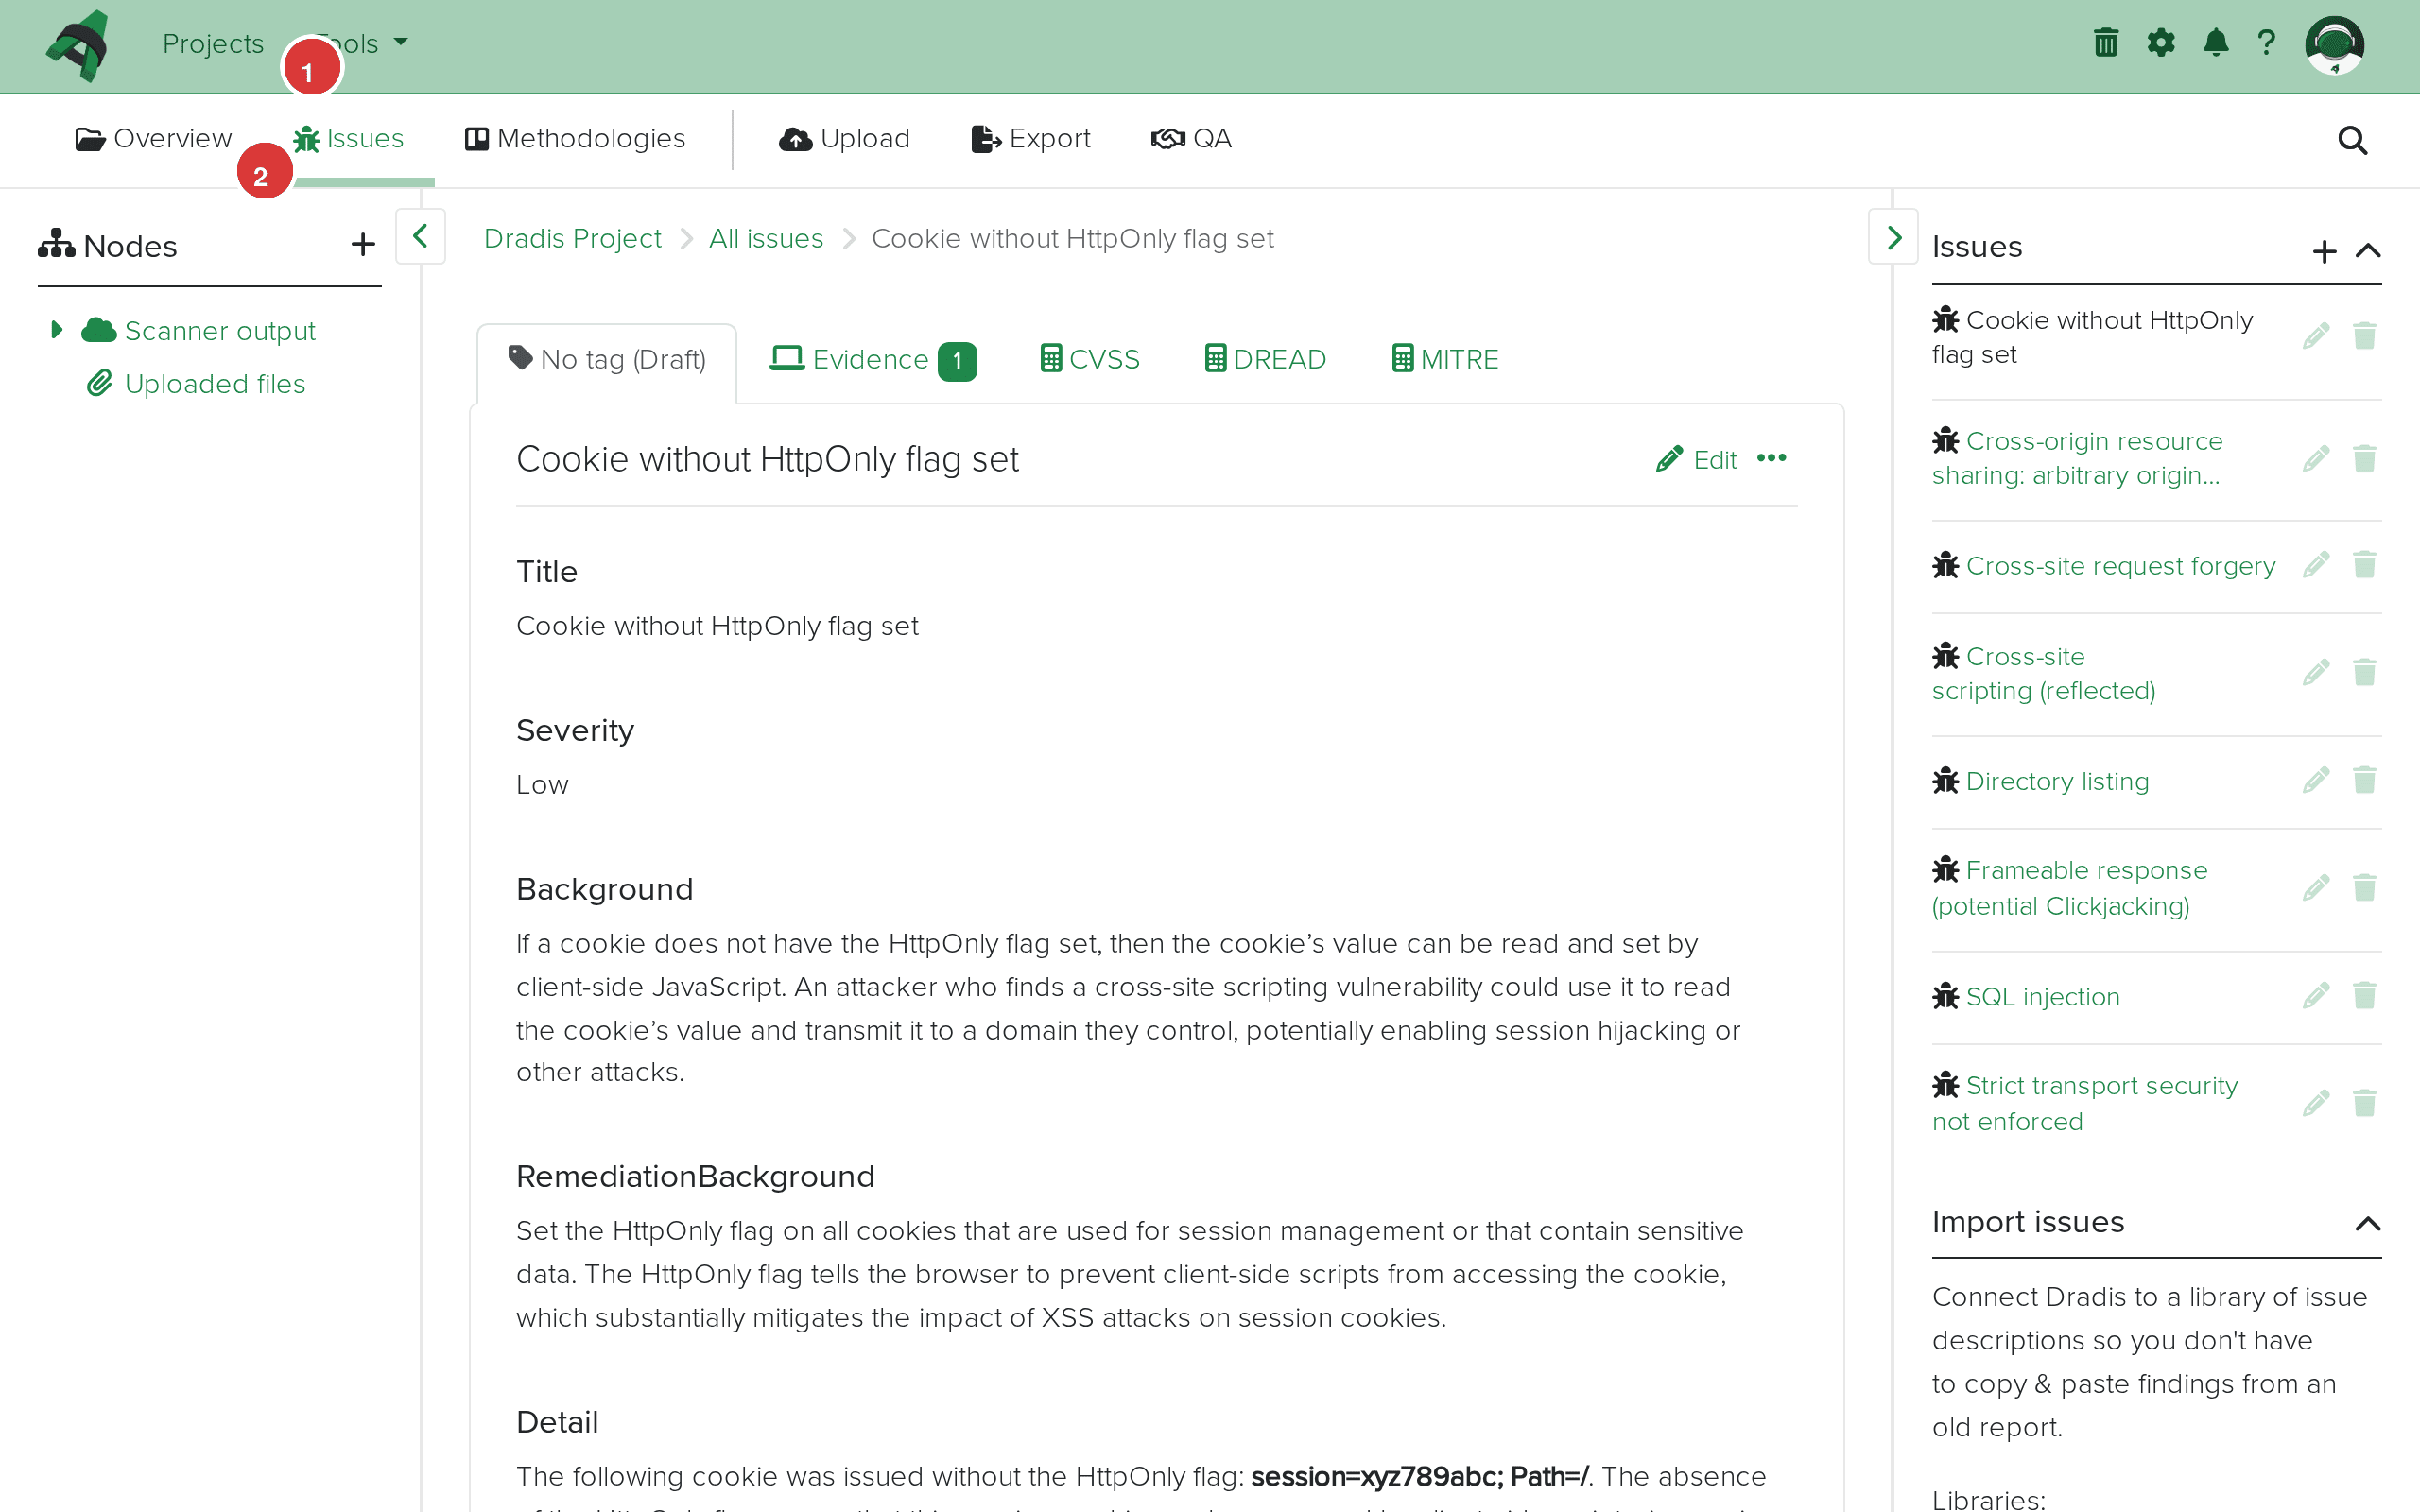 Issue detail view. The breadcrumb (1) shows the navigation path. The main content area (2) displays the imported fields: Title, Severity, Background, RemediationBackground, Detail, and Classifications.
The sidebar node tree shows the Scanner output parent with individual host nodes for each target Burp scanned. In this example, two hosts were imported: 203.0.113.10 and 203.0.113.20.
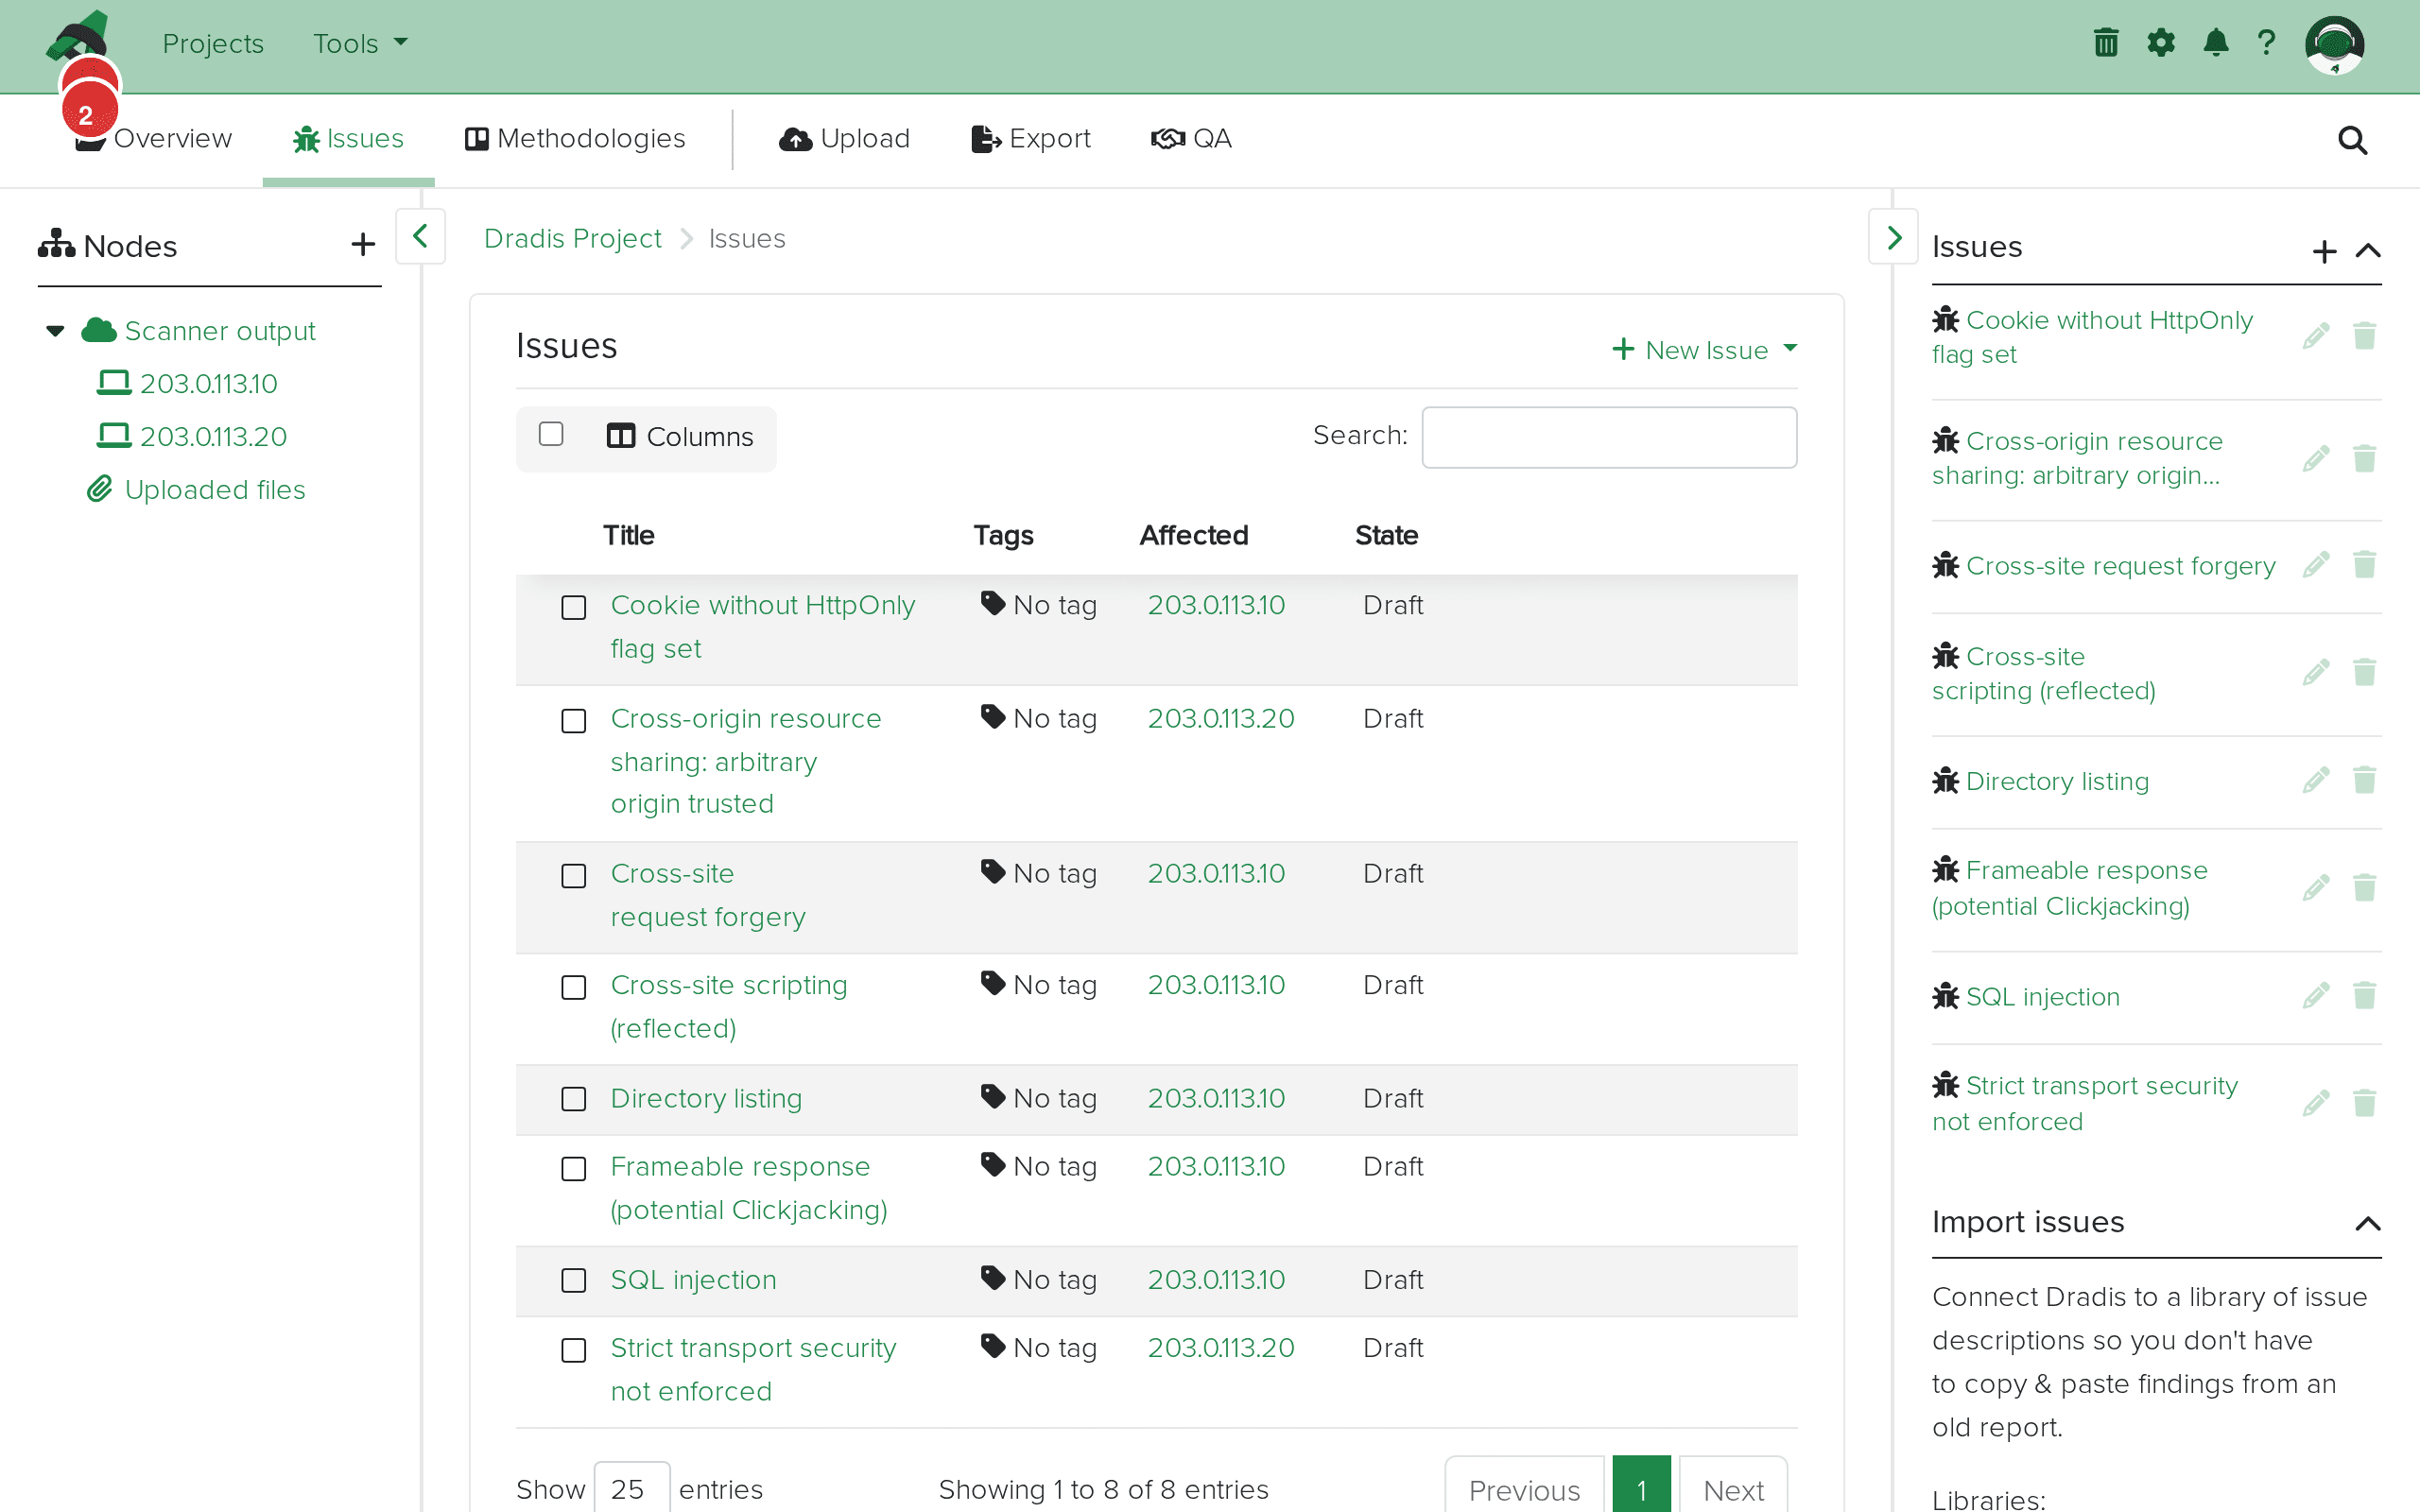 The sidebar node tree with Scanner output (1) expanded to show host nodes (2) for each scanned target.
Click a host node to see its properties, including the hostname URL. The Evidence sidebar on the right shows all findings linked to that specific host.
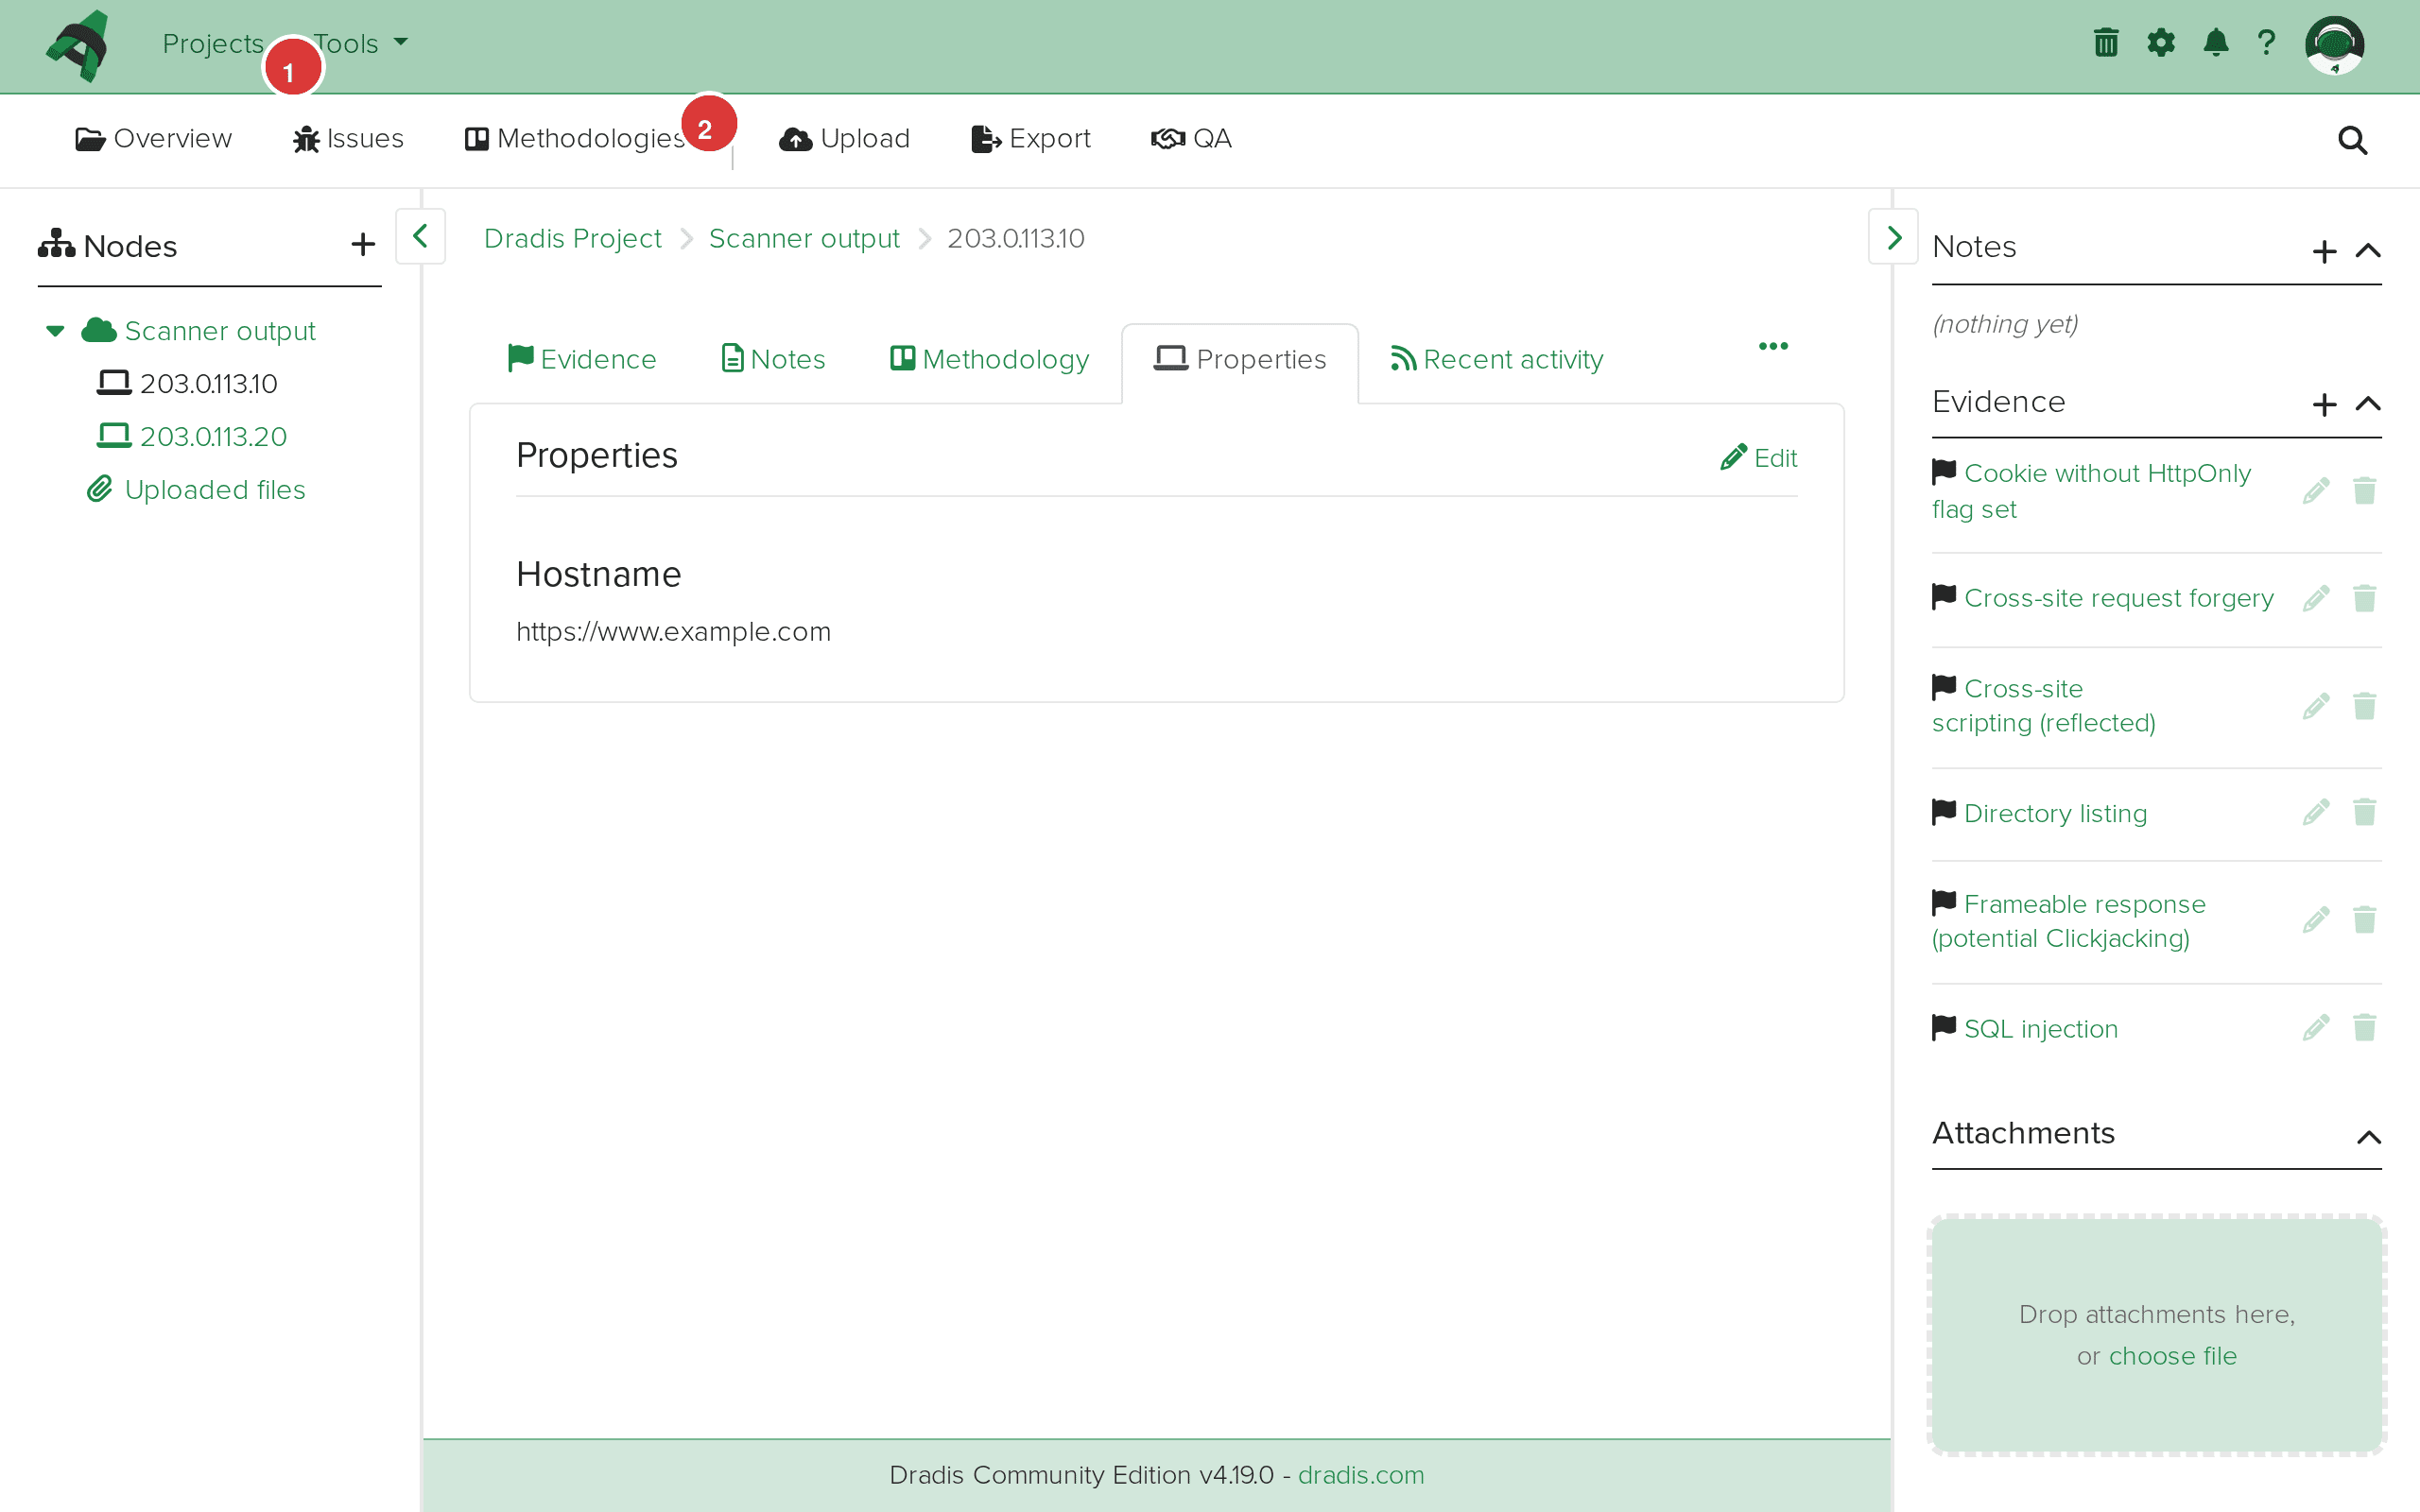 The host node view for 203.0.113.10. The breadcrumb (1) shows the navigation path. The Evidence panel (2) lists every finding detected on this host.
Click the Evidence tab to see all evidence entries in a table format, with the host label and linked Issue title for each finding.
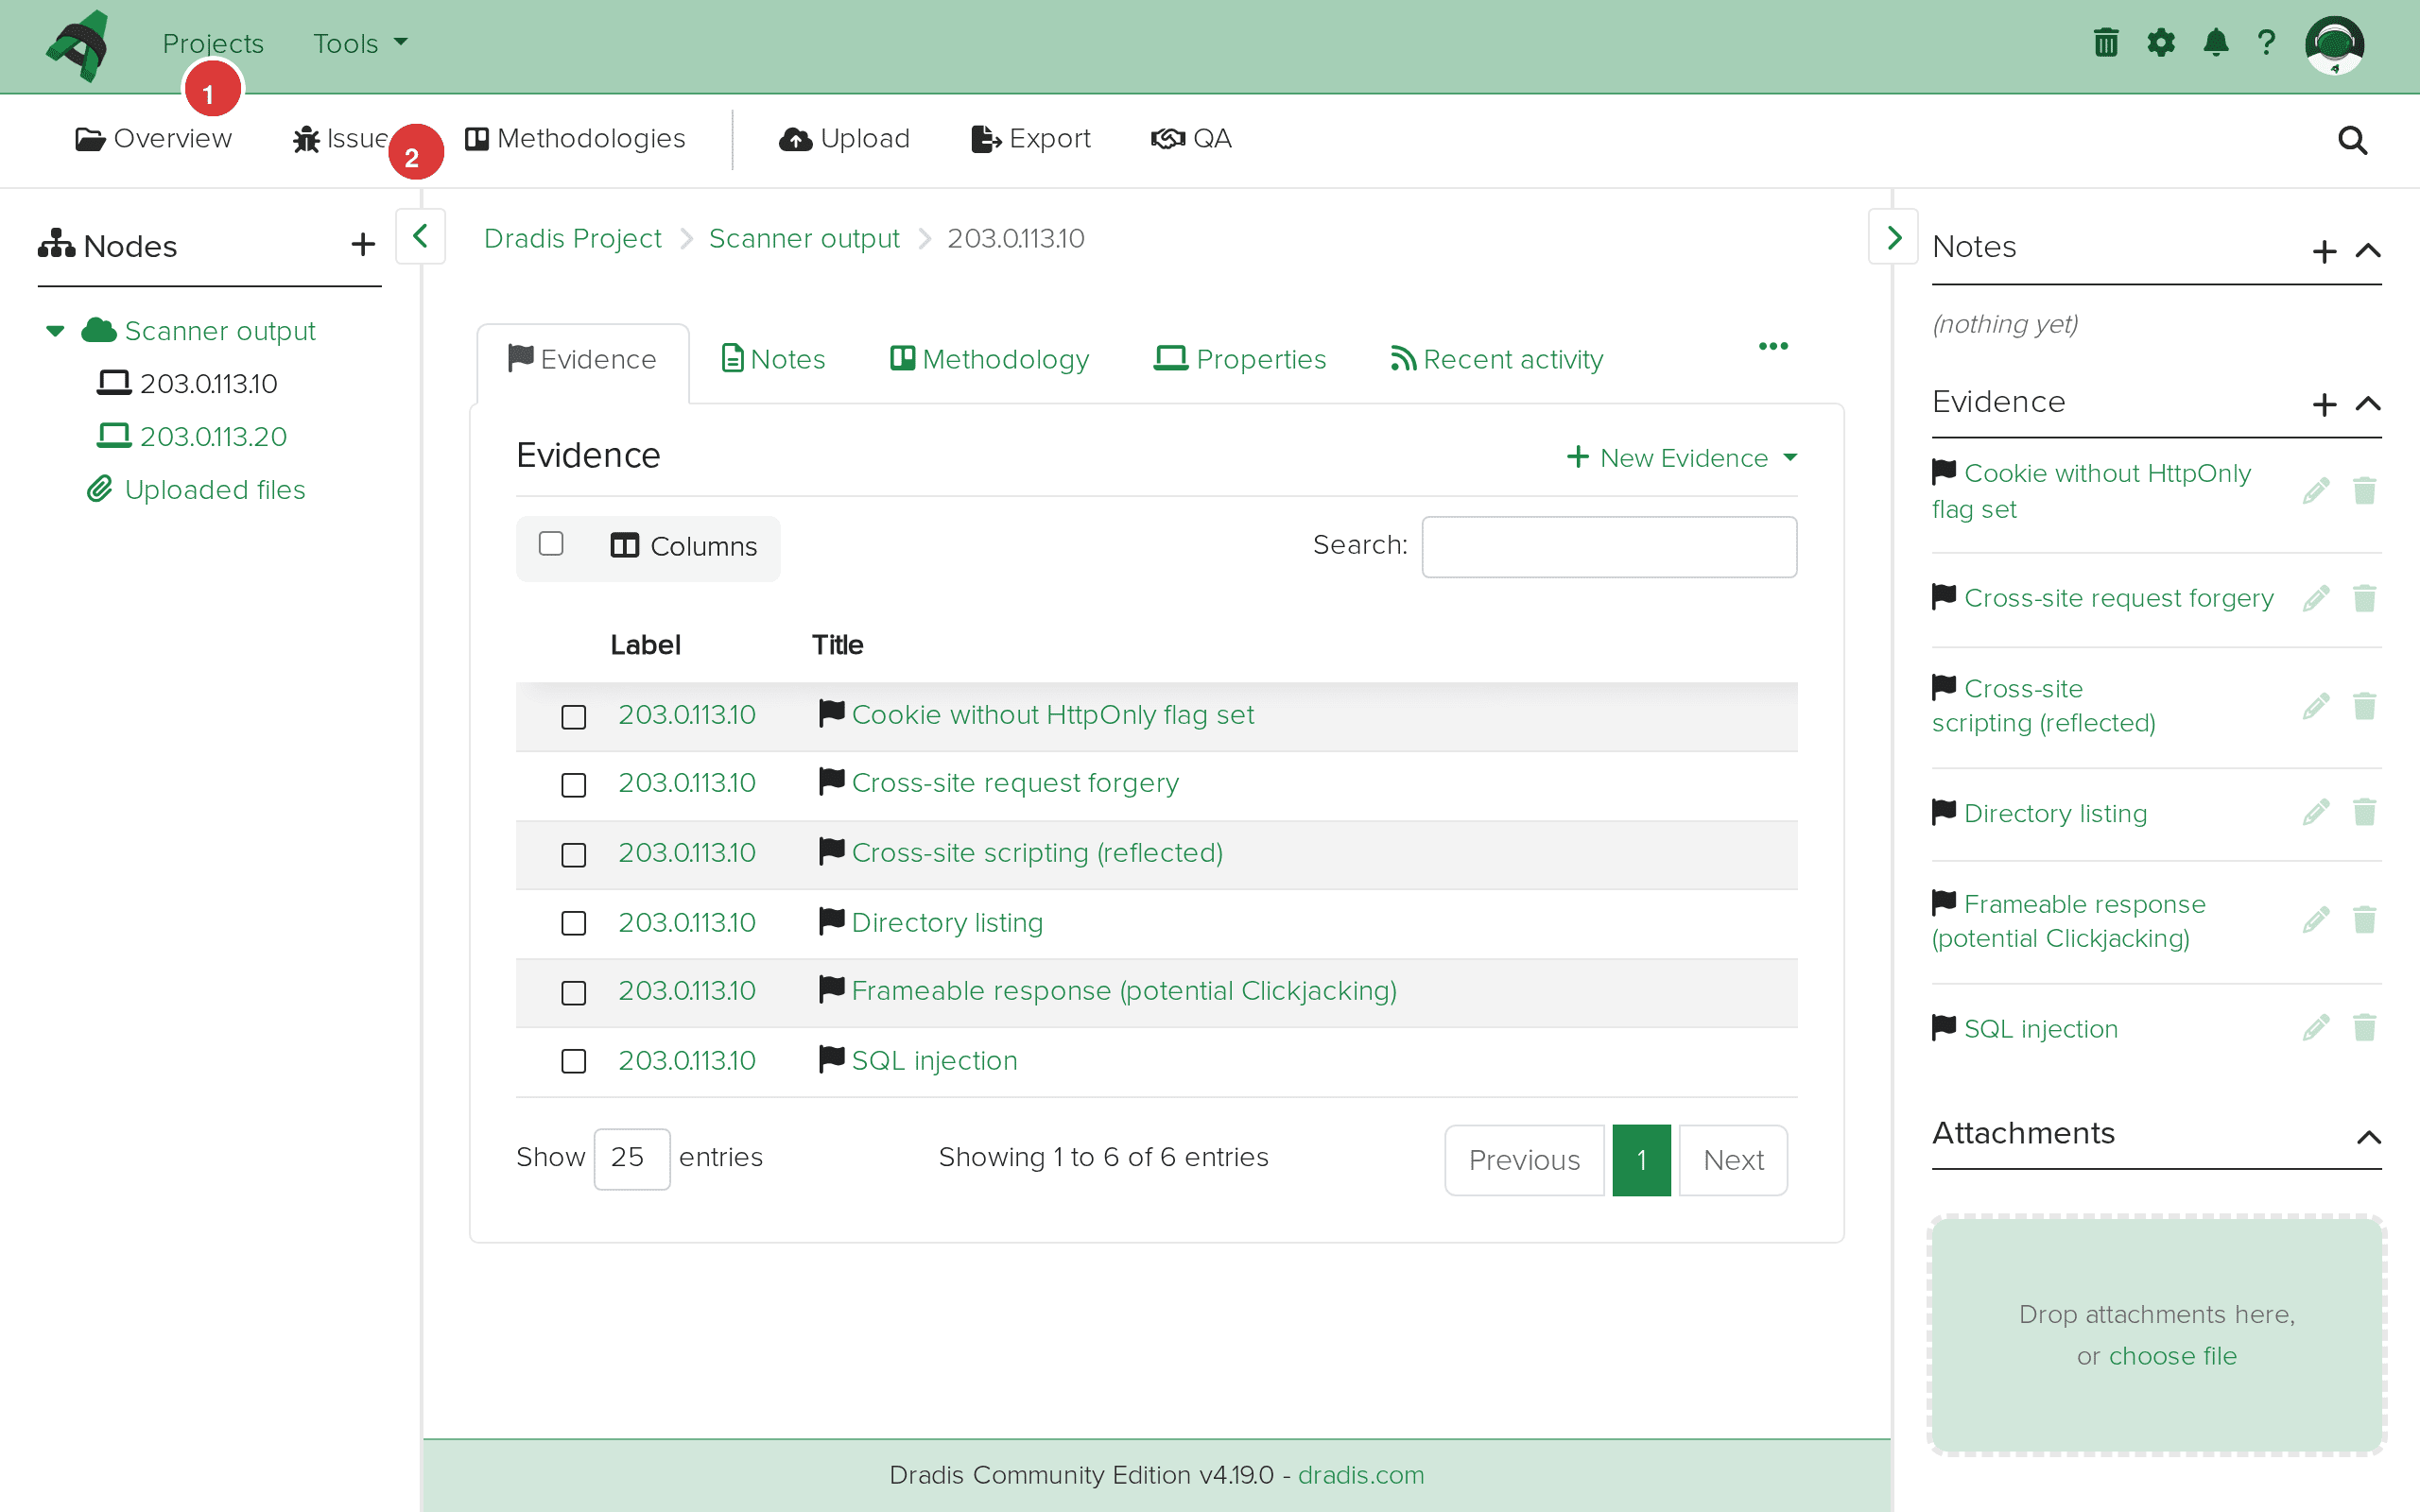 The Evidence tab (1) for 203.0.113.10 lists every evidence entry (2) with its label and linked Issue title.
Burp's greatest strength is the HTTP evidence — the actual requests and responses that prove a vulnerability exists. The Dradis plugin preserves this data in Evidence fields (issue.request, issue.response). In Dradis Pro, use the Mappings Manager to include request/response data in your report templates using Textile's bc.. (block code) format, which renders them as preformatted code blocks. Be aware that response data is truncated at 50,000 characters to prevent database issues, and binary content (images, PDFs) is replaced with a [Binary Data Not Displayed] placeholder.
When the same Burp issue type appears on multiple hosts with different severity levels, the Dradis plugin stores the highest severity in the Issue. For example, if Cross-site scripting is rated "High" on one host and "Medium" on another (perhaps due to different confidence levels), the Issue will show "High." The per-instance severity is preserved in each Evidence entry, so you can still differentiate in your report by pulling severity from Evidence fields rather than the Issue.
Burp excels at interactive web application testing, but importing results from OWASP ZAP or Acunetix alongside Burp gives you cross-validation. If both tools find the same XSS on the same host, you get independent confirmation. If Burp finds issues ZAP missed (or vice versa), you have more complete coverage. Import all scan results into the same Dradis project — the host nodes will merge when the IP addresses match, giving you a consolidated view.
Dradis provides two Burp importers: Burp::Xml and Burp::Html. The XML importer is generally preferred because it preserves structured data (type IDs, base64-encoded request/response pairs, separate background and detail fields). The HTML importer parses Burp's HTML report format, which works when XML export isn't available, but the field separation may be less precise. For best results, always export as XML when possible.
If you use Burp extensions that report custom issues (like Logger++, Autorize, or custom scanner checks), these appear in the XML with type 134217728. The Dradis plugin identifies these by name rather than type ID, so each uniquely-named extension finding becomes its own Issue. If two extensions report findings with the same name, they'll be merged into a single Issue with separate Evidence entries.
Verify you selected Dradis::Plugins::Burp::Xml (not Burp::Html) if your file is XML format, and vice versa. Open the file in a text editor: XML exports start with <?xml and contain <issues>, while HTML exports start with <html>. Also confirm the file actually contains <issue> elements — an empty scan produces valid XML with an empty <issues> container.
Burp XML exports should contain base64-encoded request and response data (indicated by base64="true" in the XML attributes). If your file has base64="false", the requests and responses contain raw HTTP data that may include invalid characters. Re-export from Burp with the default settings, which use base64 encoding. If you're working with a third-party tool that generates Burp-compatible XML, ensure it base64-encodes the request/response elements.
The plugin truncates request and response data at 50,000 characters to prevent database performance issues. For very large responses (JavaScript bundles, API responses with extensive data), you'll see the truncated version in Dradis. The original full data remains in the Burp XML file. If you need the complete response for a specific finding, reference the original Burp project or XML export.
Burp XML uses CDATA sections for HTML-formatted content in fields like <issueBackground> and <issueDetail>. The Dradis plugin preserves this HTML content. If you see encoded HTML entities or garbled characters, it may be because the original Burp export contained HTML markup. In Dradis, these fields are rendered through Textile, so HTML tags like <b>, <ul>, and <a> from Burp's descriptions are displayed as formatted text.
This is expected behavior. Burp may report "Cross-site scripting (reflected)" on 20 different pages across multiple hosts. The Dradis plugin creates one Issue for the vulnerability type and separate Evidence entries for each occurrence. This deduplication is intentional — it matches how pentest reports typically present findings (one finding description with multiple affected locations).
| Feature | Community Edition | Professional |
|---|---|---|
| Burp XML/HTML import | Yes | Yes |
| Default field mapping | Fixed template | Customizable via Mappings Manager |
| Custom Issue/Evidence templates | No | Yes — remap any Burp field to any Dradis field |
| Request/Response in reports | Manual formatting | Automated with template variables and block code |
| Rules Engine | No | Yes — auto-tag by severity, confidence, or CWE classification |
| Report generation with Burp data | Manual (HTML export) | Automated Word/Excel reports with Burp field placeholders |
| Integration with Jira/ServiceNow | No | Yes — push Burp findings as remediation tickets |
The Mappings Manager in Pro is particularly valuable for Burp imports because of the request/response data. You can build Evidence templates that format HTTP traffic as code blocks within your report, automatically including the proof-of-concept evidence that clients need to see. Request a demo to see the Mappings Manager in action.
Dradis supports Burp Suite XML and HTML exports from Burp Suite Professional and Community Edition. The XML schema has been stable across Burp versions — exports from Burp Suite 1.x through the latest 2024.x releases are all compatible. The plugin parses the standard <issues> / <issue> structure defined in the Burp DTD.
Yes. Each import adds new Issues, Evidence, and Nodes to the existing project. Issues are deduplicated by Burp type ID — if the same vulnerability type already exists from a previous import, the plugin creates new Evidence linking to the existing Issue rather than creating a duplicate. Host nodes are also reused when the IP address matches.
Dradis will create duplicate Evidence entries for the same host/issue combinations. The Issues themselves won't be duplicated (they're matched by type ID), but you'll get a second set of Evidence entries with the same request/response data. If you need to re-import cleanly, delete the existing Nodes and their Evidence first, or start a new project.
Burp Collaborator findings appear in the standard scan results and are included in the XML export when you report issues. They'll be imported like any other Burp finding. The Collaborator interaction details appear in the <issueDetail> field, which maps to the Detail field in Dradis.
Dradis Pro offers a BApp extension for Burp Suite that enables real-time push of findings from Burp directly to your Dradis project, without the export/import step. This guide covers the file upload method, which works with all Dradis editions. The BApp extension is a Dradis Pro feature — see the Dradis BApp documentation for details.
Loading form...
Your email is kept private. We don't do the spam thing.