Text styles and screenshots
Dradis uses Textile markup to format text. However, we do not support all of the Textile formatting options when exporting to Word. The formatting options listed here are the full list of supported styles. It is possible to force Dradis to display other formatting options, but only the styles and formatting options listed here will export into your reports as expected.
In this page:
- Bold and italic text
- New lines and paragraphs
- Bullet point and numbered lists
- Hyperlinks
- Screenshots and captions
- Bypass Textile formatting
Bold and italic
As of v3.7.0, Dradis includes a formatting menu to insert the correct formatting for styles, such as bold or italic text. You can click on the icons to insert the appropriate formatting in the editor pane, or you can insert the Textile formatting manually. You can see the changes applied as you type in the preview pane to the right.

New lines and paragraphs
If you want separate paragraphs in Word, you have to use two new line characters in Dradis:
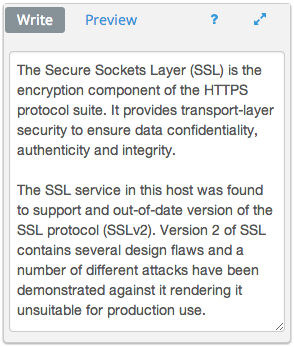
Will render in Word like:

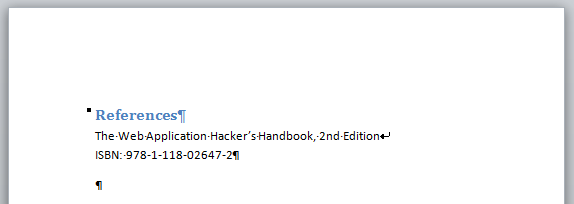
If you use a single new line character in Dradis:
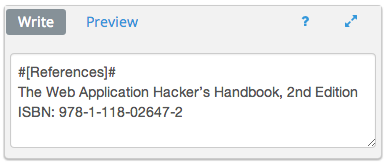
The rendered Word will look like:
Bullet point and numbered lists
You can create lists with the formatting menu icons, or use * to create bullet point lists or # to create numbered lists.
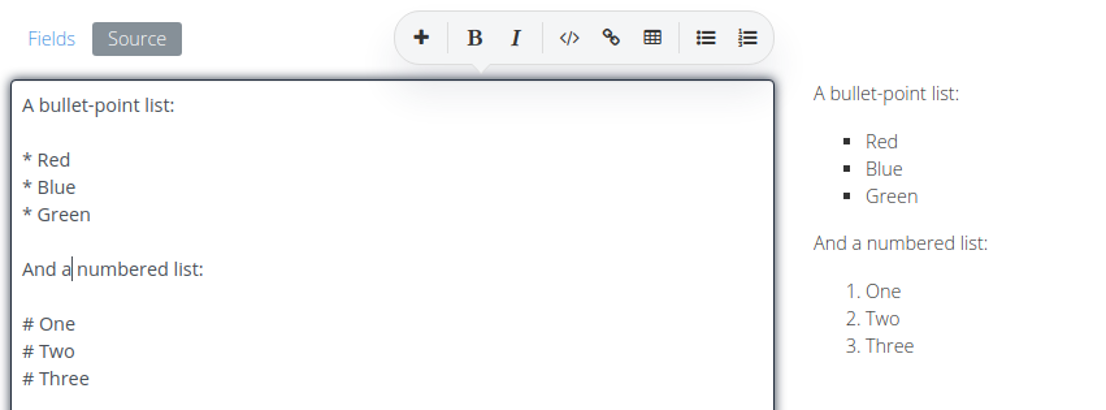
You can see the lists applied as you type in the preview pane to the right of the editor.
You can also create nested lists with the following syntax:
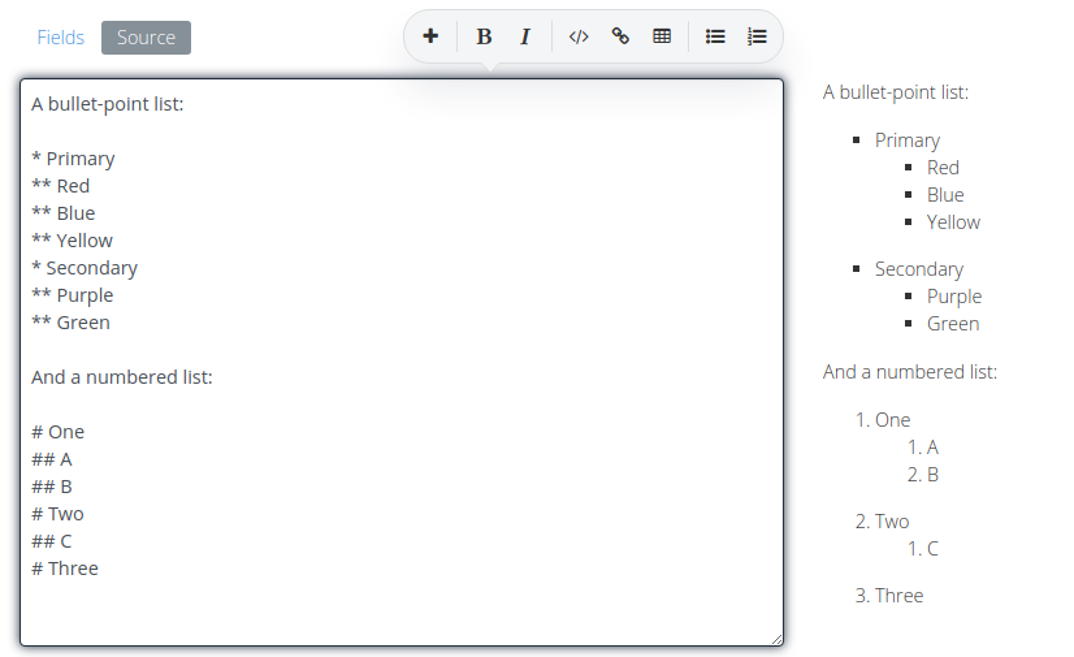
And again, when you switch between Write and Preview mode, you'll see the nested lists displayed as expected.
Nested or single-level lists will automatically export into your Word reports.
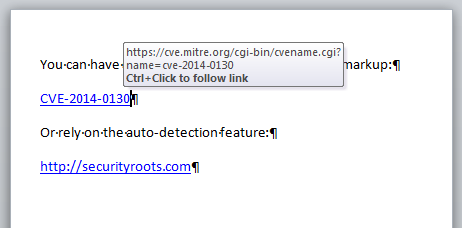
Hyperlinks

Screenshots and captions
Check out the Add a Screenshot to your Project video for a visual walk-through of the process described below.
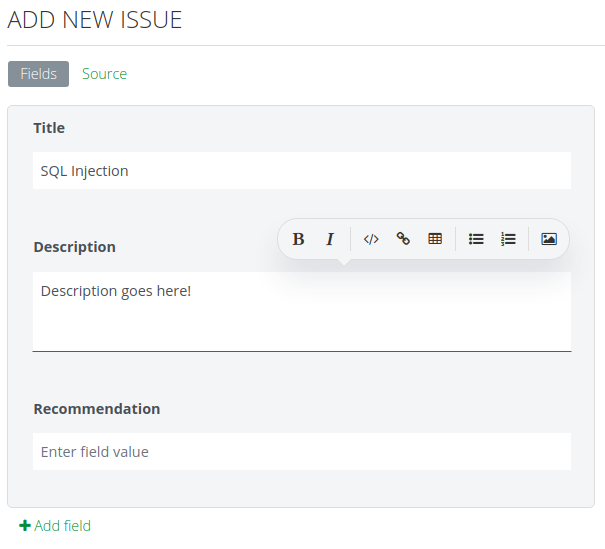
To include a screenshot in your report, you can either drag-and-drop the file into the editor, or click the image icon on the far right of the editor toolbar and select which file to insert.
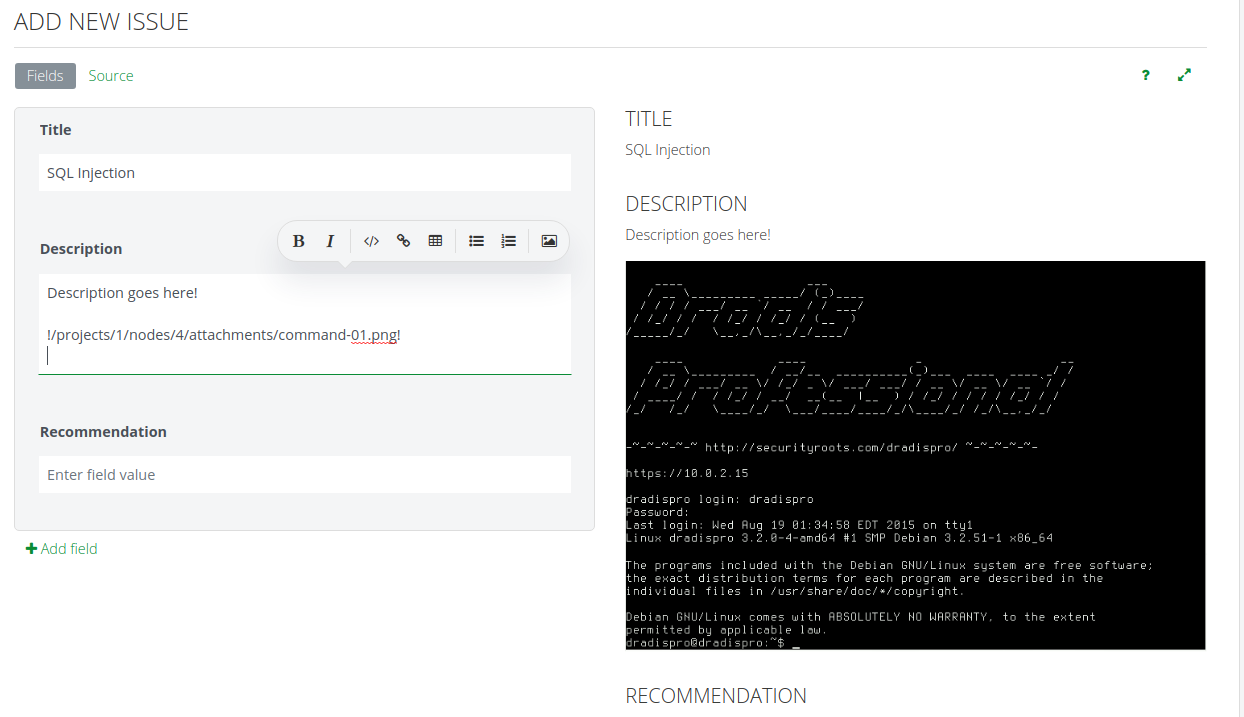
That will generate a link in the editor pane and your screenshot should appear in the preview pane to the right. The image link can also be used anywhere else in your report.
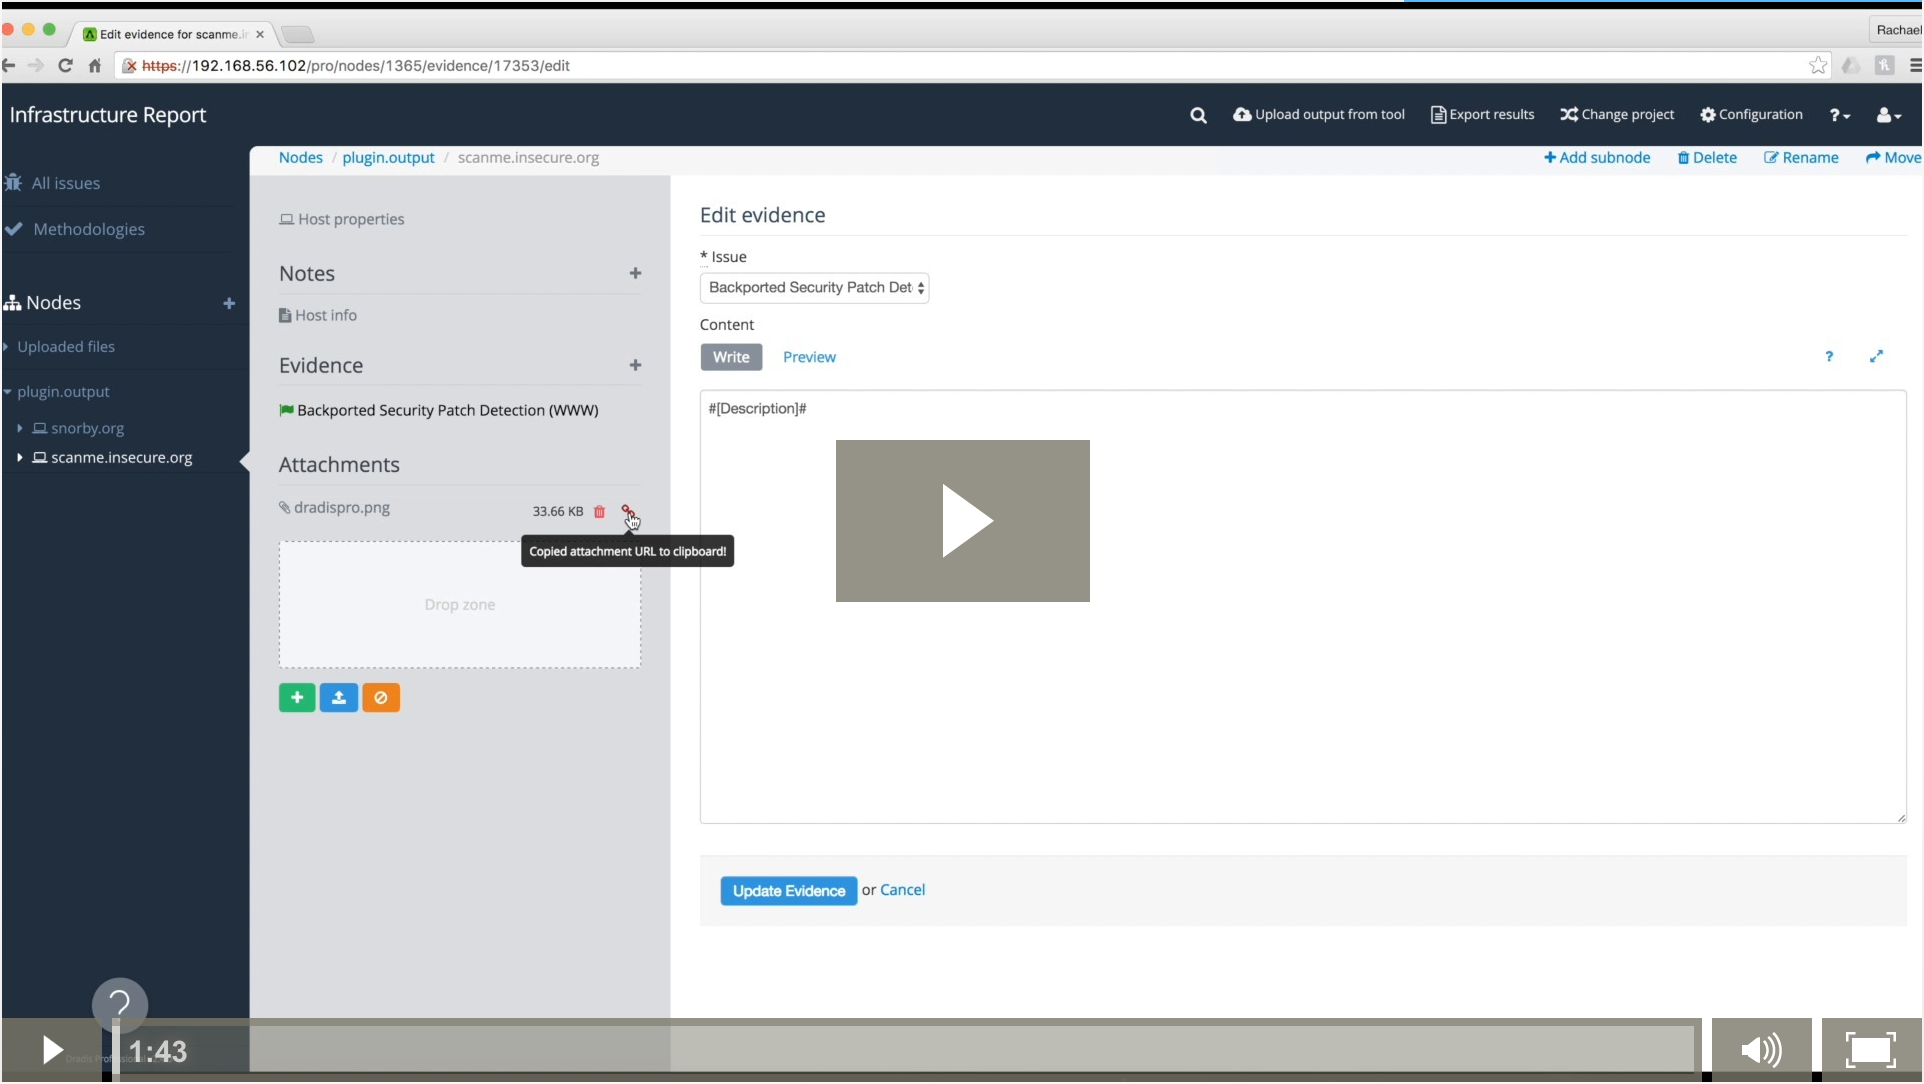
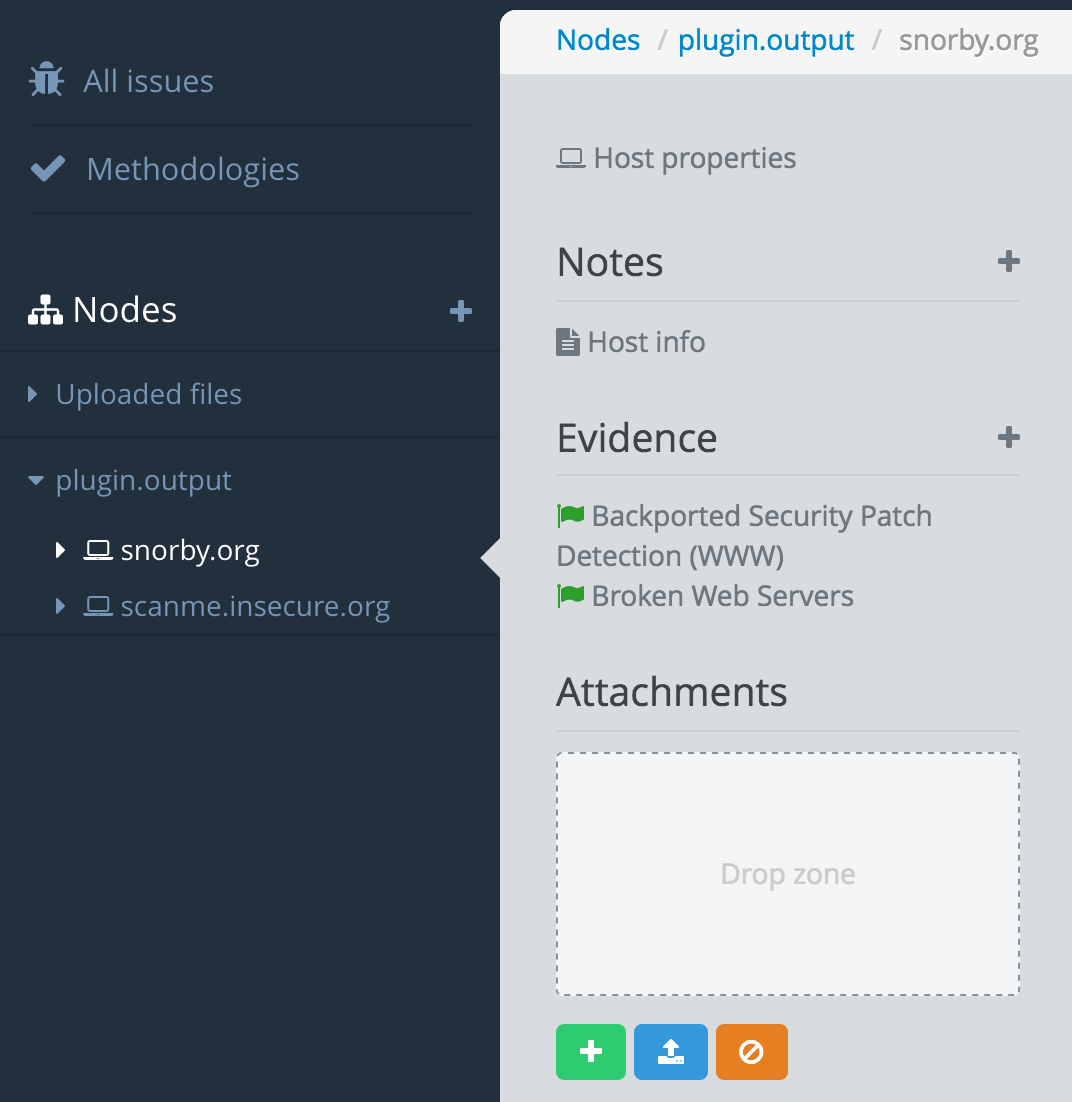
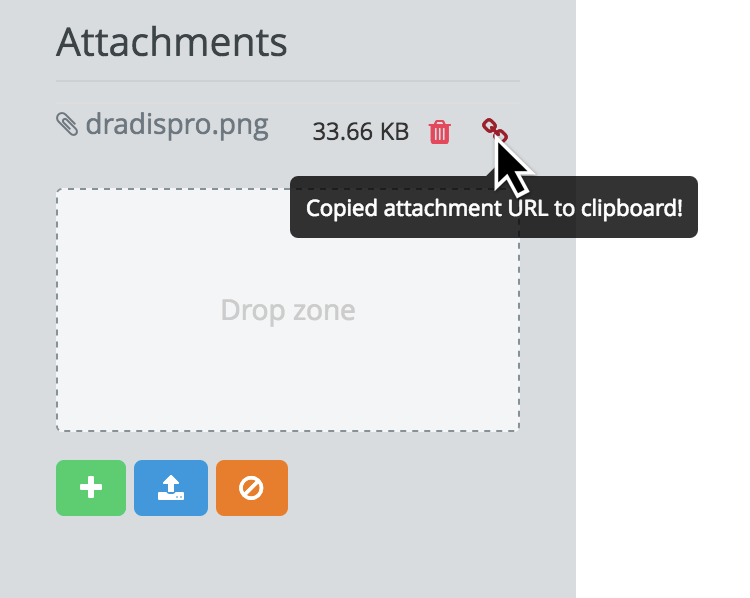
You can also upload images as an attachment to your node by clicking the green and selecting the image from your local system. You can also upload the file by dragging and dropping the image to the Drop zone or by pasting the image directly from your clipboard (if your browser supports it):
Make sure to click the blue icon to finish the upload:
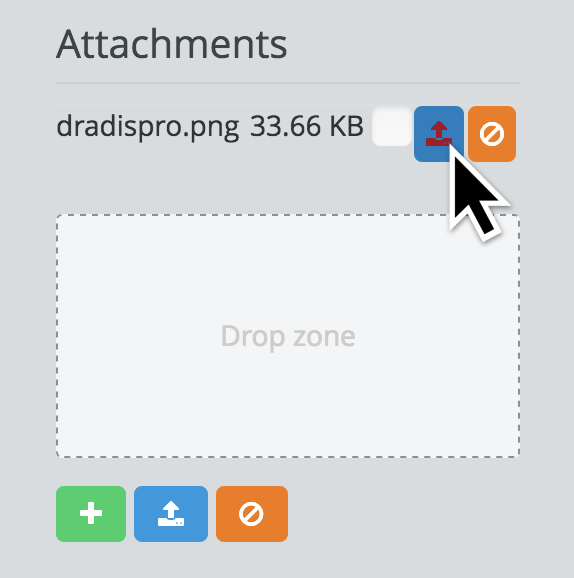
We need to include the link to the attachment in the project. Click the icon to copy the URL to your clipboard.
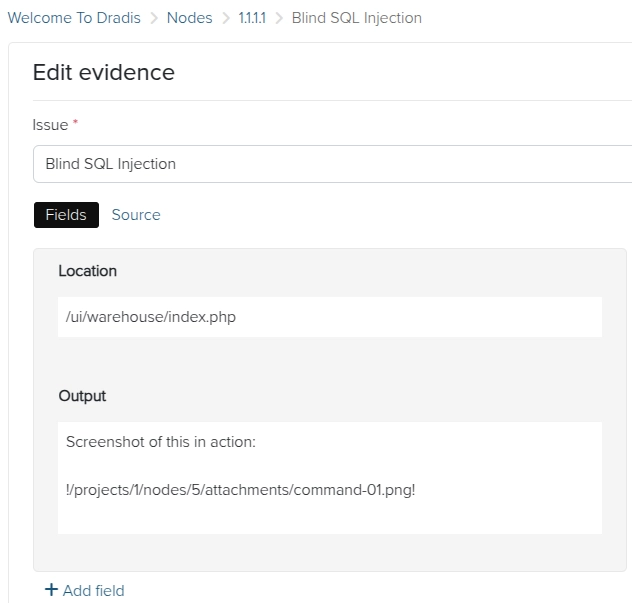
Now, paste the image URL into the correct location in your project. Now that the file is "living" within Dradis, you can include the URL anywhere in your project (an Issue, Evidence, or Note). Remember to use the Textile markers for embedding images, i.e. !<URL>!:
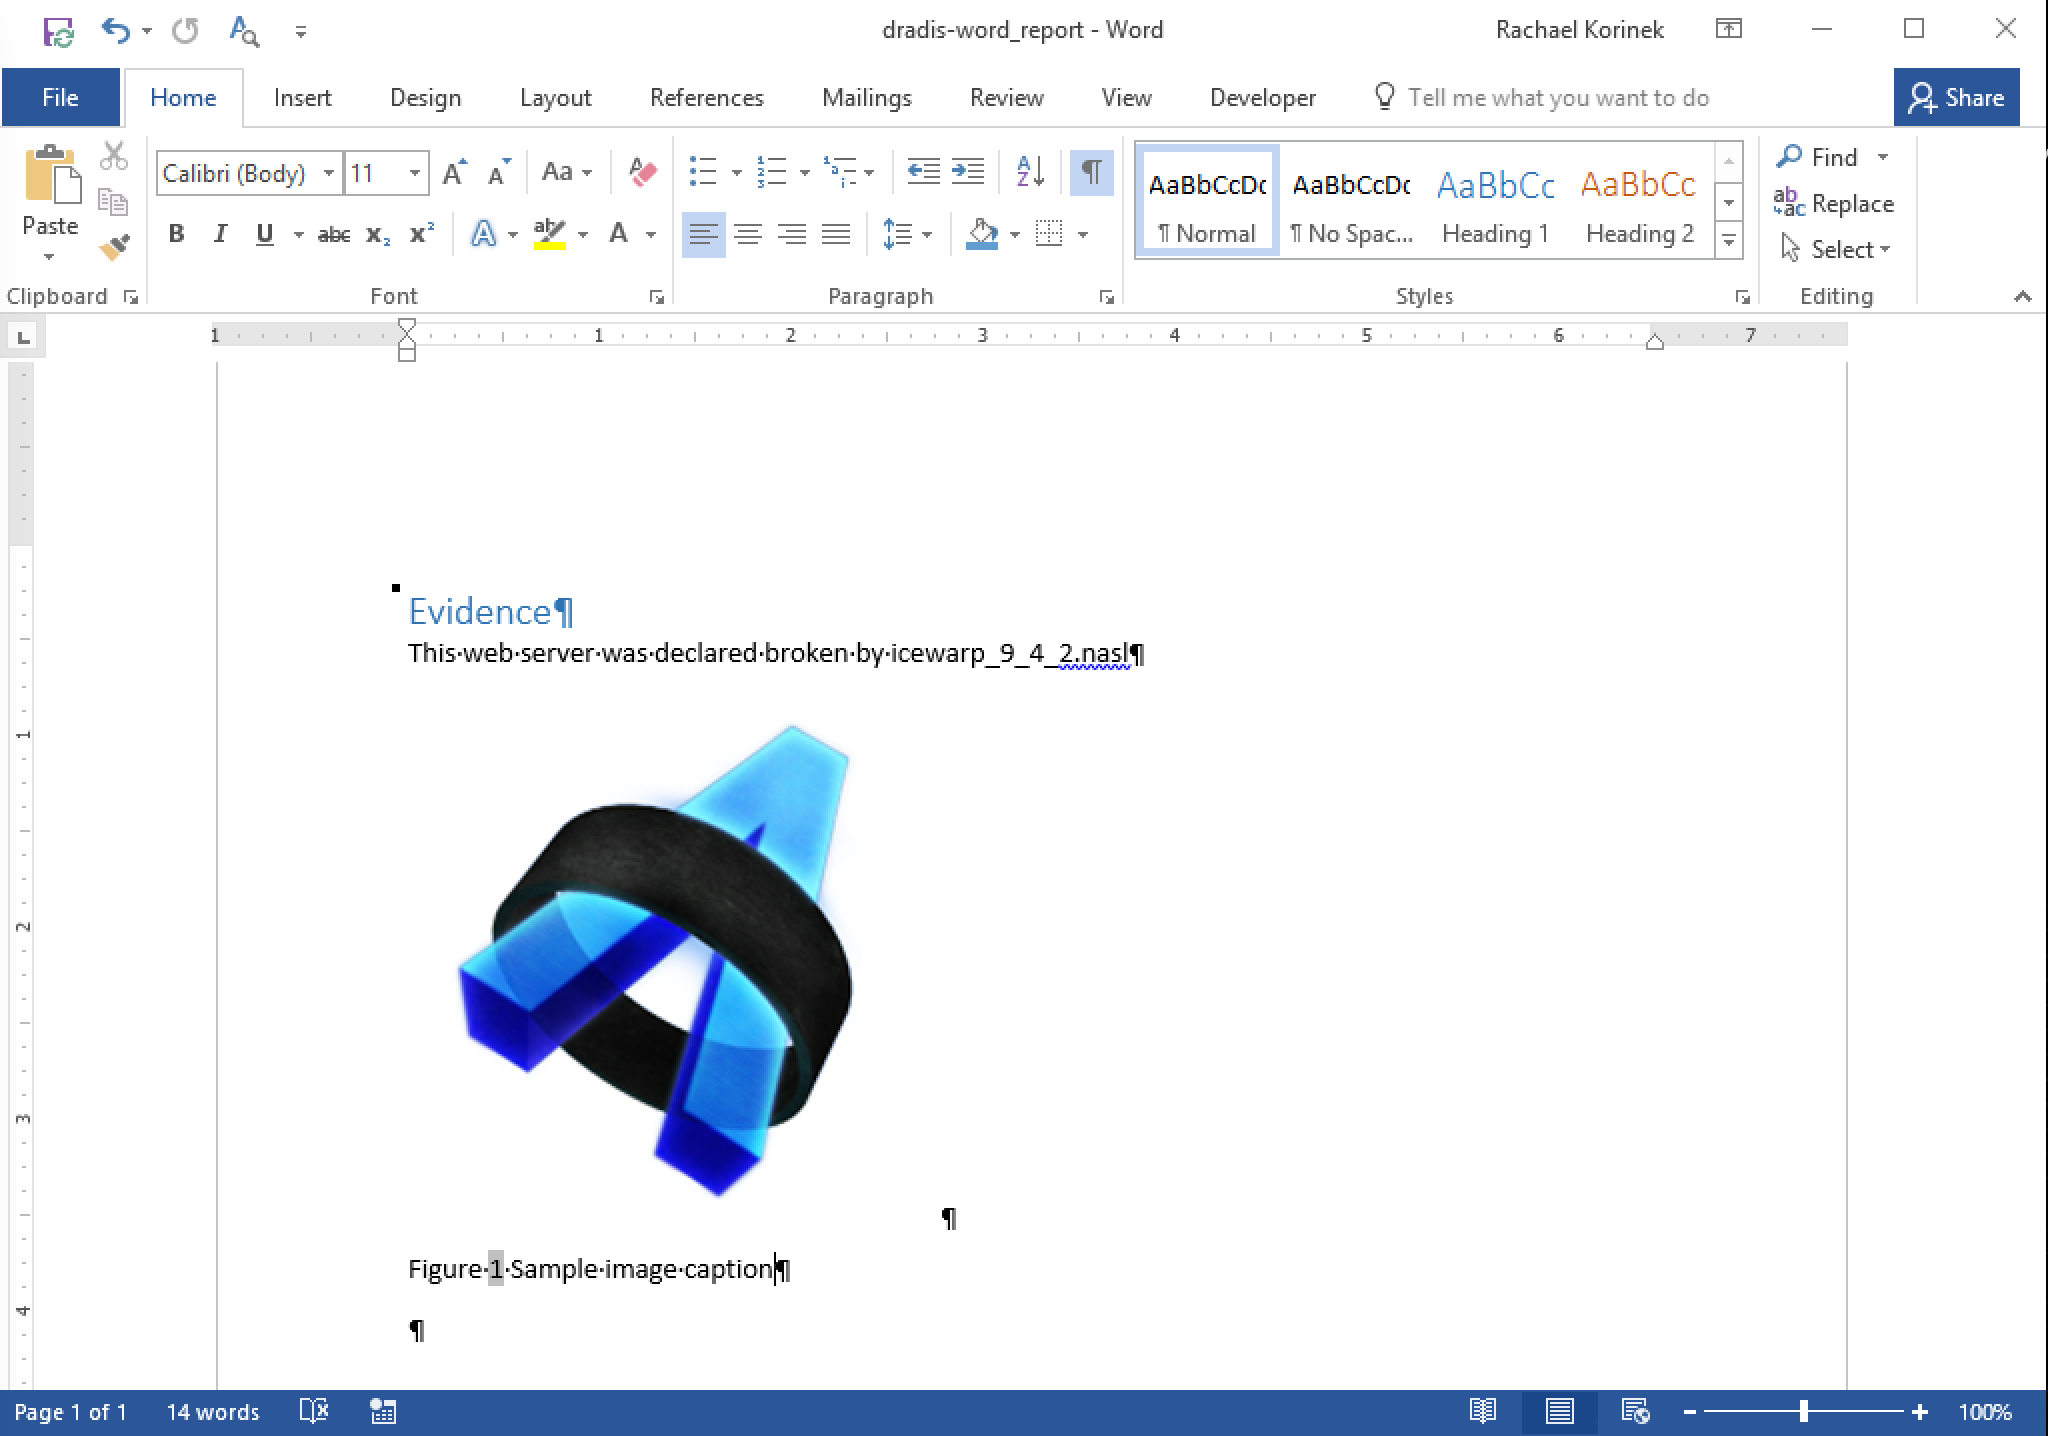
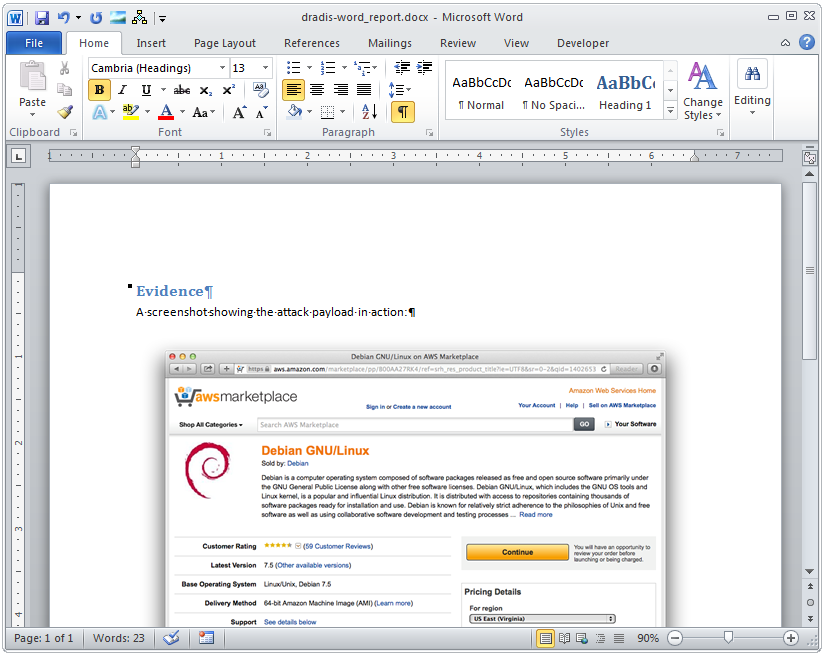
With the image uploaded to Dradis and the link inserted as content, the screenshot will be rendered in Word as expected:
Note: make sure to add new blank lines before and after your screenshots so that they are rendered correctly. For example, if you are adding two screenshots in a row, format them like this:
#[Details]#
A screenshot showing the attack payload in action:

!http://dradis-pro.dev/nodes/4747/attachments/dradispro-01.png!

!http://dradis-pro.dev/nodes/4747/attachments/dradispro-02.png!
Instead of like this:
#[Details]#
A screenshot showing the attack payload in action:
!http://dradis-pro.dev/nodes/4747/attachments/dradispro-01.png!
!http://dradis-pro.dev/nodes/4747/attachments/dradispro-02.png!
Screenshots also should not contain any trailing spaces or other characters after the final exclamation mark. The screenshot should be alone on its own line.
Create an image caption
Image captions are only available for version 2.3.0 or later. Check the footer of your Dradis Pro instance to see what version you are running and upgrade to the latest version if needed.
Add a screenshot to your project using the instructions above. Again, you can use the Textile markers for image captions, i.e. !<URL>(Sample image caption)!:
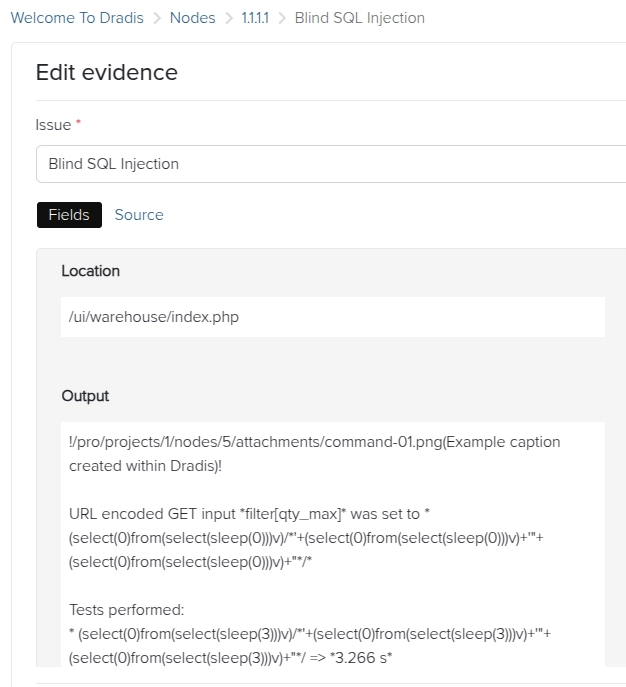
Click Update Evidence, then mouseover the image to see the caption within Dradis:
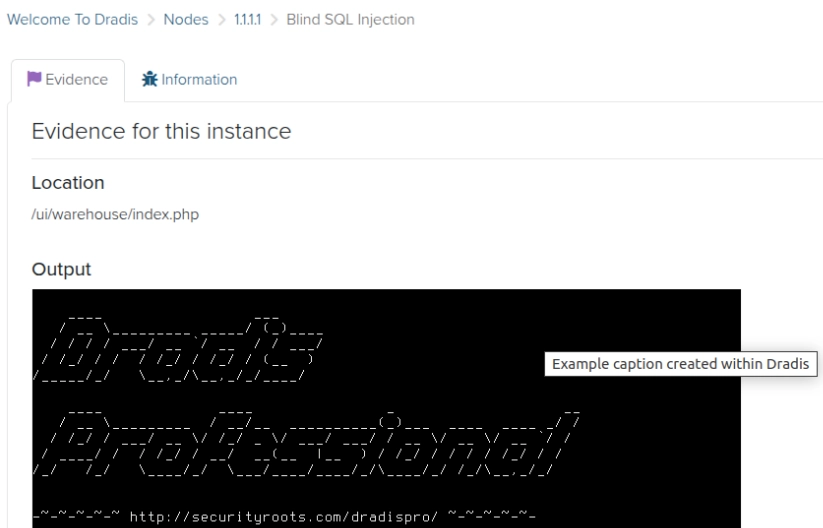
The screenshot will export into your Word report and the caption will be prepended with Figure # as shown below:
The sequence field (# in Figure # above will be automatically created and the field may need to be updated after you export.
Style your captions
The Dradis reporting engine will detect the image captions in your project and style them just how you want them. First, you'll need to decide how you want to style them.
The captions use the built-in Caption style in your Word document. We'll need to modify that style to change the way that the captions are formatted:
-
Open your Word document and click the small downward arrow in the bottom right of the Styles section of the Home tab.

-
Inside the Styles pane, click Options in the bottom right corner.
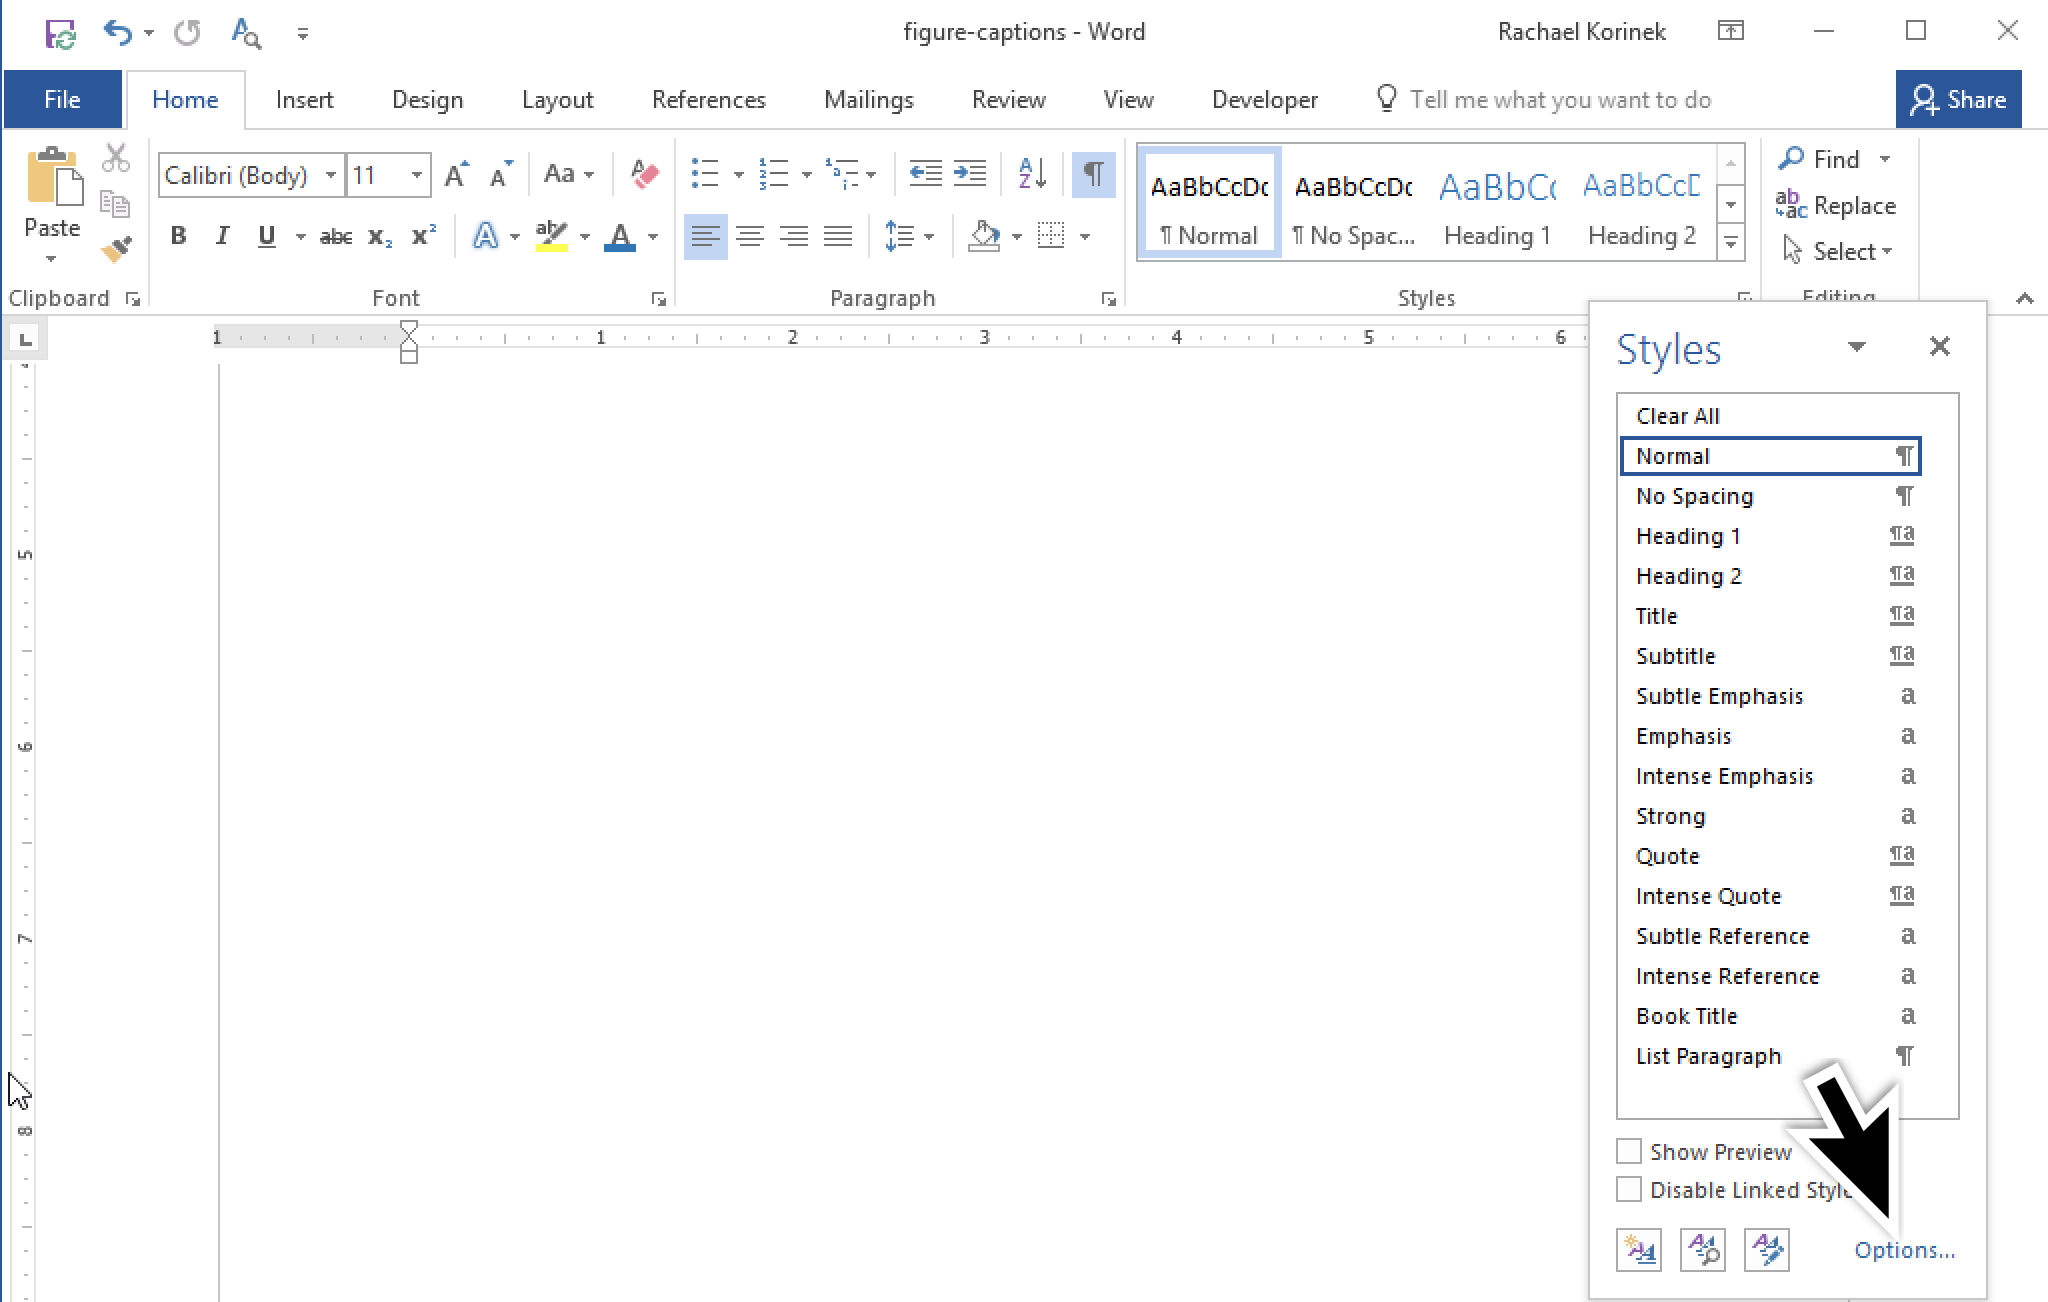
-
Under Select styles to show: select All styles, then click OK.
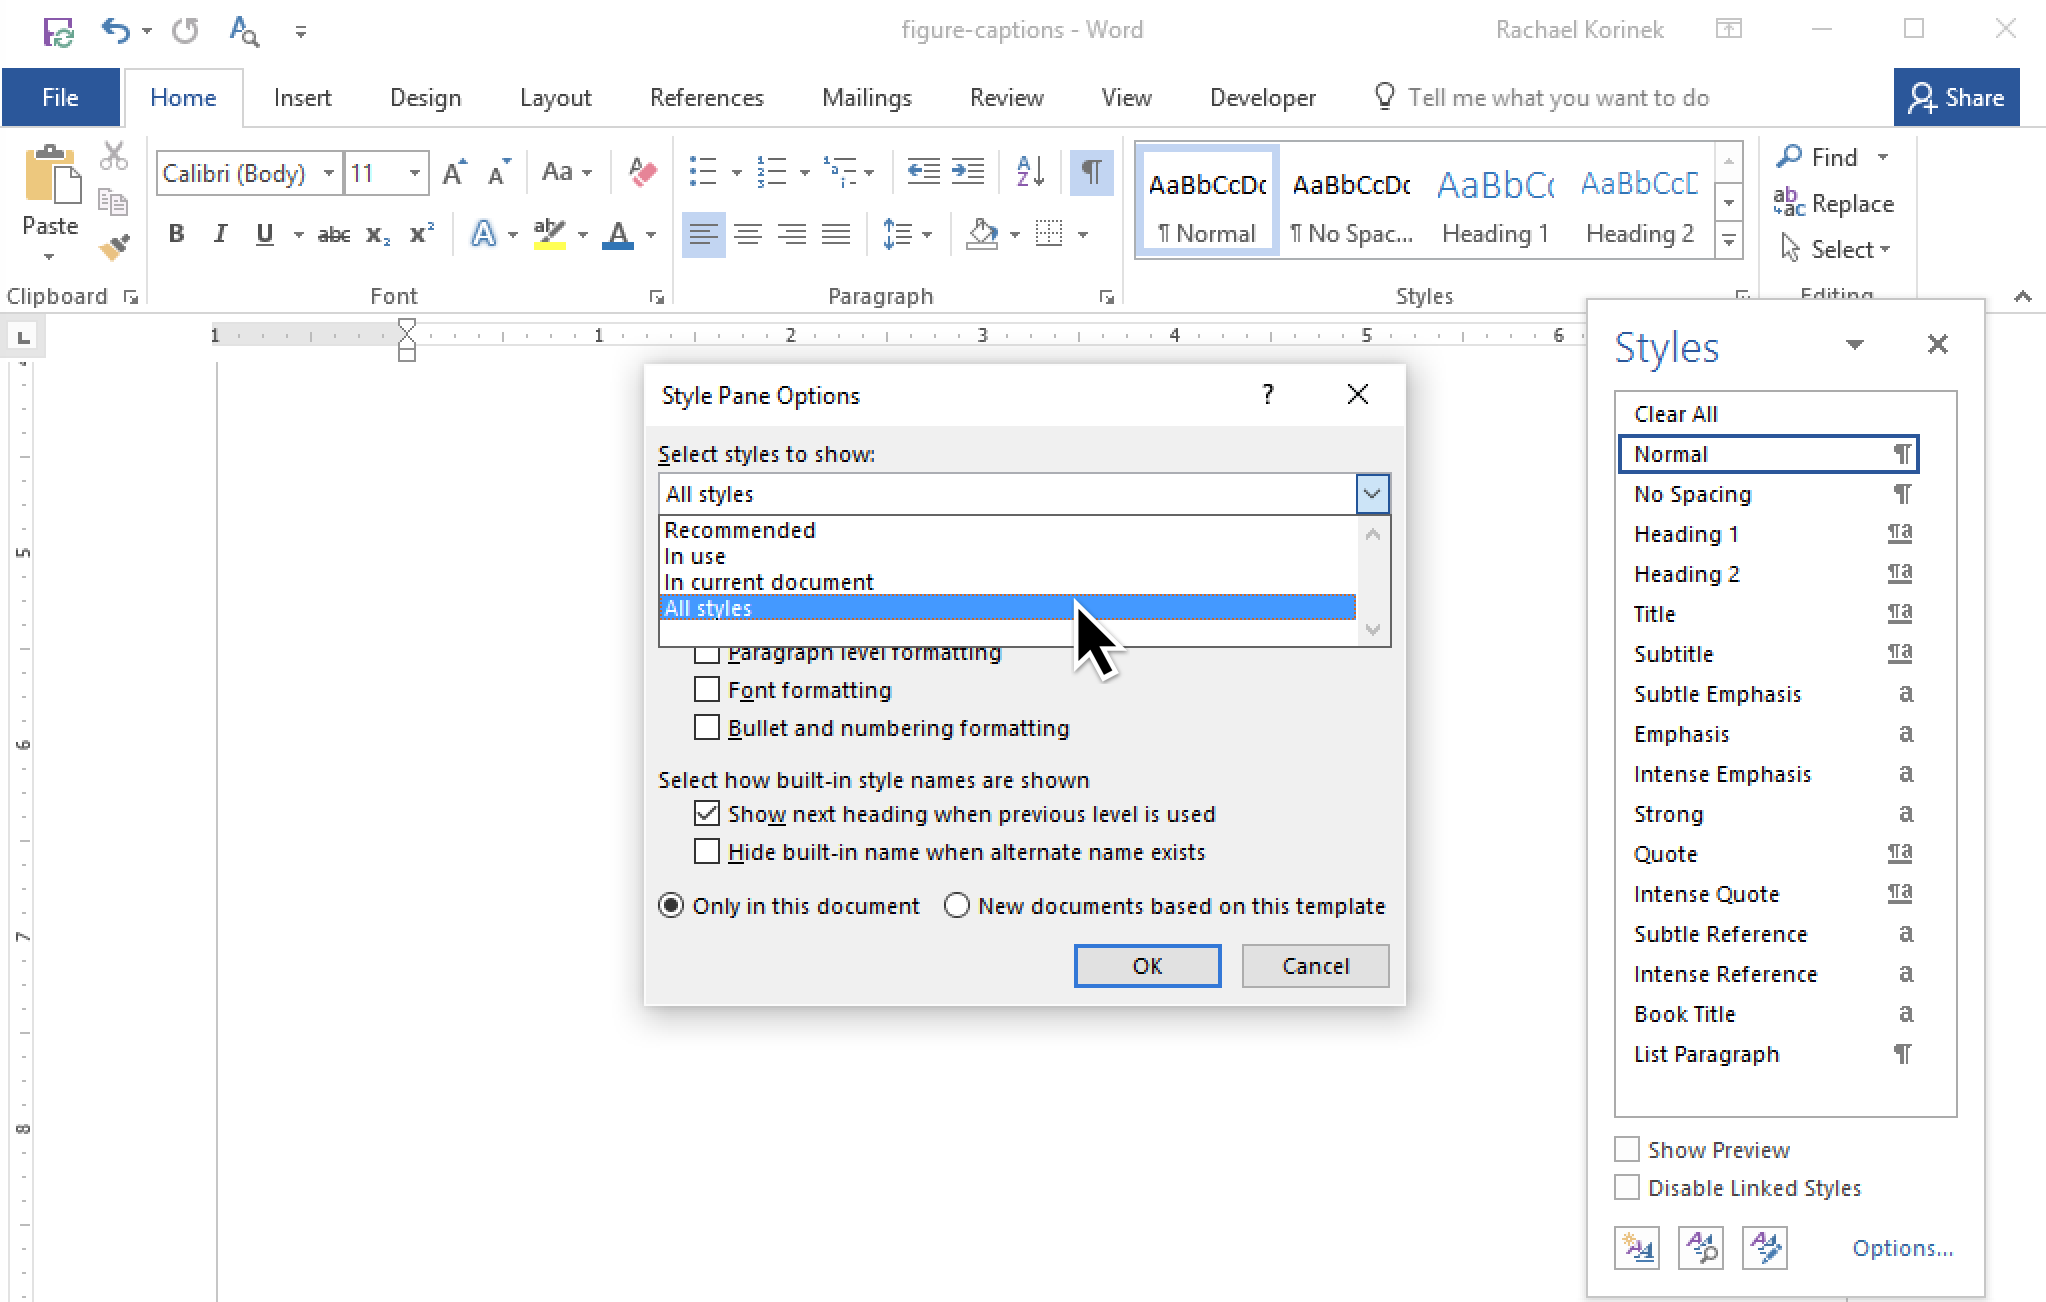
-
Back in the Styles pane, scroll down until you find the
Captionstyle. Click the carat to the right of the name and then select Modify... from the pop-up that appears.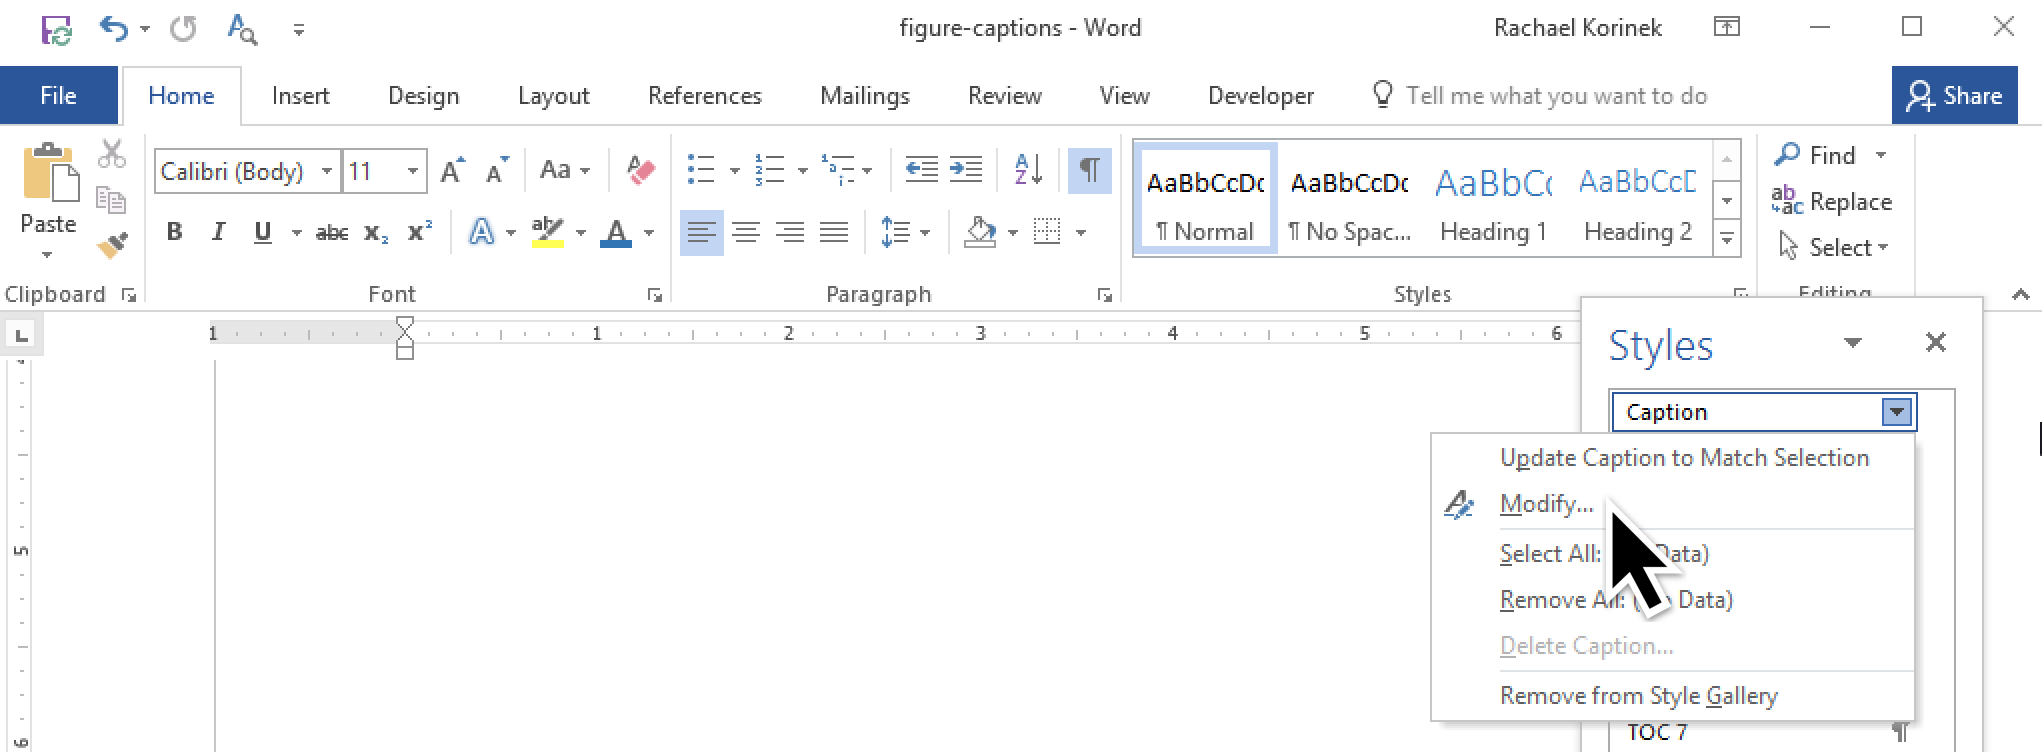
-
Modify the style to match the formatting you need for your captions. We've applied color, indents, and more below. When you're ready, click OK to save your changes.
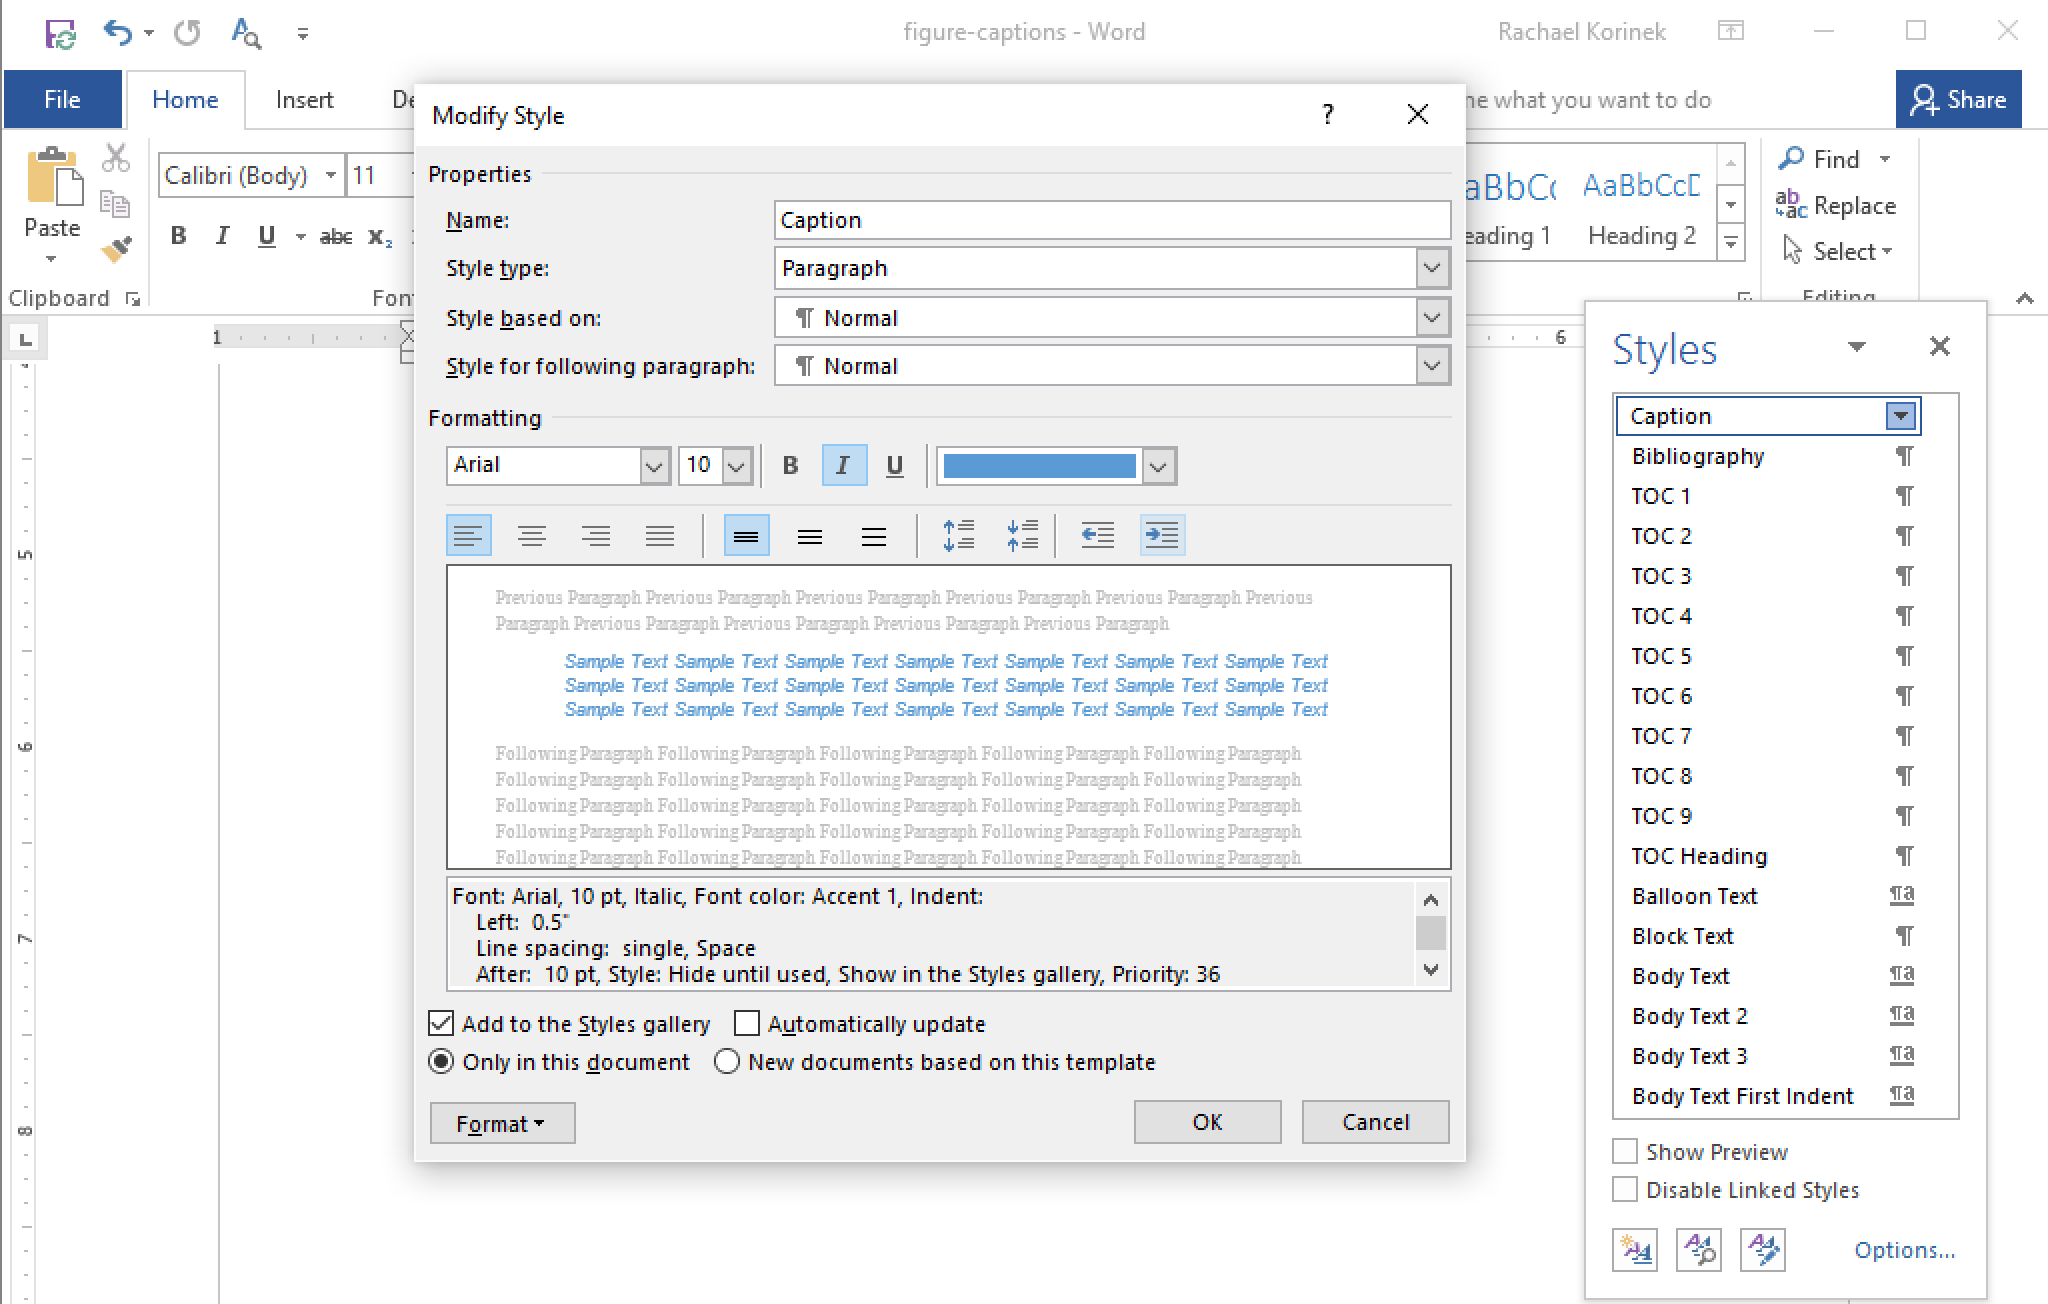
-
Now, when you export a Dradis project using this Word report template, all of the captions will use the
Captionstyle we just modified: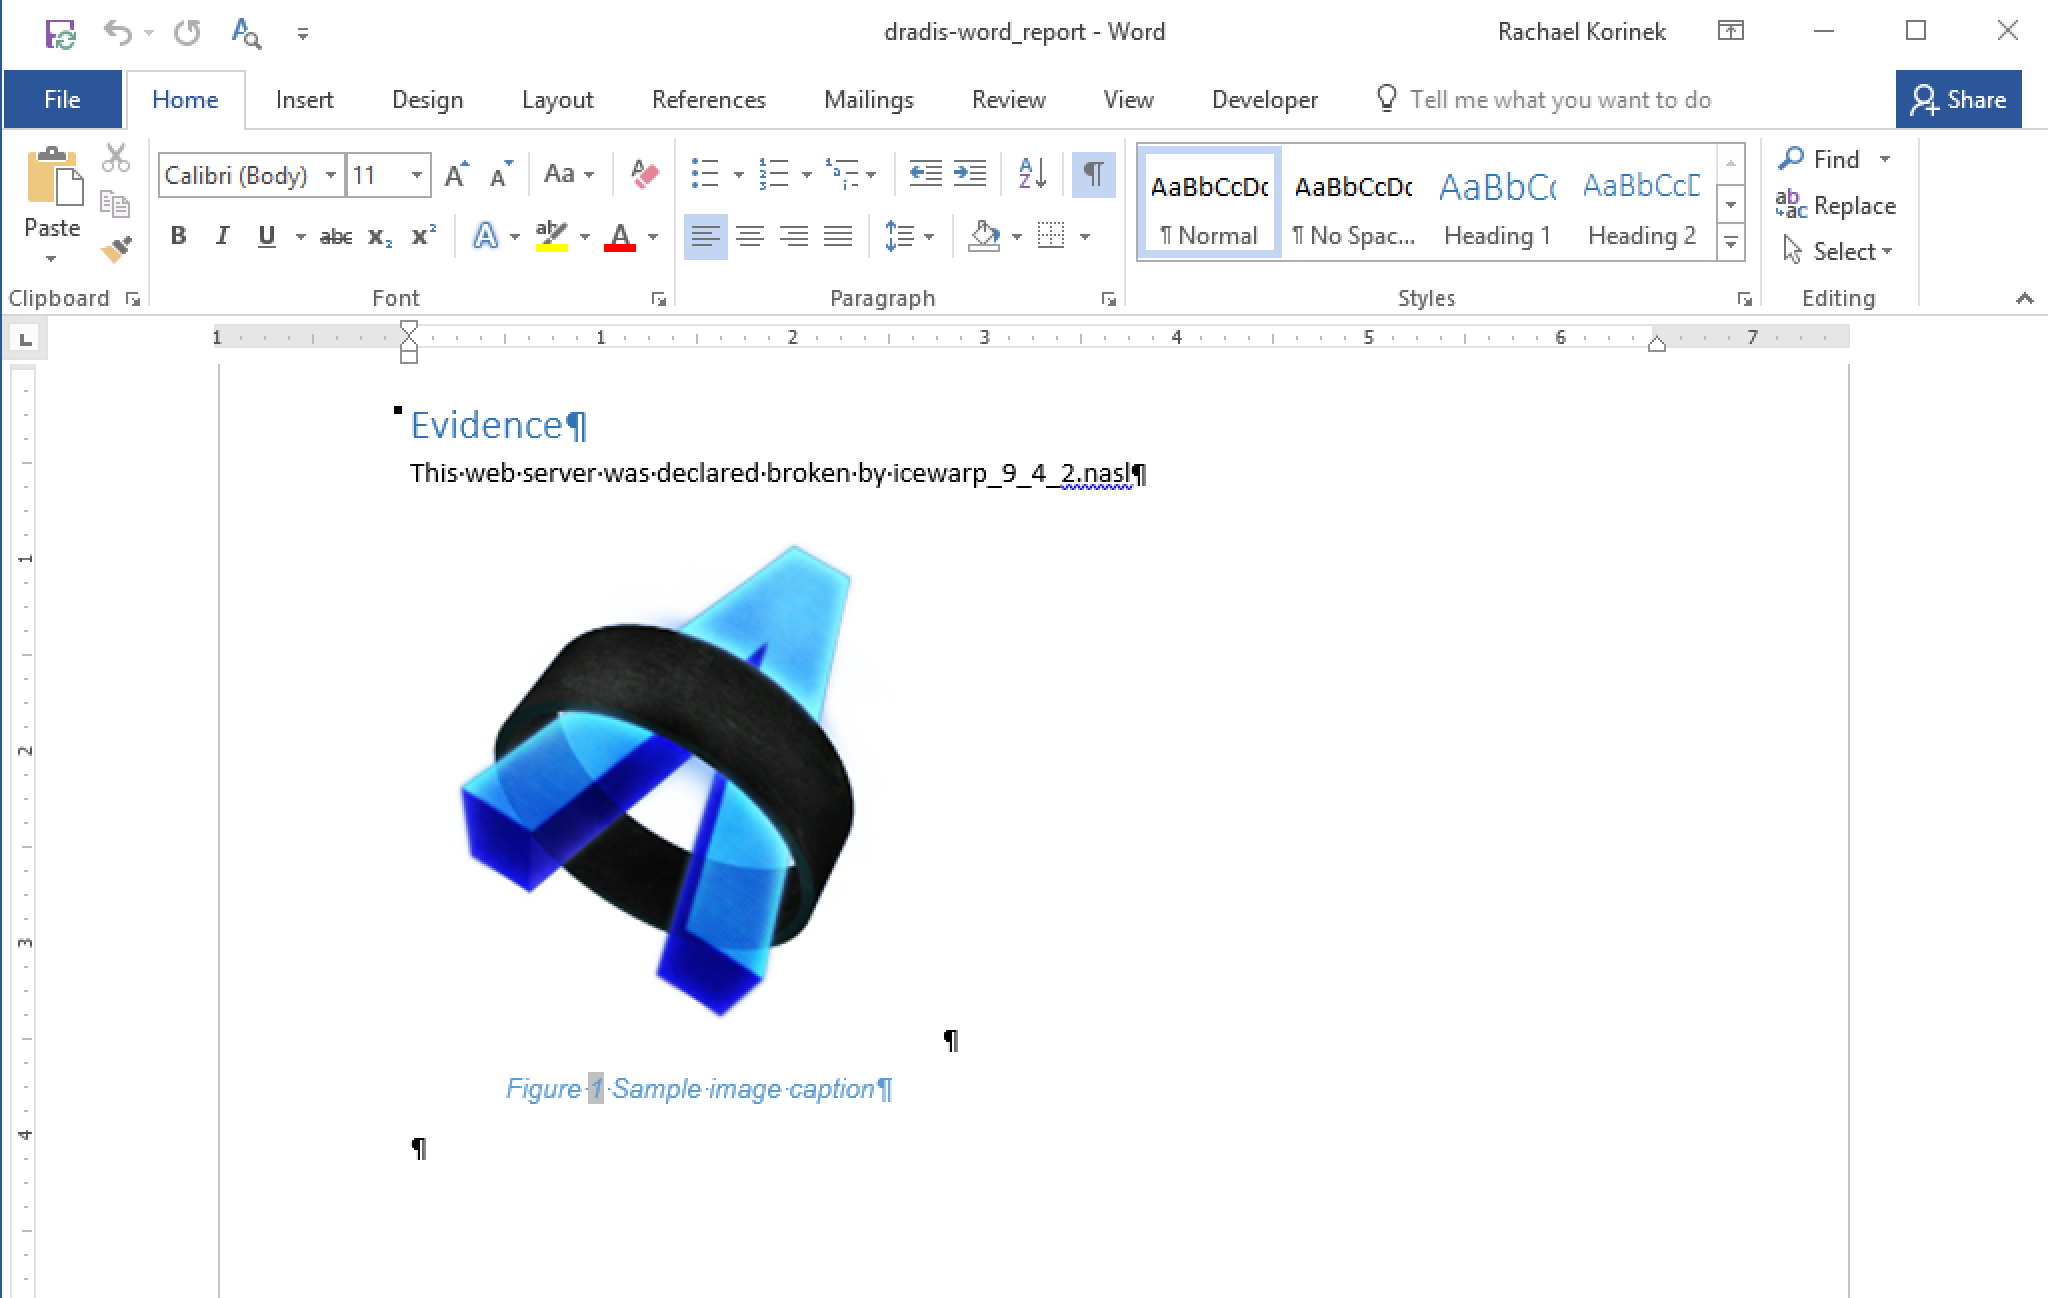
Bypass Textile formatting
Maybe you want to insert some text that looks like Textile formatting, but isn't? Perhaps you want to write something like *UPDATE* without it being bold, or need to show a hash that starts with ! but isn't a screenshot? That's what the notextile marker ==text to ignore formatting== is for.
Using this marker, for example, ==!This_is_not_a_screenshot!== will appear in your report as simply !This_is_not_a_screenshot! rather than throwing an error from Word trying to parse it like a screenshot.
Next help article: Code blocks →
