Automatically unlock your LUKS-encrypted disk
Warning: following this guide will render disk encryption useless. You will be storing your encryption key, plain-text, in the unencrypted part of the disk!
Want to do away with the disk encryption passphrase altogether? This guide will show you how to disable it for your instance.
This is useful if:
- You want 100% unattended reboots.
- You're taking the Dradis VM in your laptop and don't want to type the password every time.
Before making these changes, be sure to take a snapshot and a backup of your Dradis instance.
1. Back up your initramfs disk
Run the following commands in the Dradis console as root:
# cp /boot/initrd.img-X.Y.Z-N-amd64 /boot/initrd.img-X.Y.Z-N-amd64.safe
Make sure to change X.Y.Z-N to match the actual file in your instance. A valid command example:
# cp /boot/initrd.img-4.19.0-13-amd64 /boot/initrd.img-4.19.0-13-amd64.safe
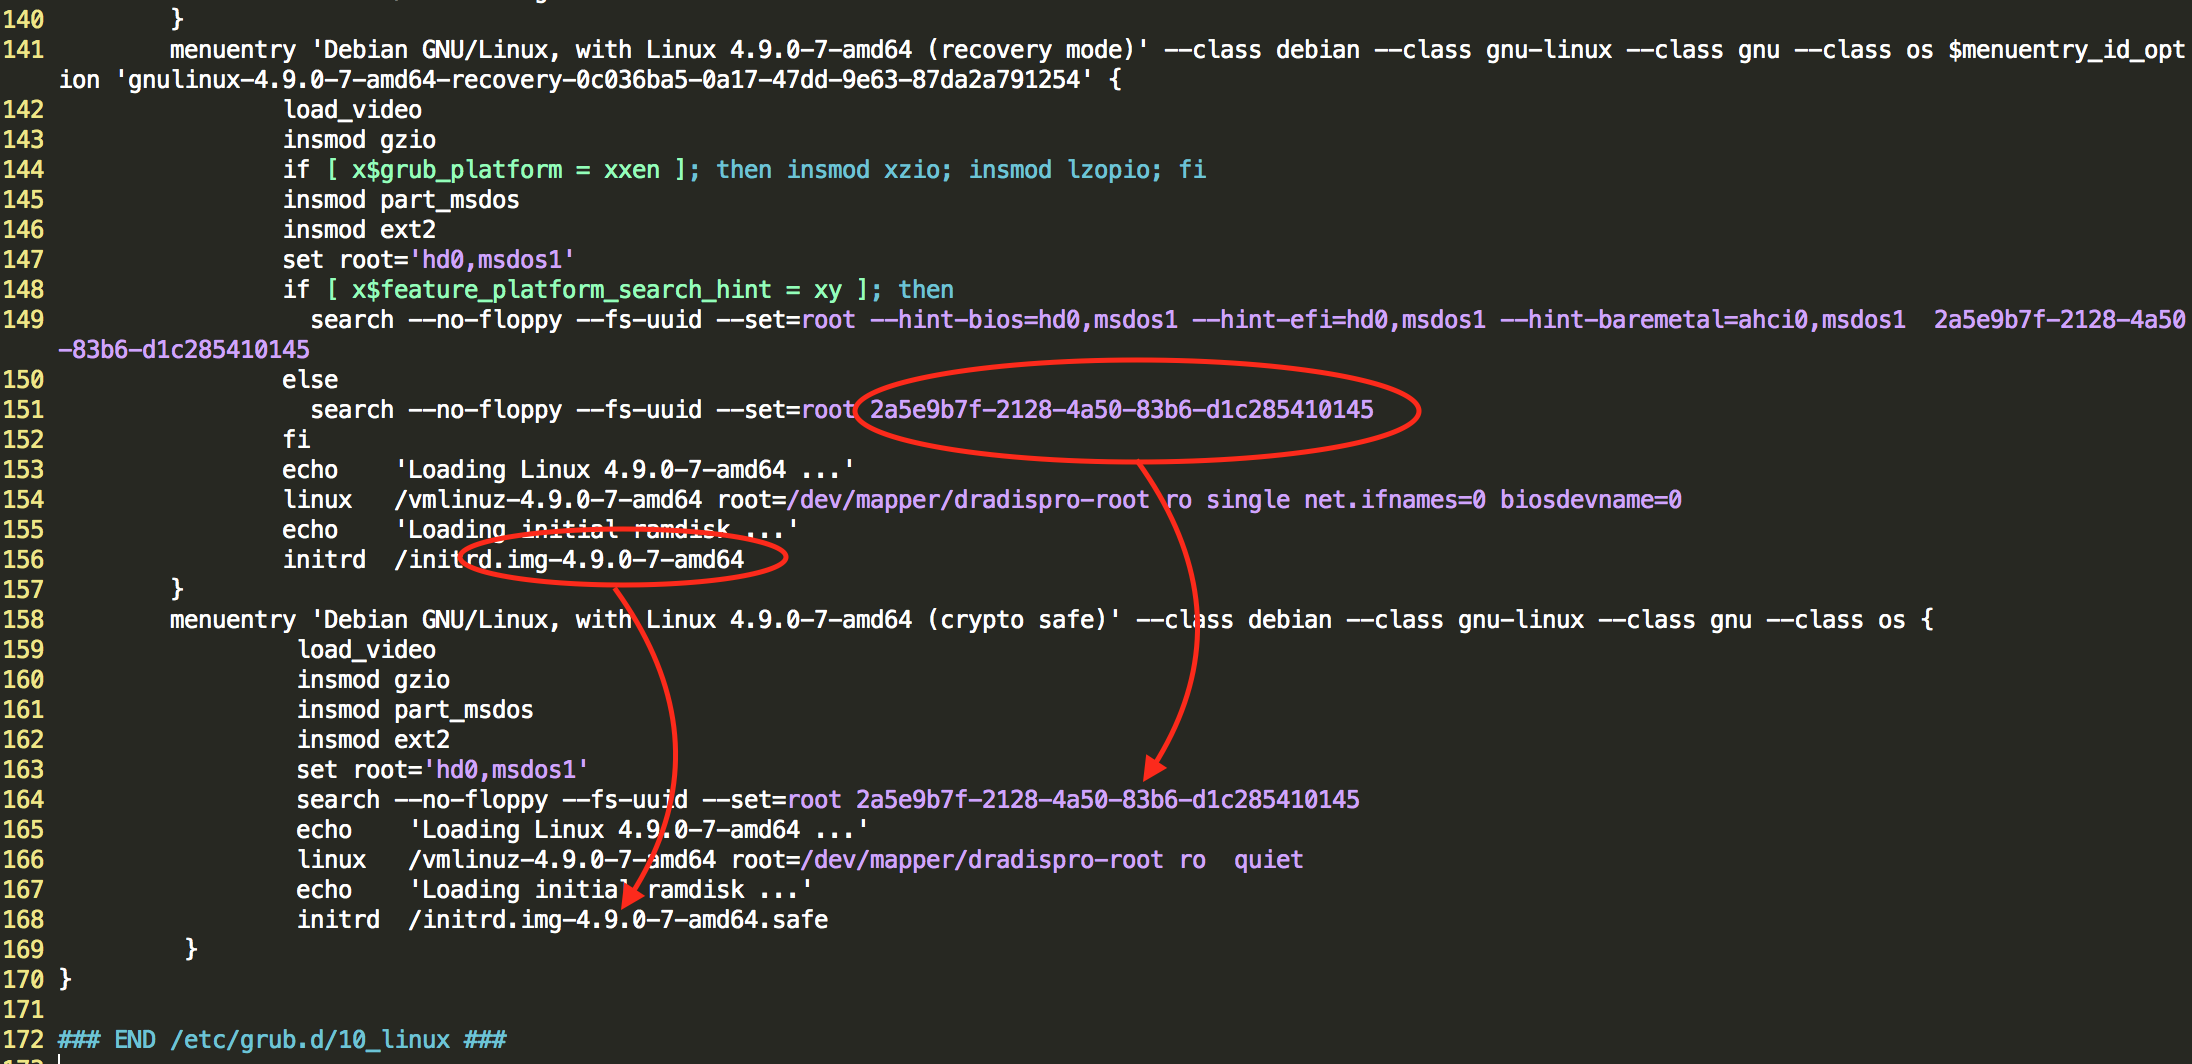
Optionally add a new entry in the boot menu to fall back to the safe initramfs disk:
# vi /boot/grub/grub.cfg
Edit /boot/grub/grub.cfg to add the following:
### BEGIN /etc/grub.d/10_linux ###
#...
menuentry 'Debian GNU/Linux, with Linux 4.19.0-13-amd64 (crypto safe)' --class debian --class gnu-linux --class gnu --class os {
       load_video
       insmod gzio
       insmod part_msdos
       insmod ext2
       set root='hd0,msdos1'
       search --no-floppy --fs-uuid --set=root 2a5e9b7f-2128-4a50-83b6-d1c285410145
       echo    'Loading Linux 4.19.0-13-amd64 ...'
       linux   /vmlinuz-4.19.0-13-amd64 root=/dev/mapper/dradispro-root ro  quiet
       echo    'Loading initial ramdisk ...'
       initrd  /initrd.img-4.19.0-13-amd64.safe
}
# ...
### END /etc/grub.d/10_linux ###
NOTE: Make sure the existing values in that file match the new contents added now:

2. Create the key file in the unencrypted /boot partition
# dd if=/dev/urandom of=/boot/keyfile bs=1024 count=4
3. Set permissions
# chmod 0400 /boot/keyfile
4. Add the new file as unlock key to the encrypted volume
# cryptsetup -v luksAddKey /dev/sda5 /boot/keyfile
Enter any passphrase:
Enter your old/existing passphrase here. Expected output:
Key slot 0 unlocked.
Command successful.
Note:The device names may vary depending on the hypervisor: XenServer would assign "xvda", Proxmox would assign "vda", while VMware would stick to "sda".
5. Find the UUID of /dev/sda1
# ls -l /dev/disk/by-uuid/
6. Edit /etc/crypttab
Edit the contents of file /etc/crypttab (use the UUID of /dev/sda1 from the previous step)
# vi /etc/crypttab
This contents should be:
sda5_crypt UUID=9b7200b5-0e0a-447a-93a8-7eb8f1f4a1ee none luks
(The UUID may be different)
The changes we'll be making:
Replace the 3rd parameter ‐
none‐ with/dev/disk/by-uuid/<uuid>:/keyfilewith the UUID for sda1Replace the 4th parameter ‐
luks‐ withluks,keyscript=/lib/cryptsetup/scripts/passdev
The final result:
sda5_crypt UUID=9b7200b5-0e0a-447a-93a8-7eb8f1f4a1ee /dev/disk/by-uuid/2a5e9b7f-2128-4a50-83b6-d1c285410145:/keyfile luks,keyscript=/lib/cryptsetup/scripts/passdev
In this case the UUID for our /dev/sda1 UUID was 2a5e9b7f....
If you run into any issues with file permissions, run:
# chmod 0777 /etc/crypttab
After editing, run the following to reset the permissions:
# chmod 0440 /etc/crypttab
7. Generate a new initramfs disk
# mkinitramfs -o /boot/initrd.img-4.19.0-13-amd64 \
    4.19.0-13-amd64
(Make sure 4.19.0-13 is your version, as on step 1)
8. Cross your fingers and reboot
# reboot
Congratulations: You have effectively short-circuited the security of the encrypted drive. Be careful now!
Next help article: Change your LUKs-encrypted drive's passphrase →