From a sample report to a Dradis template
In this guide we cover everything you need to do to convert a sample Word report into a Dradis template.
Learn how to:
- Add document properties
- Add content to Scope, Executive Summary, and Summary of Findings sections
- Filter your findings and order them by severity
- Present vulnerability information by host
- Include the Services table created by the Nmap plugin
- Use advanced styling like custom tables, screenshots, and code blocks
Before you begin
- Make sure you have the Developer Tab enabled on your instance of Word.
- Consider saving your .docx Word file as a .docm file with macros enabled so that you can add macros like the UpdateAllFields macro.
- If you have a Table of Contents, you do not need to do anything special with it to include it in your Dradis template. Just consider adding the UpdateAllFields macro to your template so that the Table of Contents is updated after export.
- Create a new (blank) Dradis project. As you complete the sections below, add the relevant content (Notes, Issues, etc) to your Dradis project right away so that you can test the template and catch any problems.
Document Properties
Add document properties when you have project-specific details that are repeated multiple times throughout the report (e.g. Client Name) or don't make sense to add as a separate Note (e.g. Project Title).
You might have placeholders like these in your sample report already:
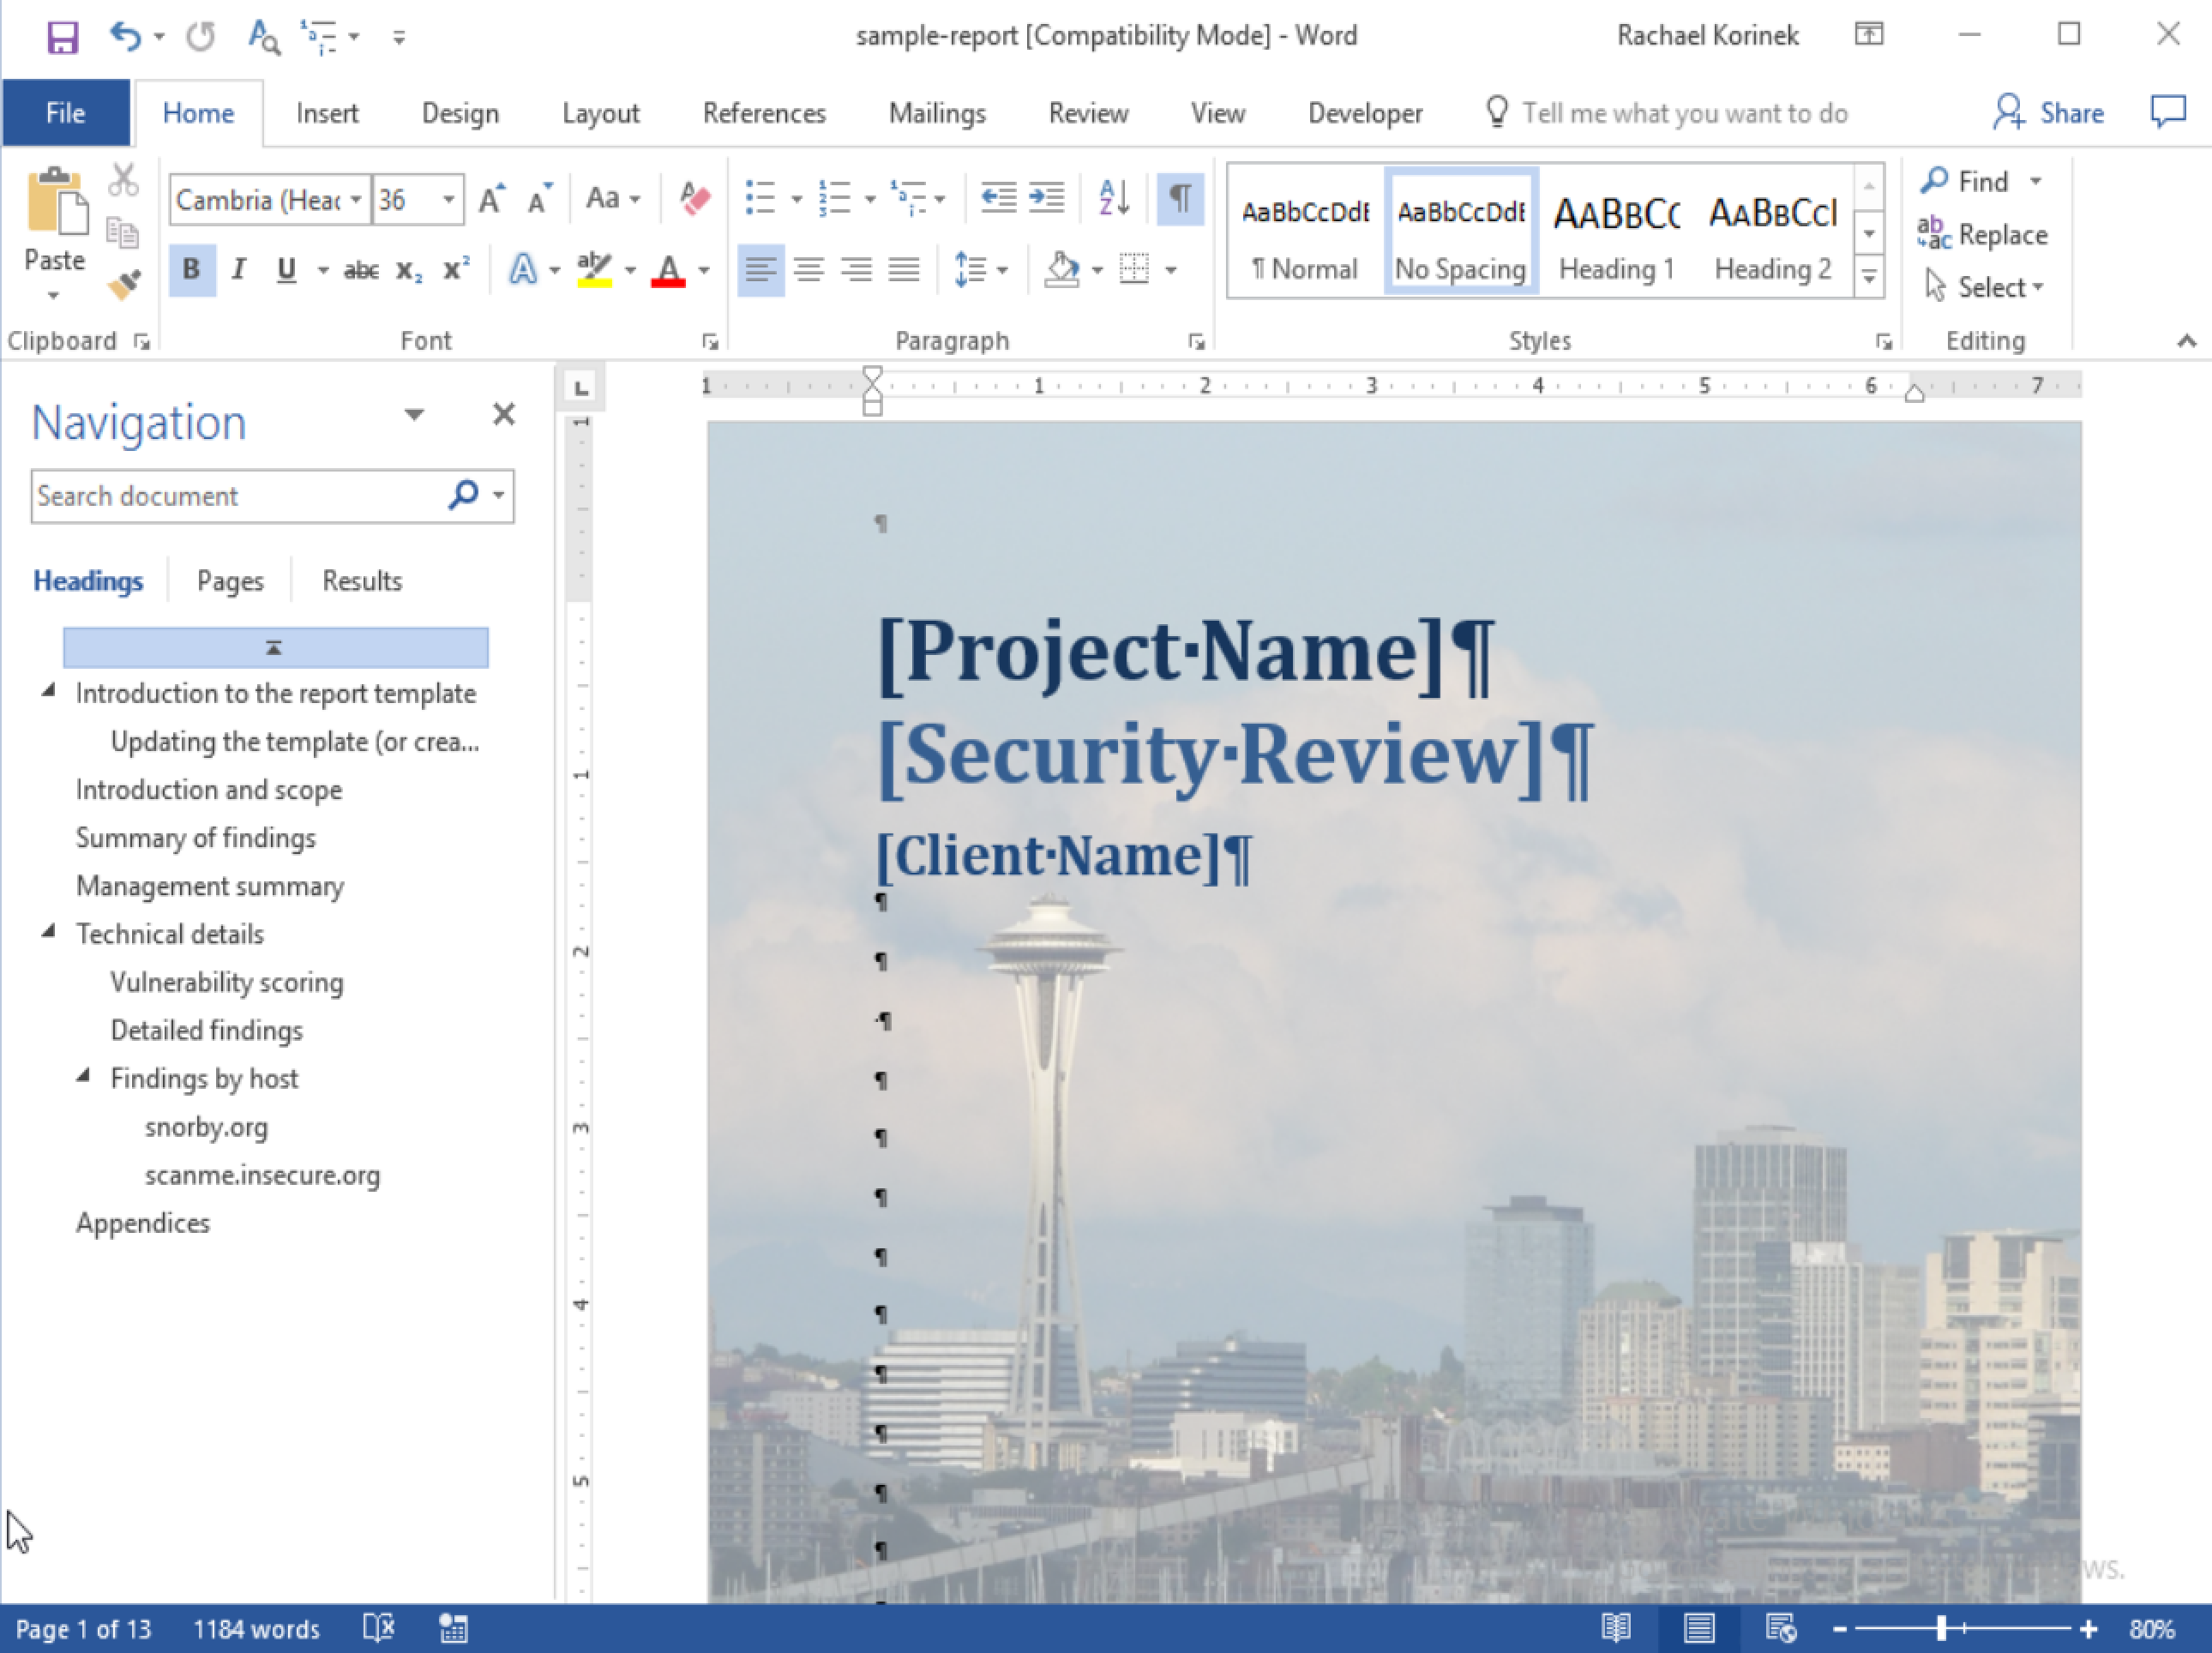
Replace them with document properties using the Adding document properties page of this guide:
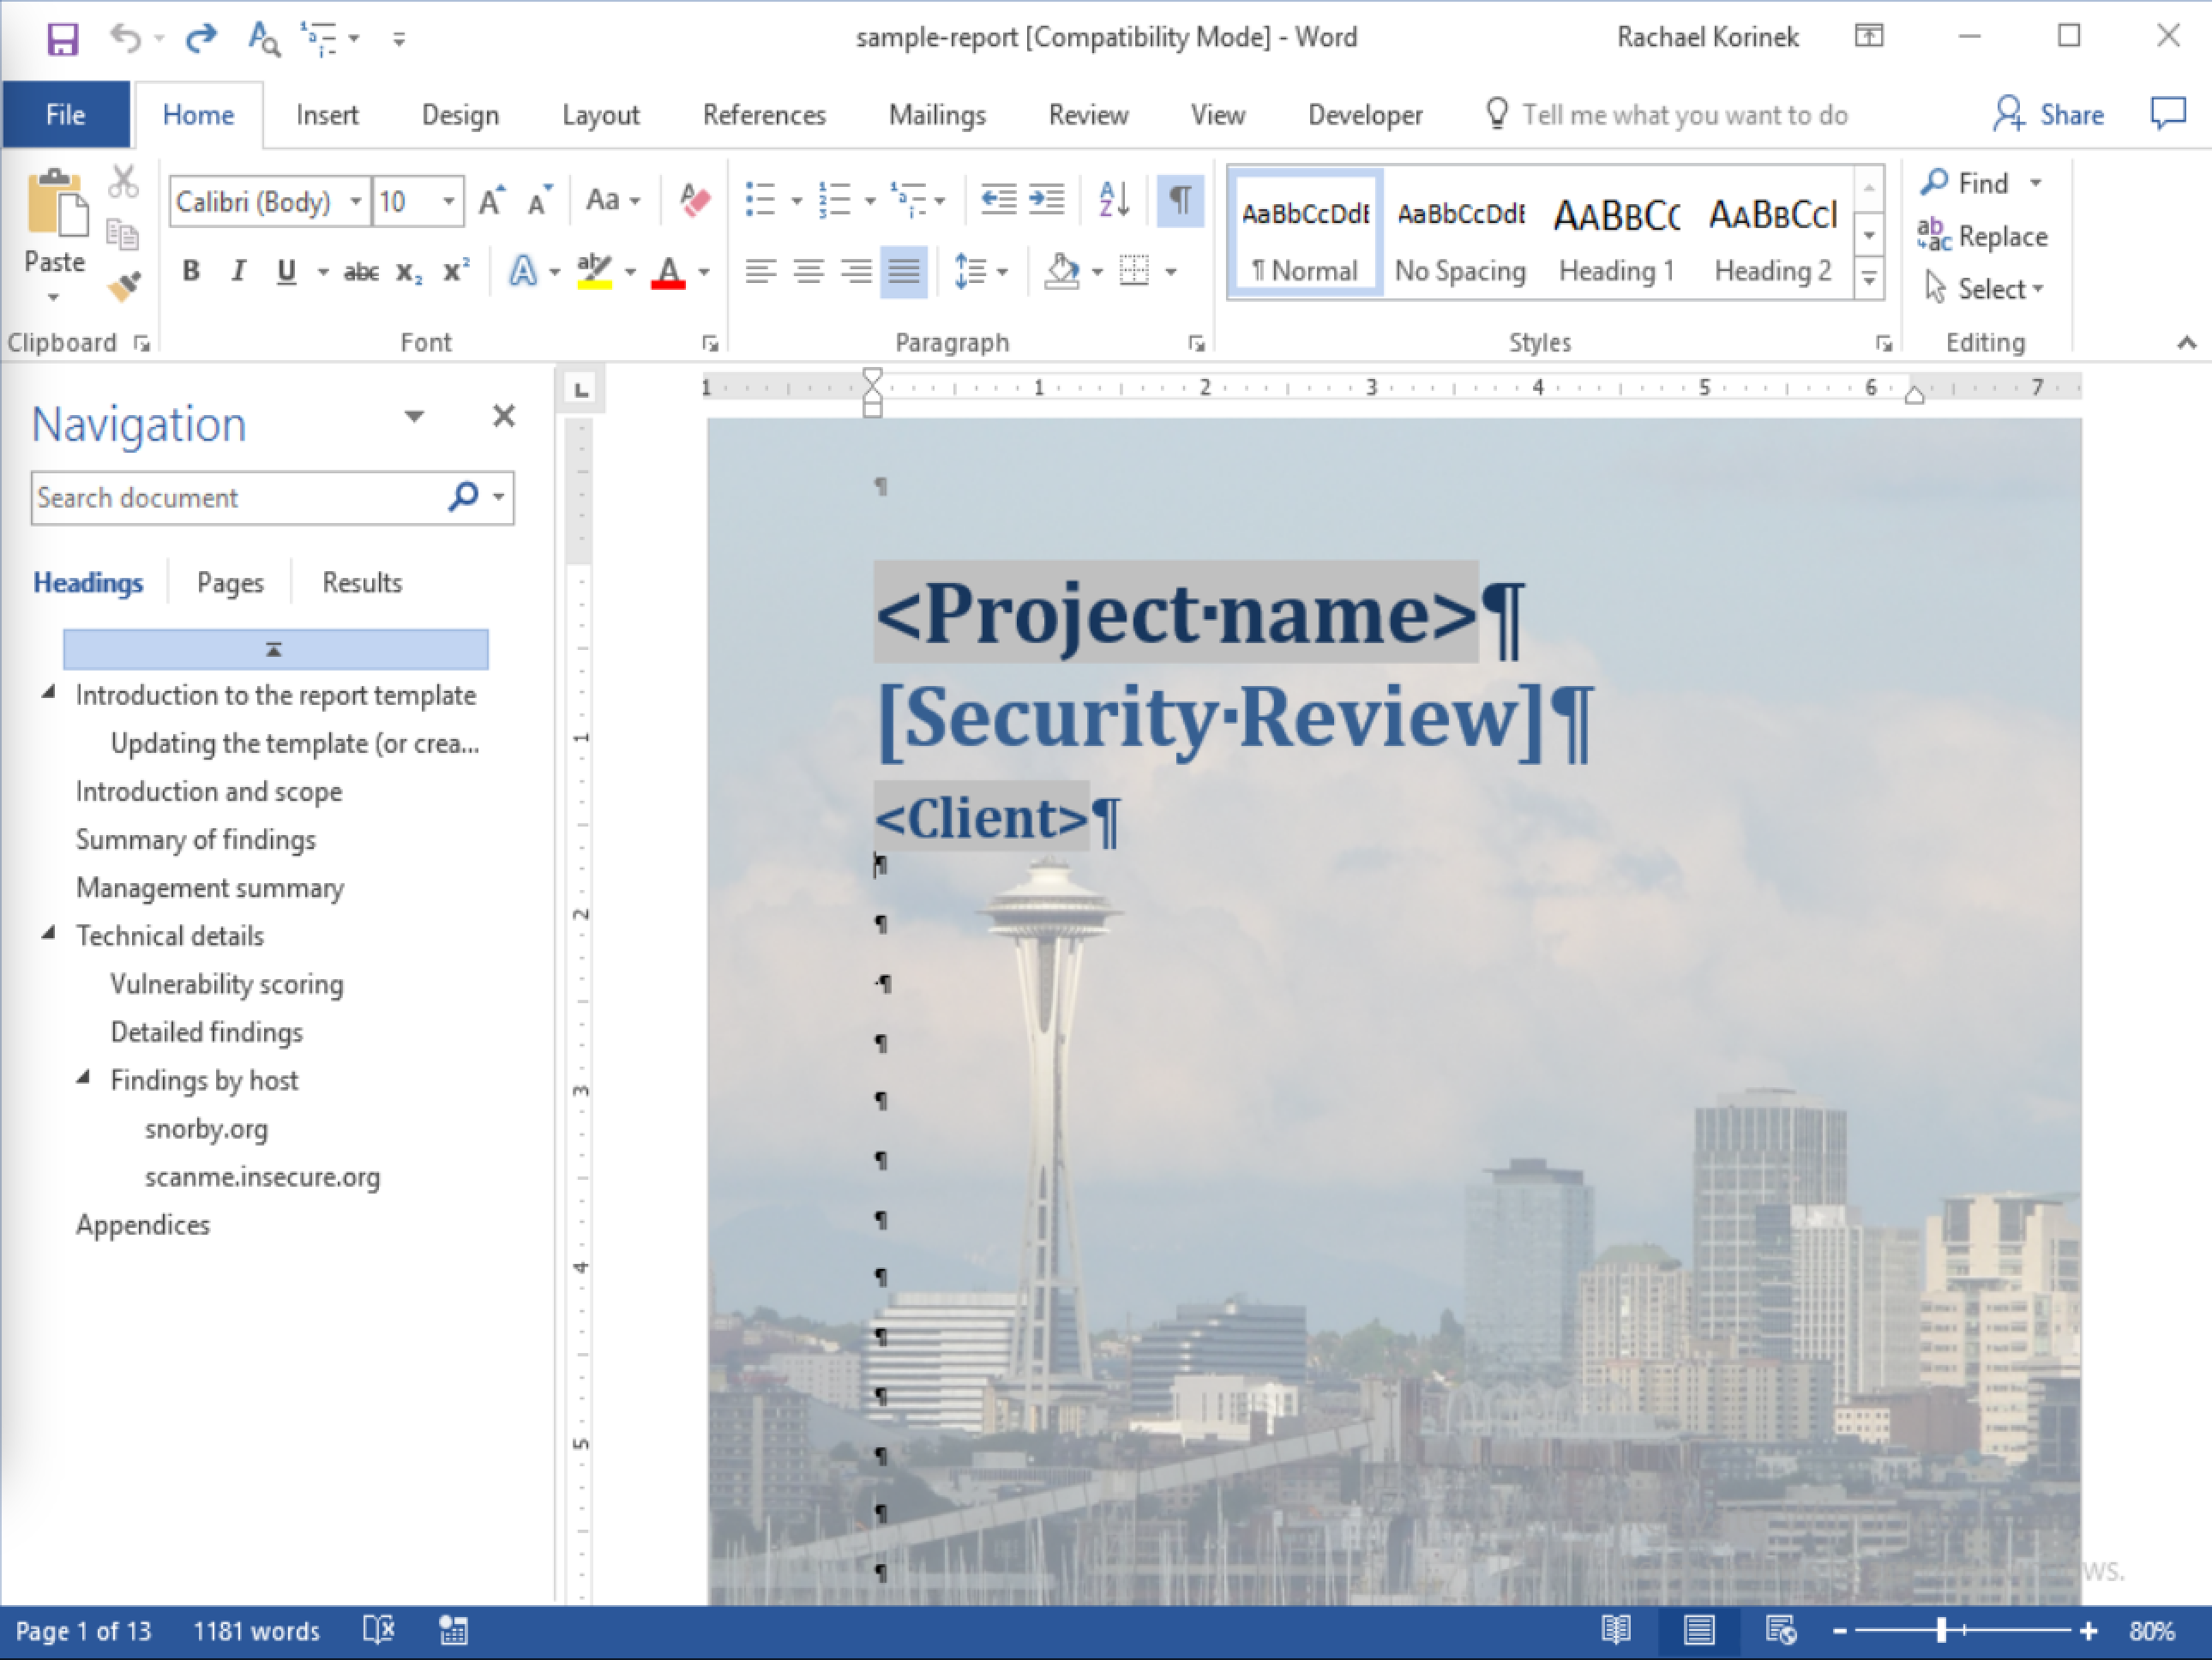
After adding the document properties to your template and Dradis project, make sure to run a quick test export! If you get an error message, check out the Failed export page of our Debugging your template guide for more details.
Scope, Executive Summary, and Summary of Findings sections
Learn how to use Note content controls to extract information from your Dradis notes and include it anywhere in the report including the Executive Summary or Scoping sections.
Build a Summary of Findings table using the information from the Issues in your project.
Introduction, Scope, and Summary Sections
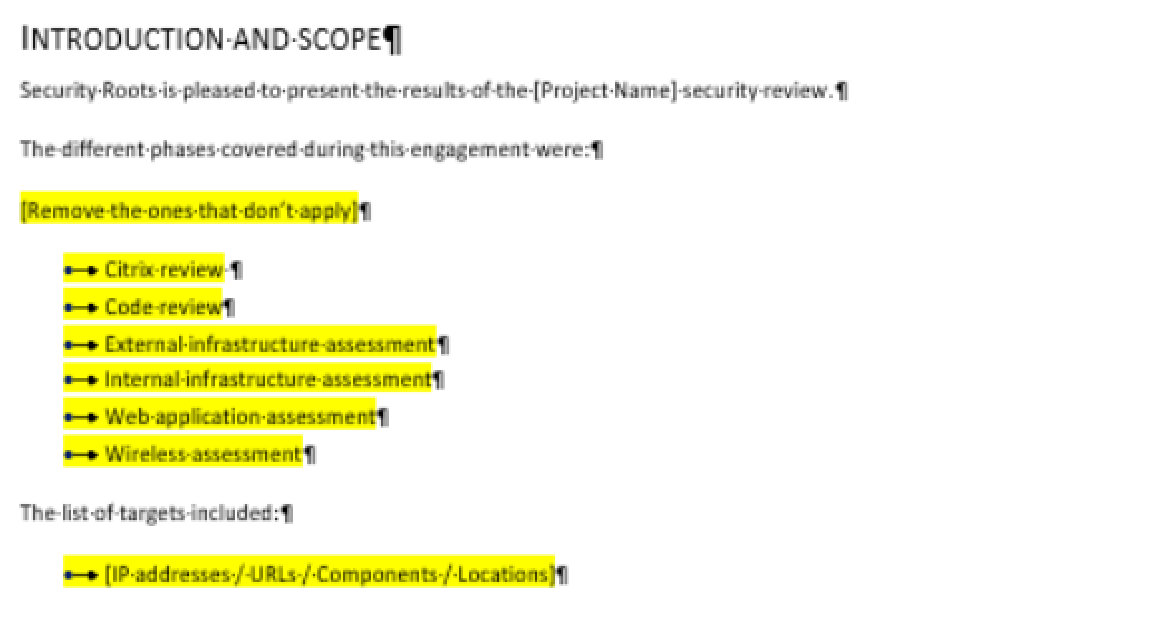
We replaced the placeholder engagement phase content with a Note content control that we filtered by Type|Scope. So, any content that we put in our Dradis project inside the Description field of the Note with a Type field value of Scope will export into this section of the report.
We also added a Node Label content control so that a list of every affected host in our project will export here in the report.
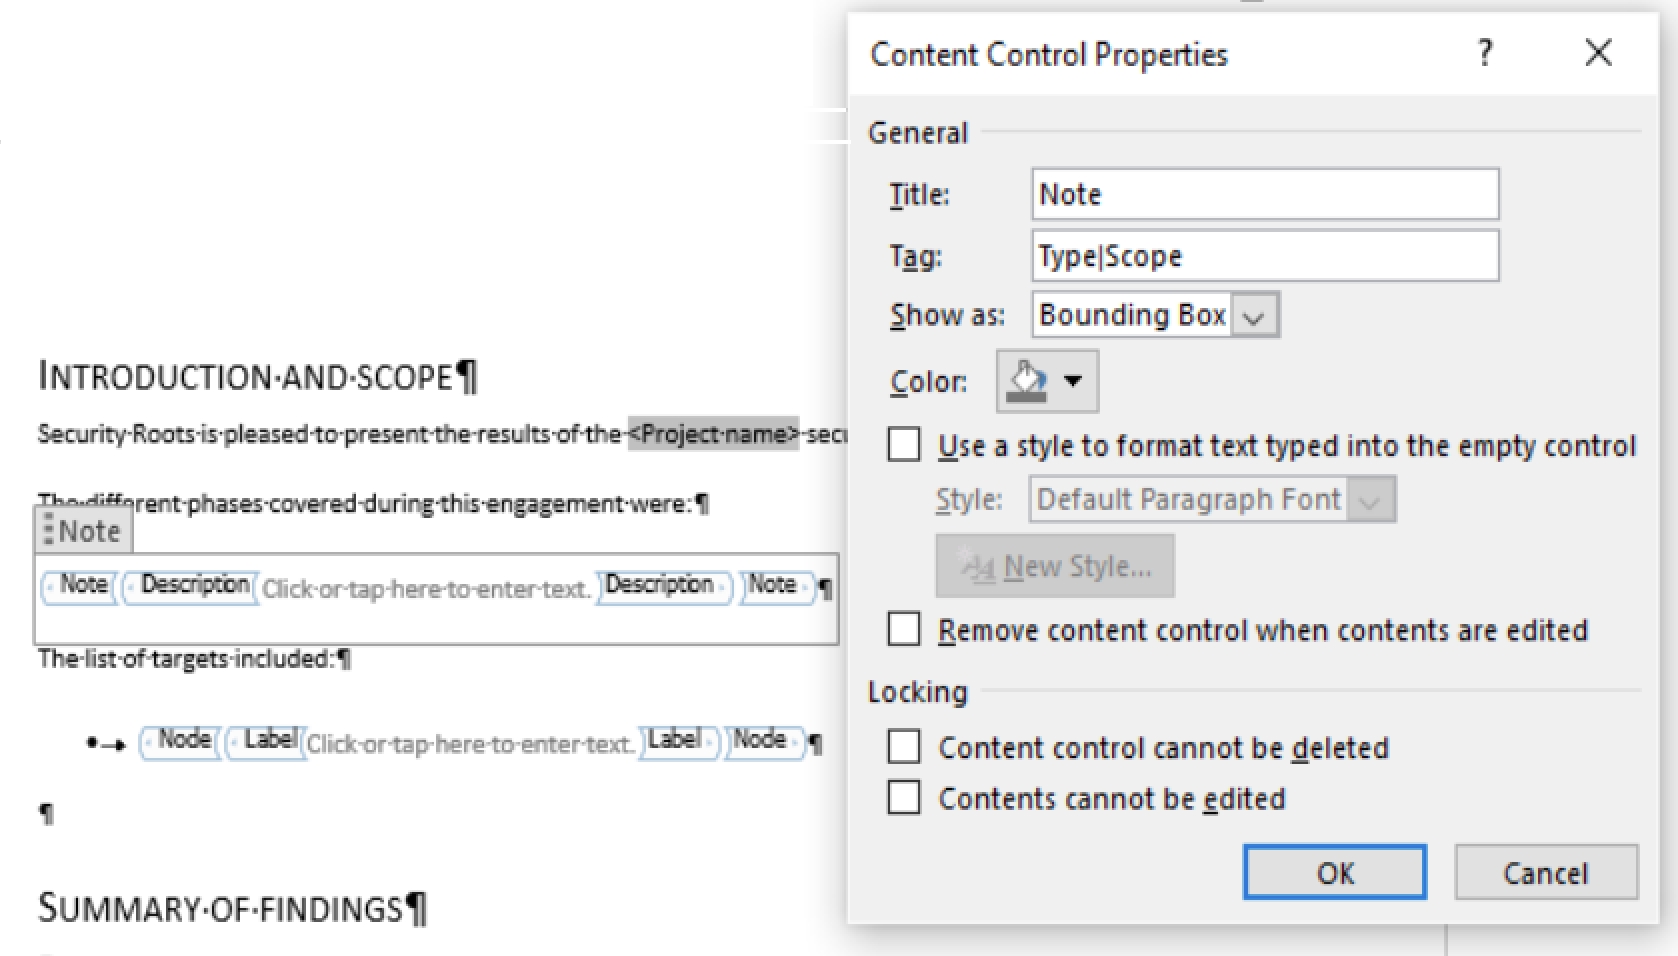
We can also use the same Note filtering process to create the content controls in the Summary section:
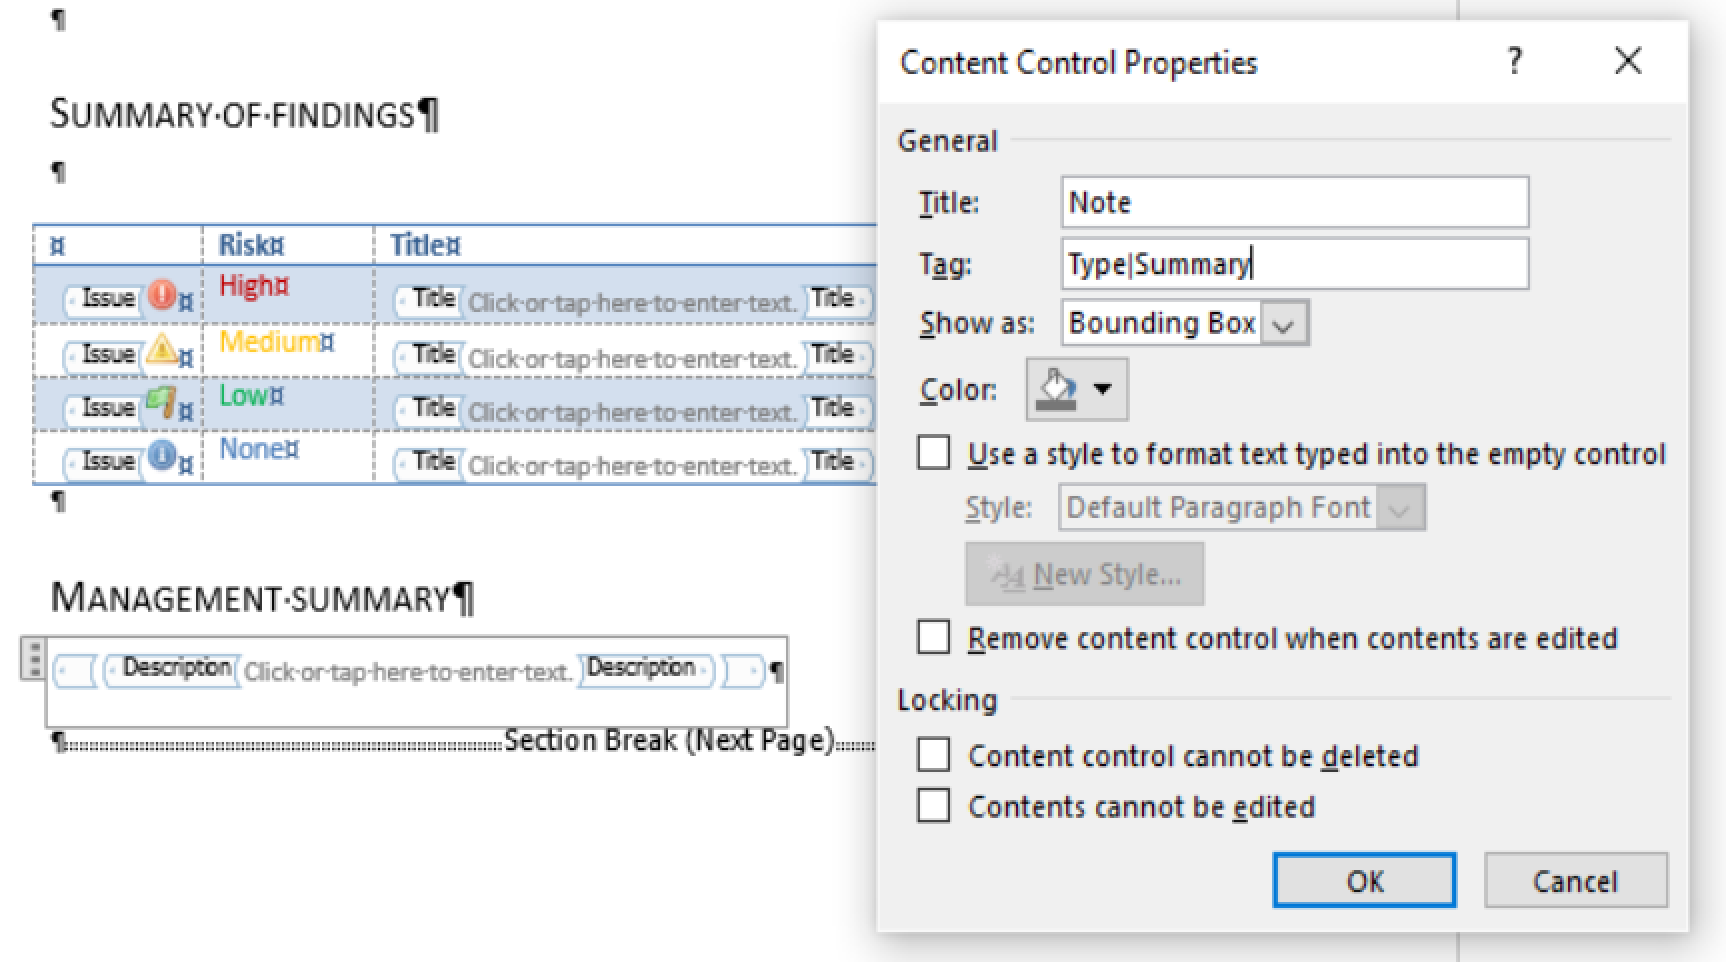
Summary of Findings Table
To create the Summary of Findings table, we'll be including the information from the Issues in the project rather than pulling from Notes.
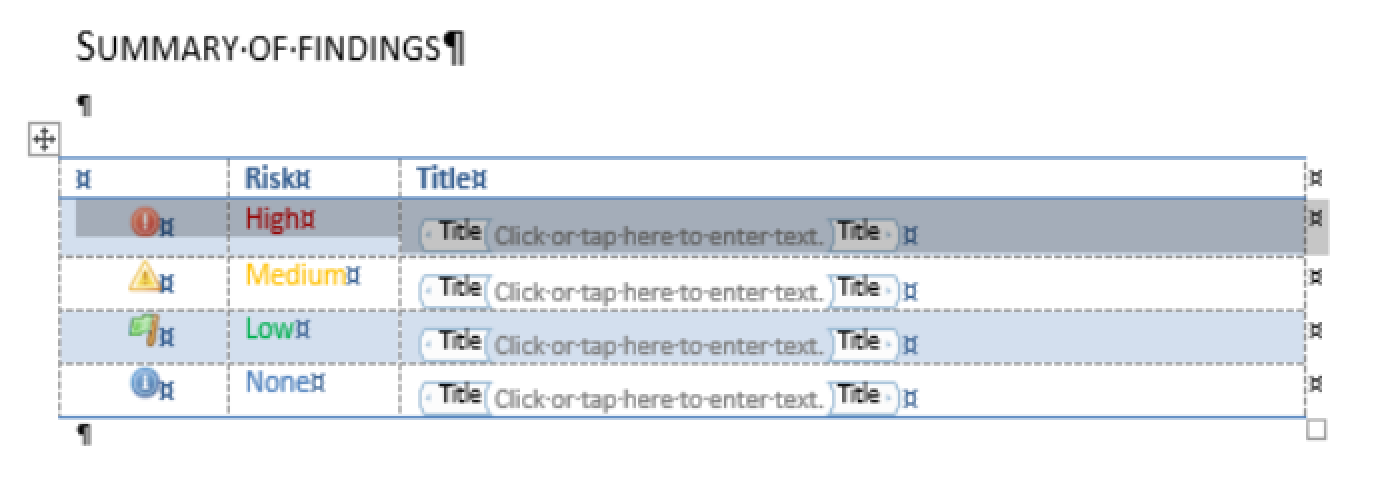
If you want a new row in a table for every Issue (or instance of Evidence, etc), make sure to select past the row as shown below before adding in the content control:
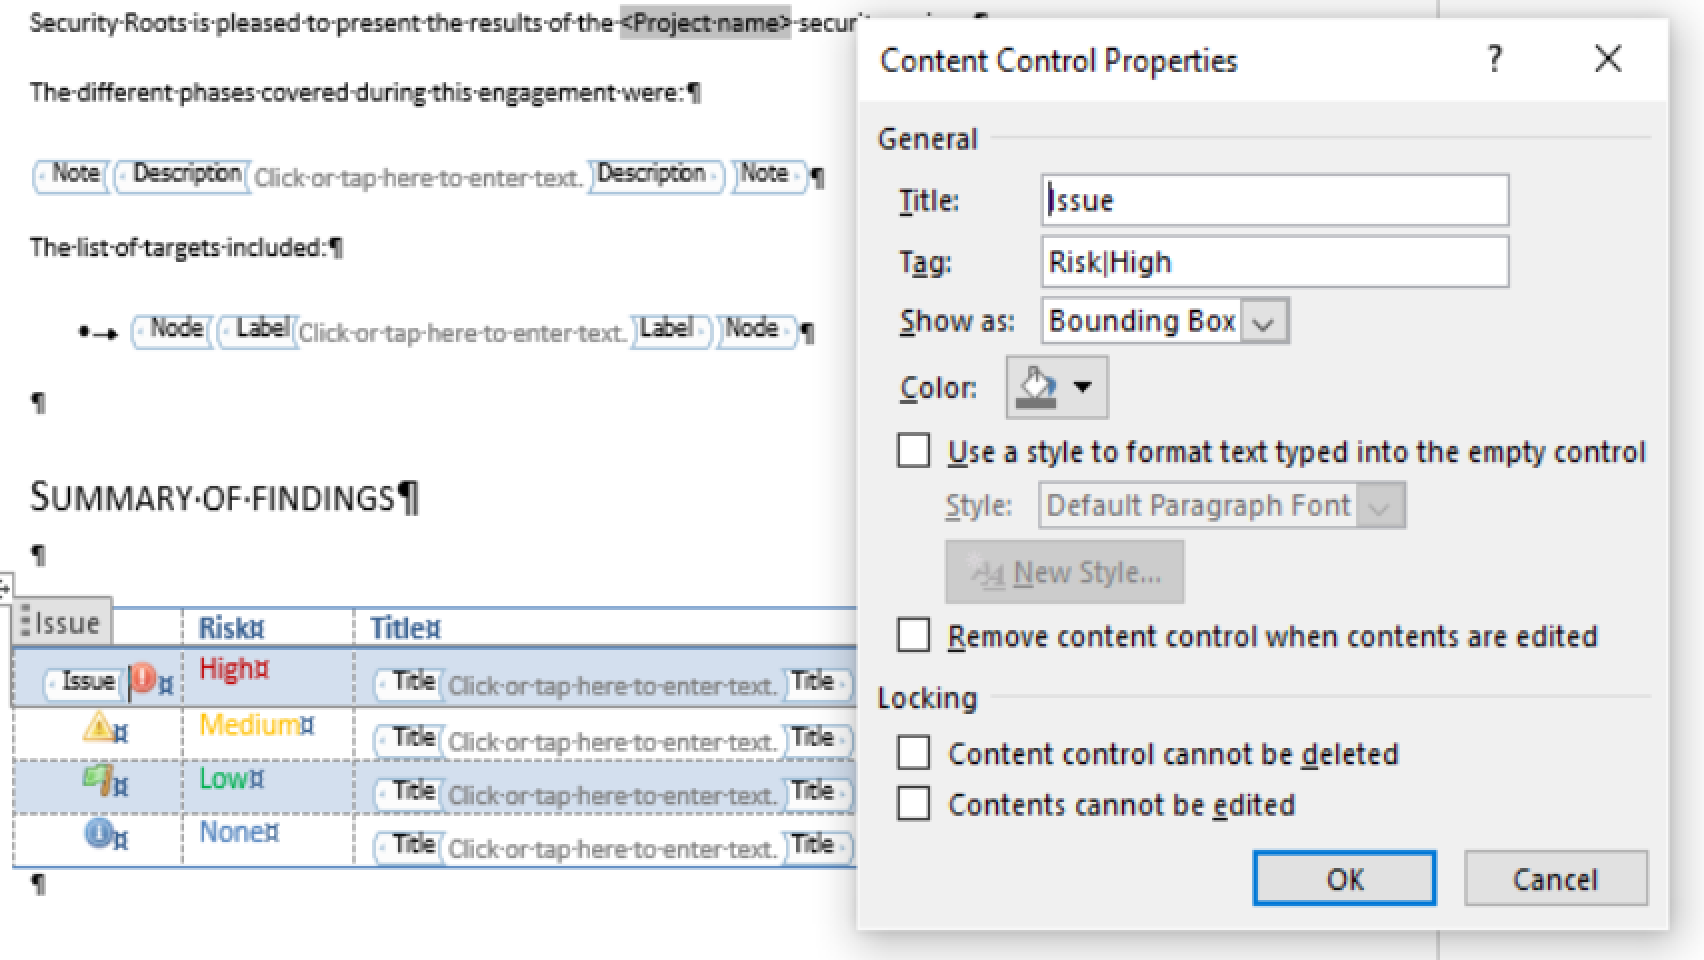
After adding in the content control, make sure to filter it as needed. In our case, we'll filter it by Risk|High:
Filter findings and order by severity
Dive deeper into the finding details like the Issue's Title, Description, Solution, Risk rating, and more
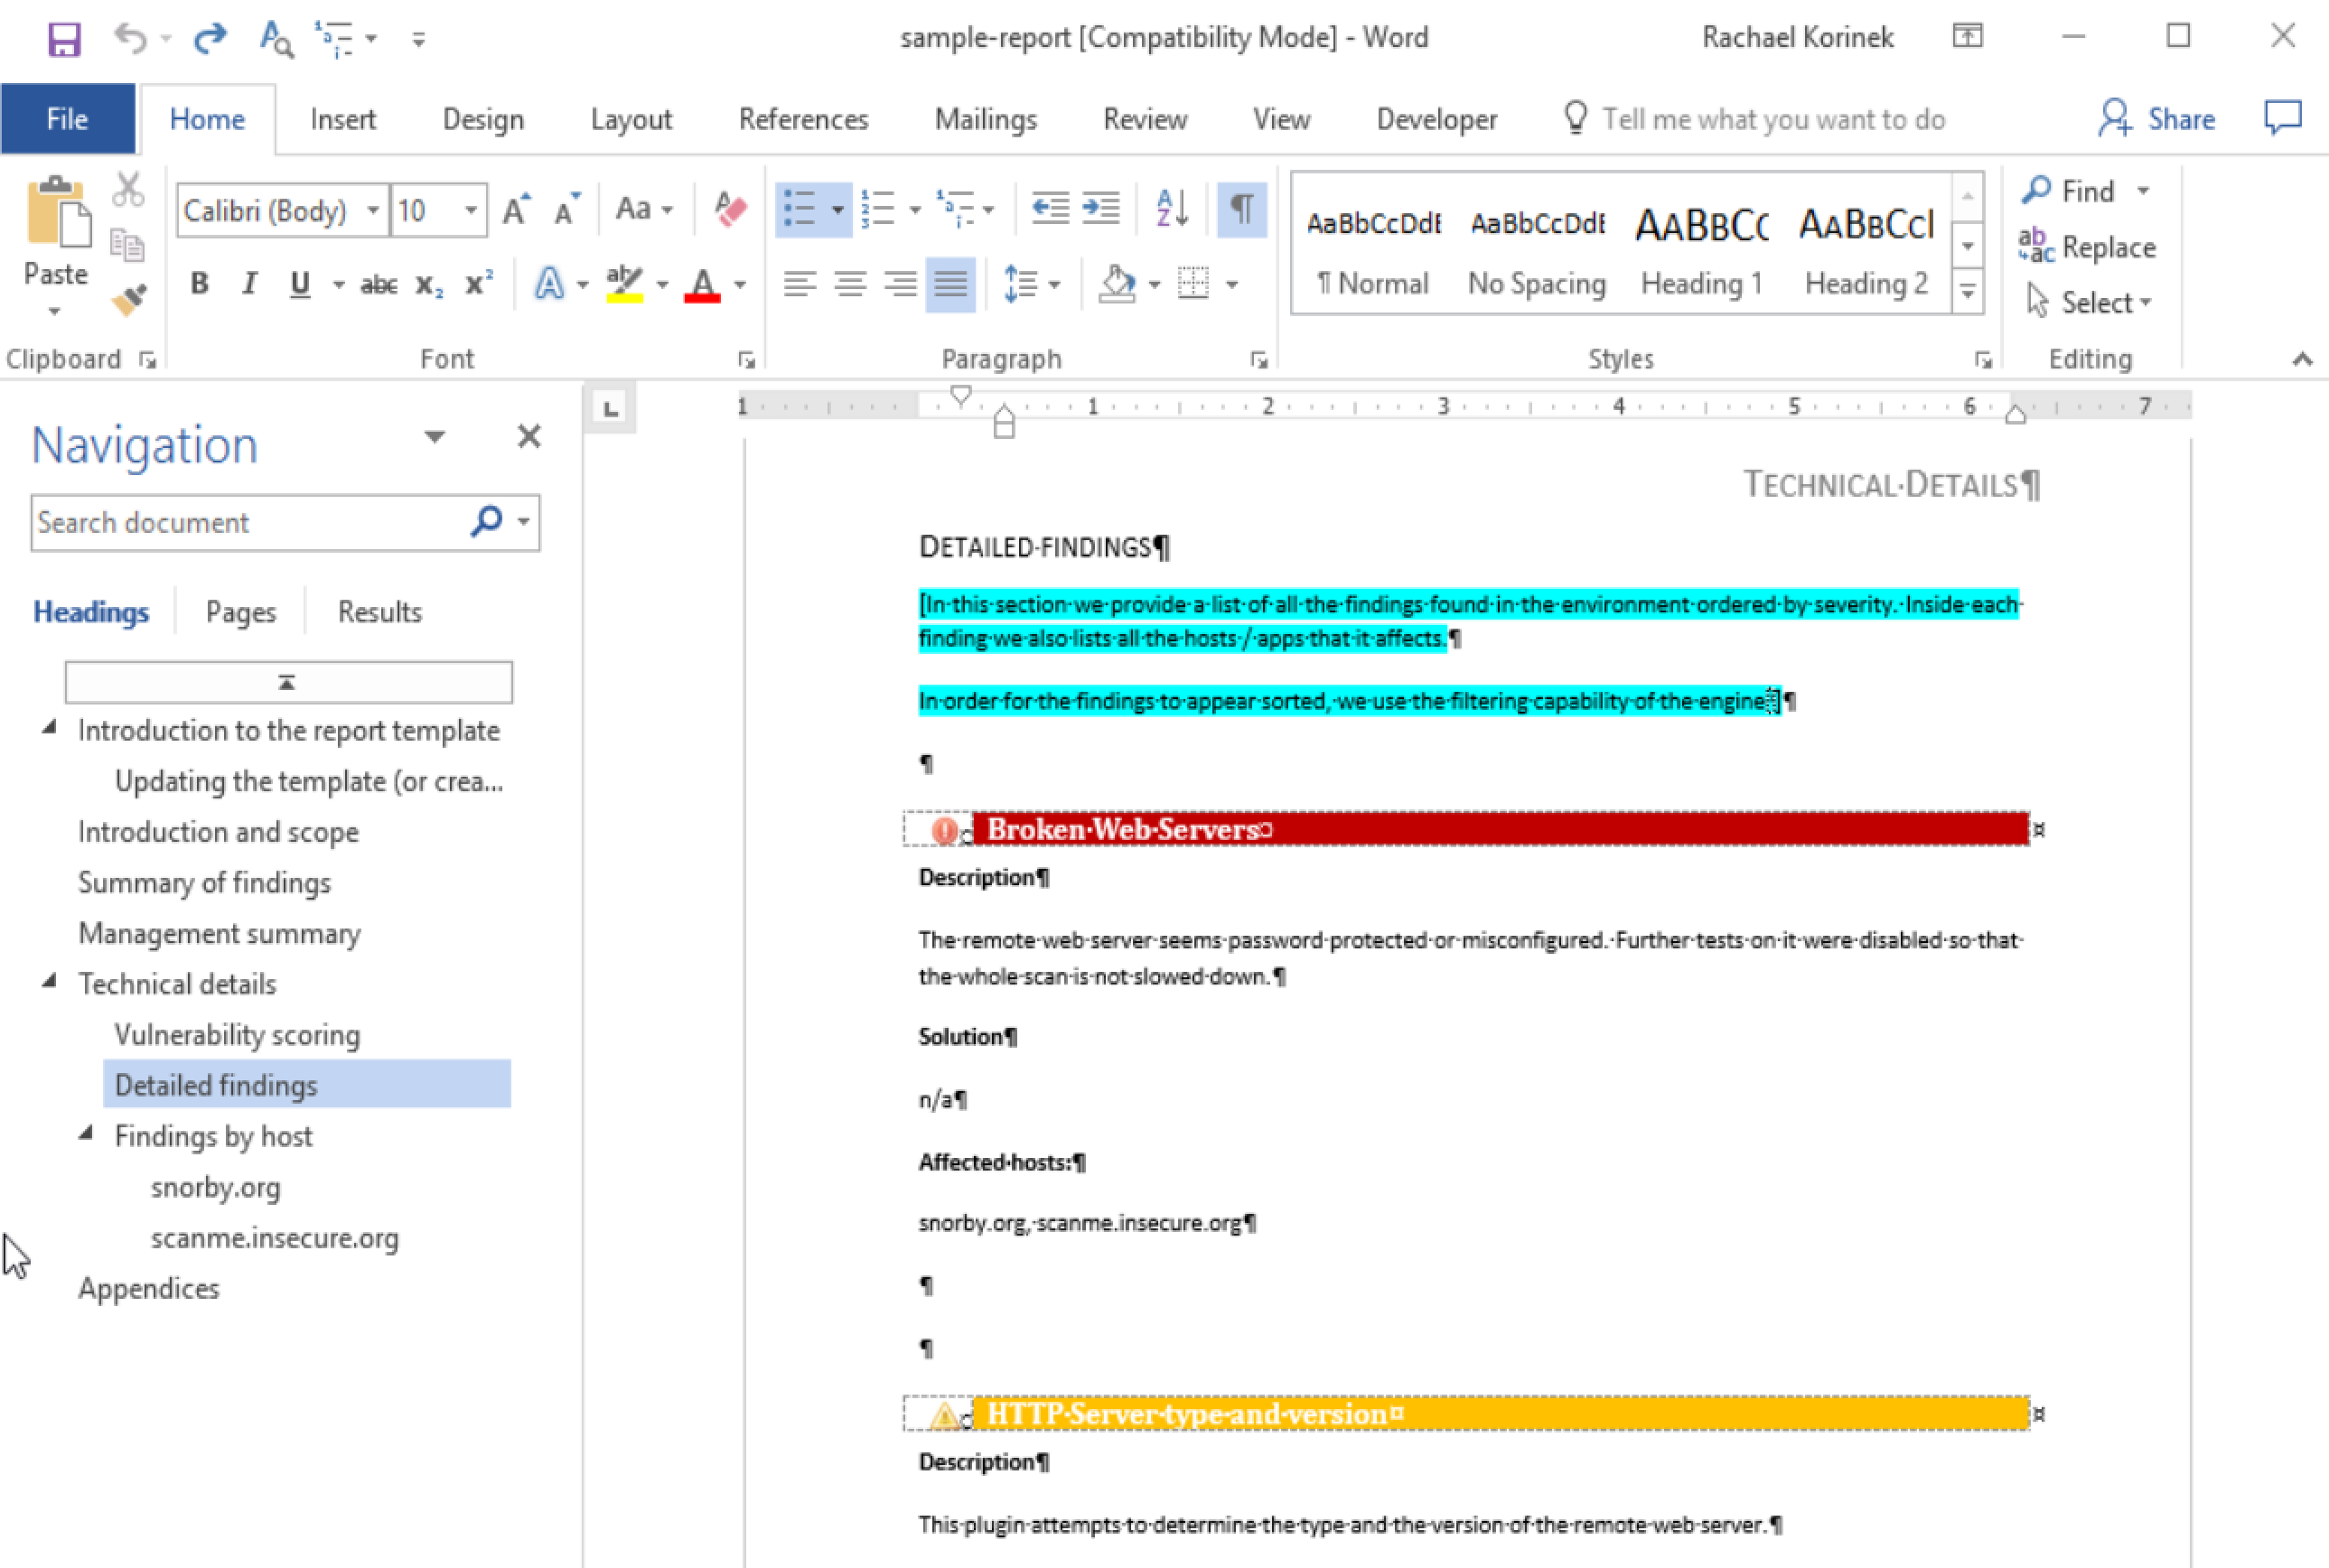
The detailed findings section in this case is also organized by risk rating with High-risk Issues appearing first. What we need to do is convert this sample Issue into a template Issue for other High-risk Issues using content controls.
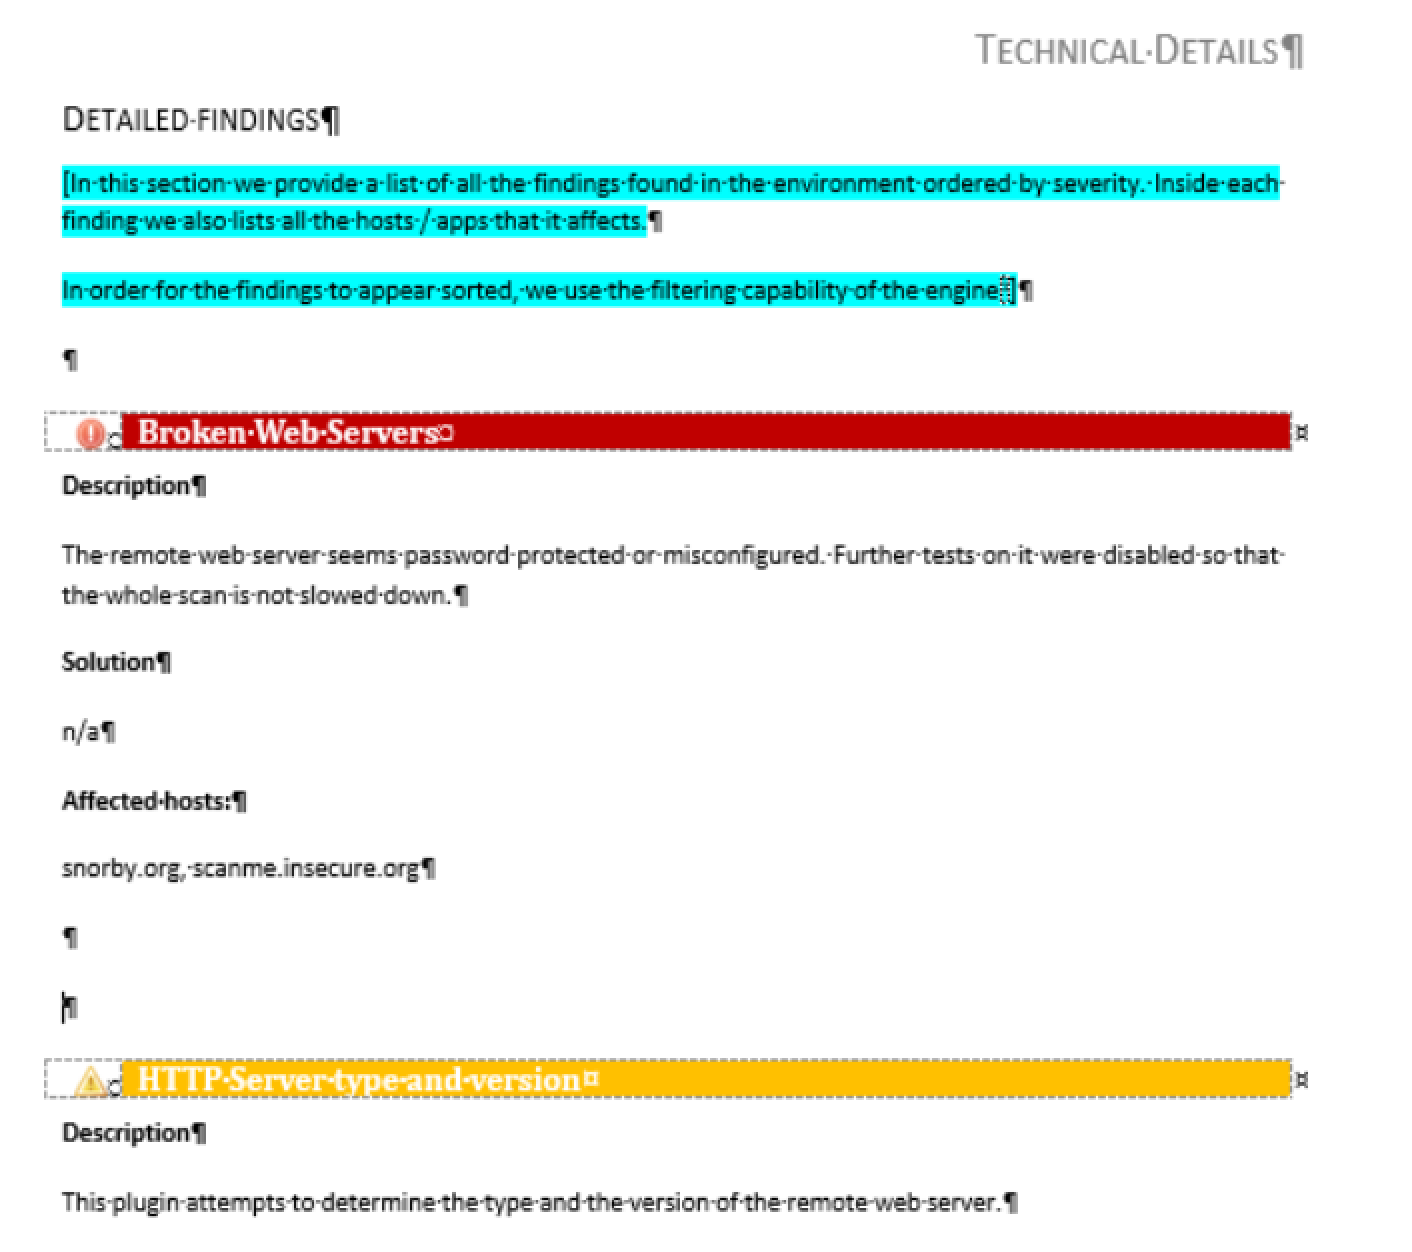
We replaced the example Issue Title with the Title control, replaced the sample description with the Description control, and replaced the example solution with the Solution control.
We also added in the magical Affected control in the place of the sample affected hosts.
Finally, we wrapped all of these controls inside the Issue control before filtering it by Risk|High.
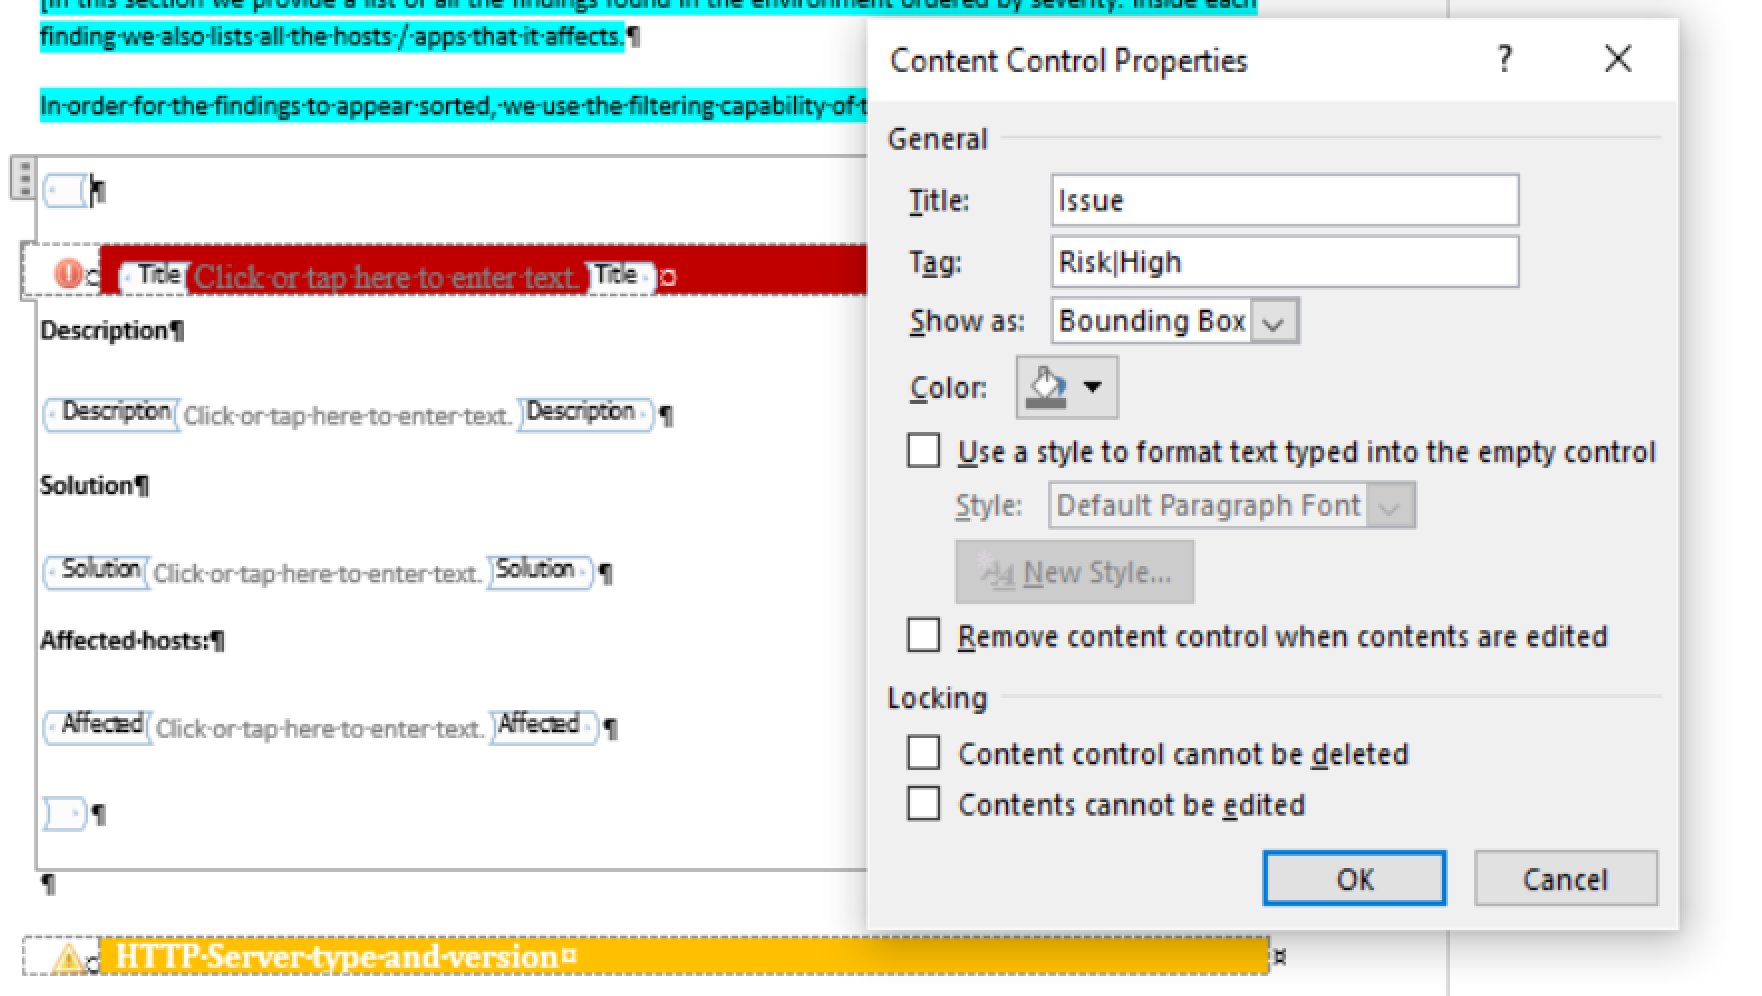
Repeat this process for every differently-filtered Issue in the project (e.g. Risk|Medium, Risk|Low, etc.
Present findings by host
Provide a list of findings that affect this host, sorted by severity.
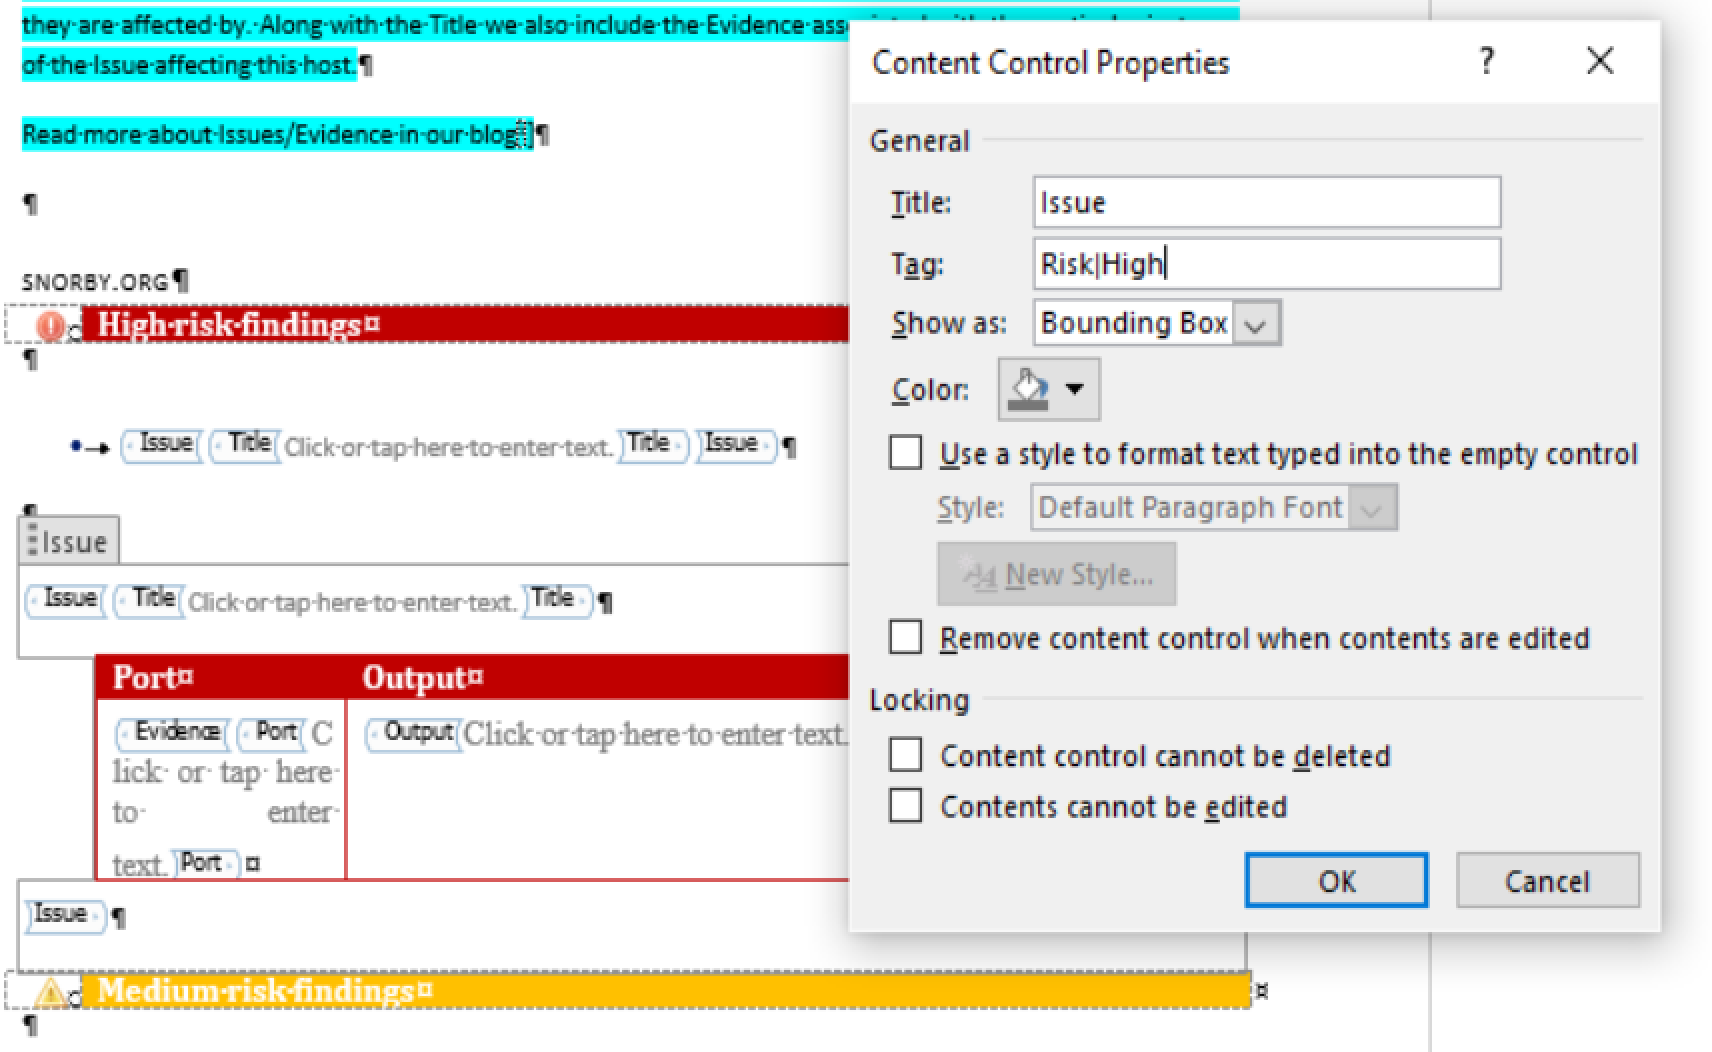
For each affected host in the project, we want to see a list of the Issues and the relevant Evidence for each of those Issues. This is going to require nesting a few controls but is actually not as complicated as it may sound.
The first Issue control will output a bulleted list of all of the High-risk Issues associated with this affected Host. We've seen this before, the Title field is wrapped with an Issue control that is filtered by Risk|High.
Below in the table, we're adding Evidence to the mix. First we added the Port and Output controls to the table cells, then we wrapped the entire table row in an Evidence control. And finally, we wrapped the entire table in an Issue control, filtered as always by Risk|High.
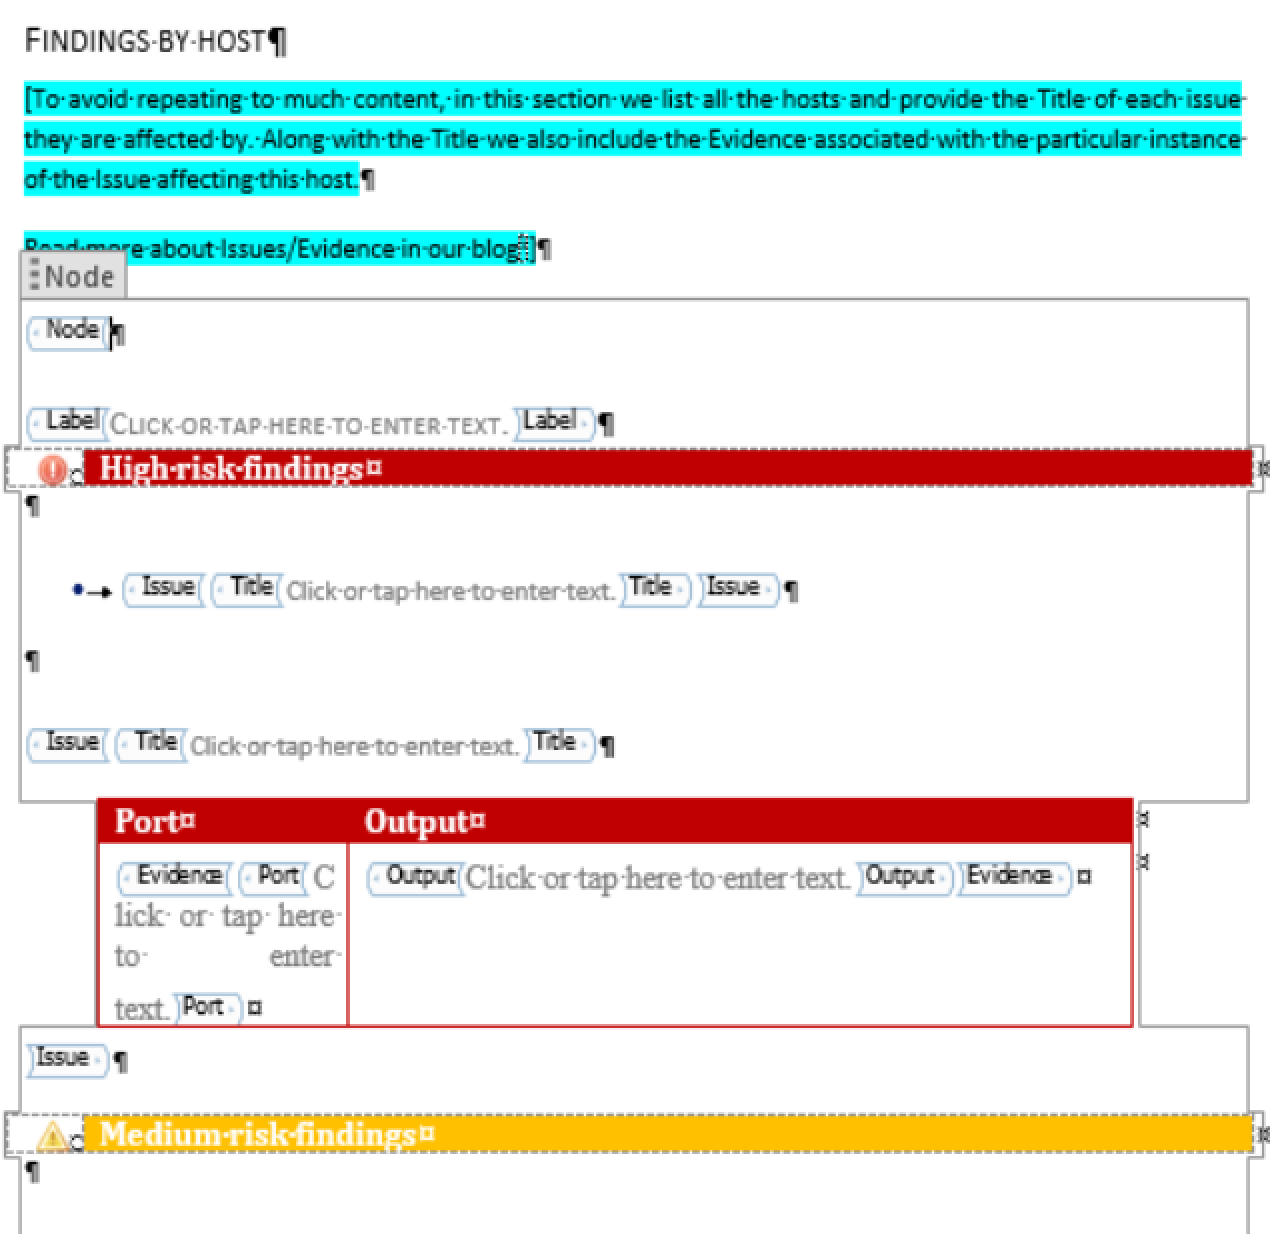
But wait, don't we want to group these by host?
Yes! In order to get these Issues organized by host, we'll need to wrap the entire repeated section in a Node control. First, we added the Issue and Evidence controls for the other Risk ratings, and added a Node Label control as well.
Nmap Services table
Add a table of open services (straight from the Nmap plugin), and apply a custom style to it.
When you upload an Nmap file to Dradis, it will look something like this:
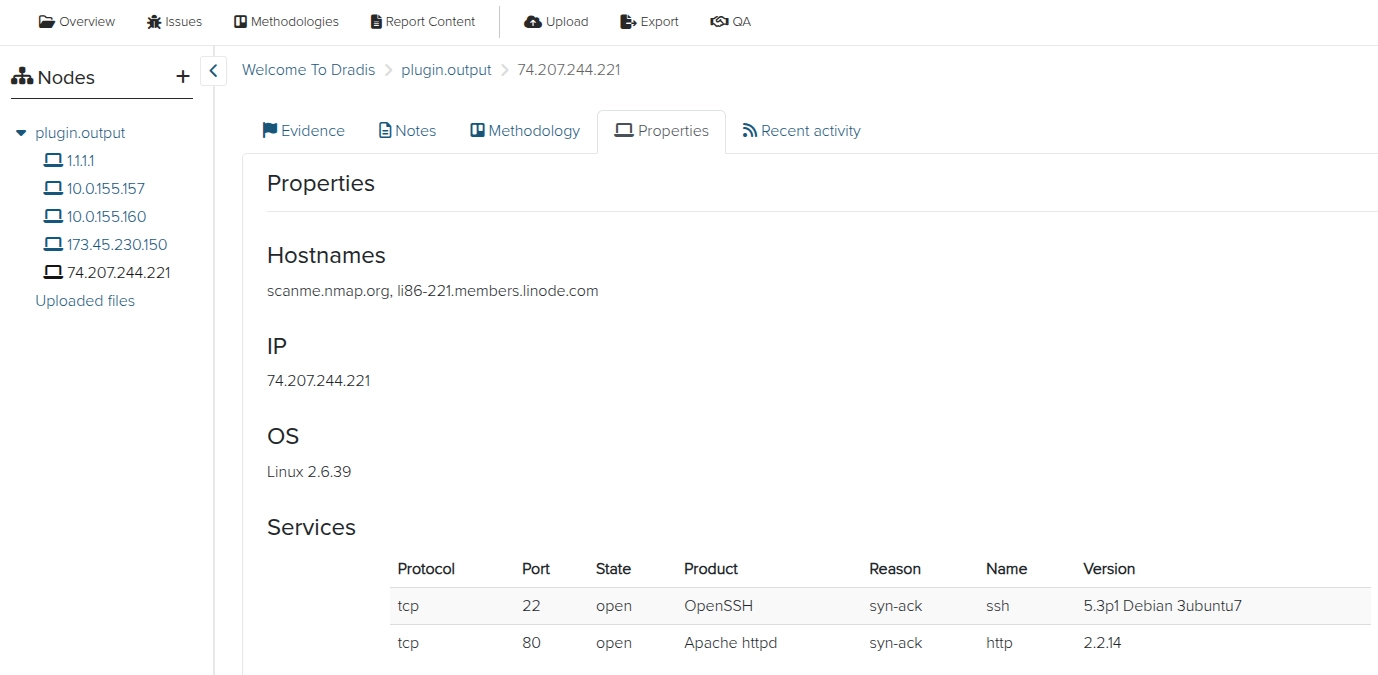
To add the Services table to your report, first you have to decide whether you want to pull in the Services table from the Node properties or from the Host Note. In most cases, we recommend using the Node properties but if you need to apply a custom table style to your Services table, then you should pull the Services table from the Host Note.
You can change the fields and formatting of the Host or Port Notes within the Mappings Manager. Head over to Dradis::Plugins::Nmap within the Mappings Manager and select the Host or the Port template. You cannot customize the format or content of the Node properties within the Mappings Manager.
To include the Sercices table from the Node properties in our sample report, we would need to add in the following content controls. Remember, you need to use the Node properties capitalization in the content controls.
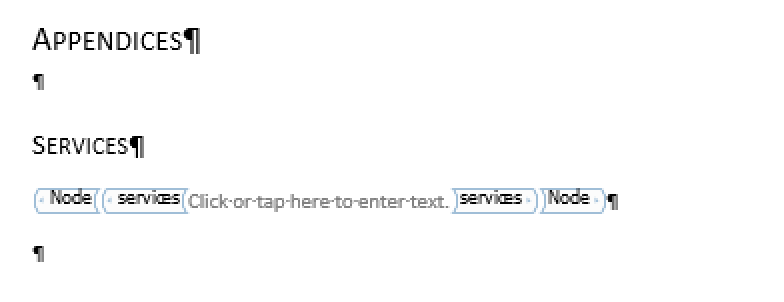
If you want to pull in the content from the Host Note instead, first you will need to make sure that the Note is set to the correct category.
The Notes from Nmap will automatically be imported using the Default category. In order to include them in our Word report, we need to make sure they are set to the AdvancedWordExport ready category.
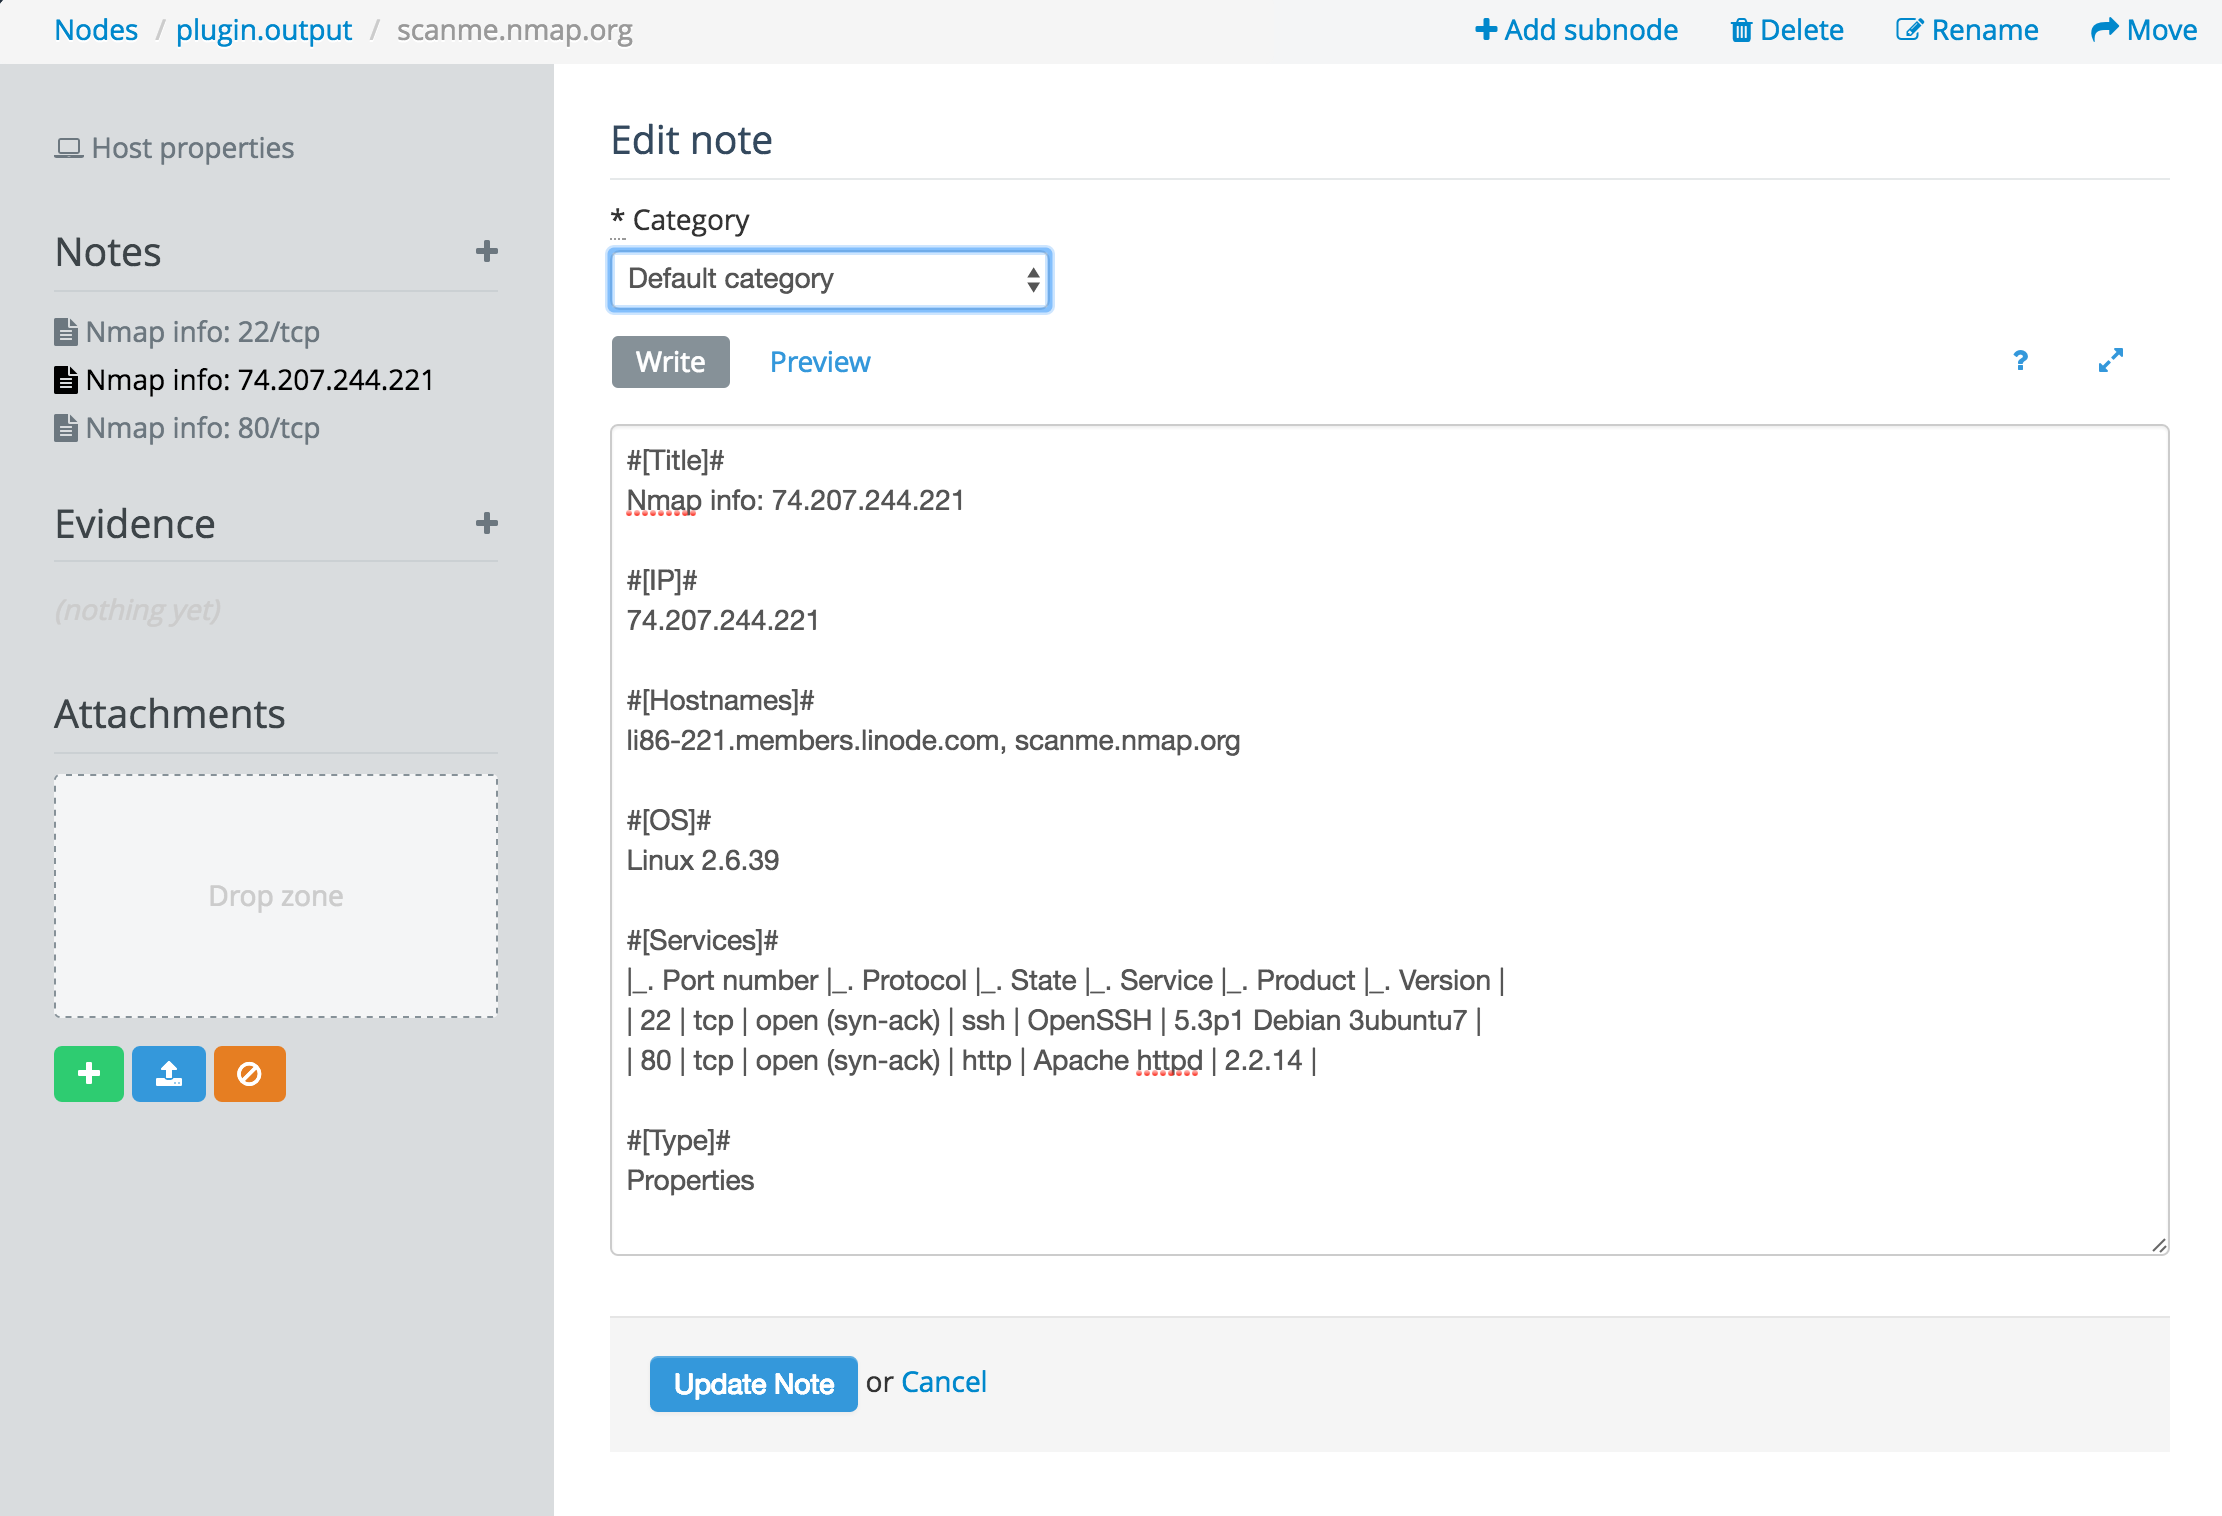
Contact our support team if you need to change the categorization for Nmap Notes.
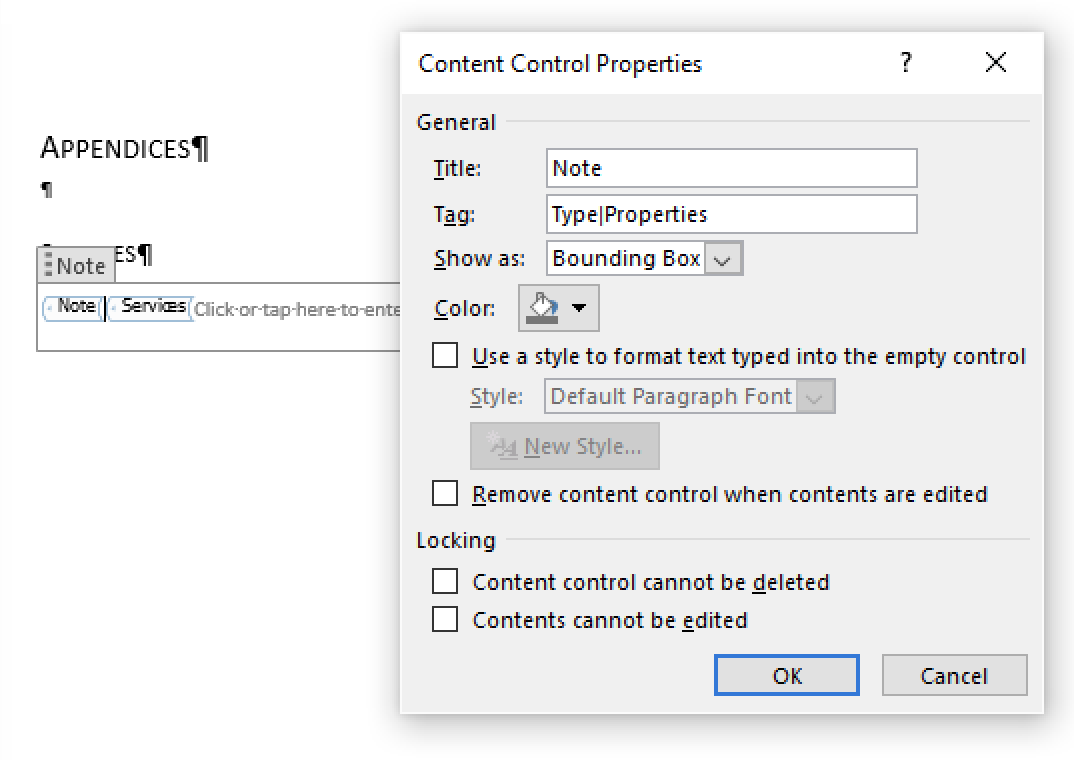
After setting the Category to AdvancedWordExport ready, we'll need to add fields like the following to our report template. See the Note content control page for more detailed instructions.
Make sure to define a #[Type]# field within the Mappings Manager so that you can filter by that field value in your report template.
Advanced styling options
Are you creating tables within Dradis and want them to export into your report with some custom formatting? Check out the instructions on the Custom Tables page of this guide.
Add screenshots to your reports and add captions to those screenshots using the instructions in the Screenshots and Captions section of the Text Styles and Screenshots page of this guide.
Don't forget to add the
Codestyle to your report template. See more details on the Code Blocks page of this guide.
Next help article: From Nessus to Word →