Filtering and sorting
A filter is used to limit what elements of our Dradis project are considered for a given section by the reporting engine.
For example, if your report template has a section for High risk findings, you want to be able to limit what Issues appear in that section. You'll use a filter for that.
This guide covers:
- Filtering Issues: a concrete example
- Defining a filter
- Filter types:
- Combining filters with AND
- Combining filters with NOT
- Combining filters with OR
- Setting precedence with parentheses
- Which content controls can I filter?
A concrete example
Say we've got a project with three issues:
| Risk | Title |
|---|---|
| High | Out-of-date Apache |
| Medium | SSLv2 enabled |
| Low | Directory listings enabled |
Lets try to create a similar table in our report. We'll work our way backwards, from the end result:
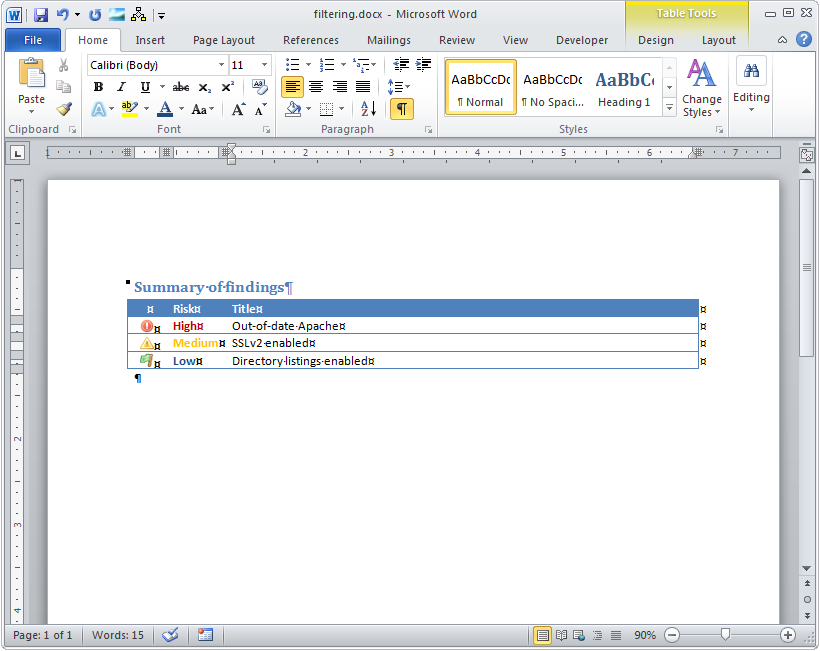
There are a few interesting things to note in this table:
- We will need the values of our
RiskandTitlefields. - Depending on the finding's
Risk, we want one icon / color combination. Highrisk findings, appear beforeMediumrisks, andLowrisks are the last ones.
We'll start with the Title placeholders:
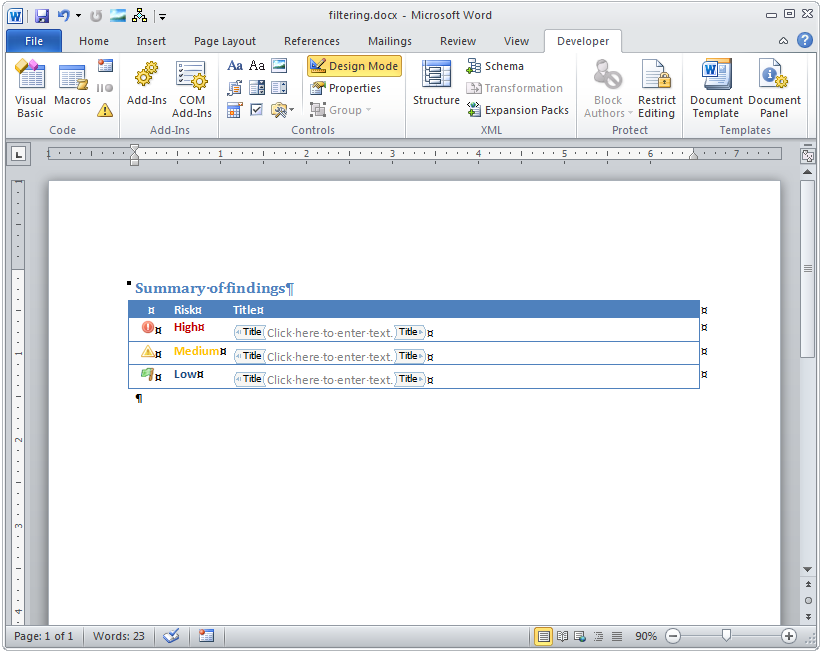
That was easy enough. Now moving on to the Risk field.
The less savvy report template creator (this of course is not your case!) could be tempted to go ahead and add placeholders for the Risk field. However lets pay some attention to what is going on here.
For every High risk finding in your project you want the same icon and the same High label. With the same behavior for Medium and Low risks.
There is no reason to create a placeholder to repeat the same information. Placeholders are useful to display information that changes from one finding to another.
For now, lets wrap each row in the table with an Issue control (if you need a refresher on what this does, review the Issue content control section).
Select the row:
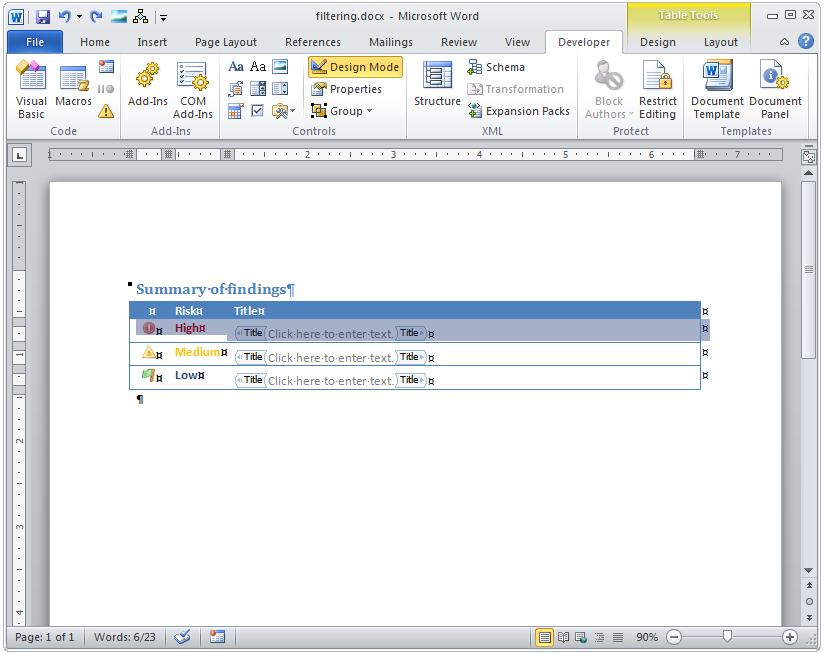
And add a wrapping Rich Text Content Control. Use Issue as the Title field of the control. Rinse, and repeat for all the rows:
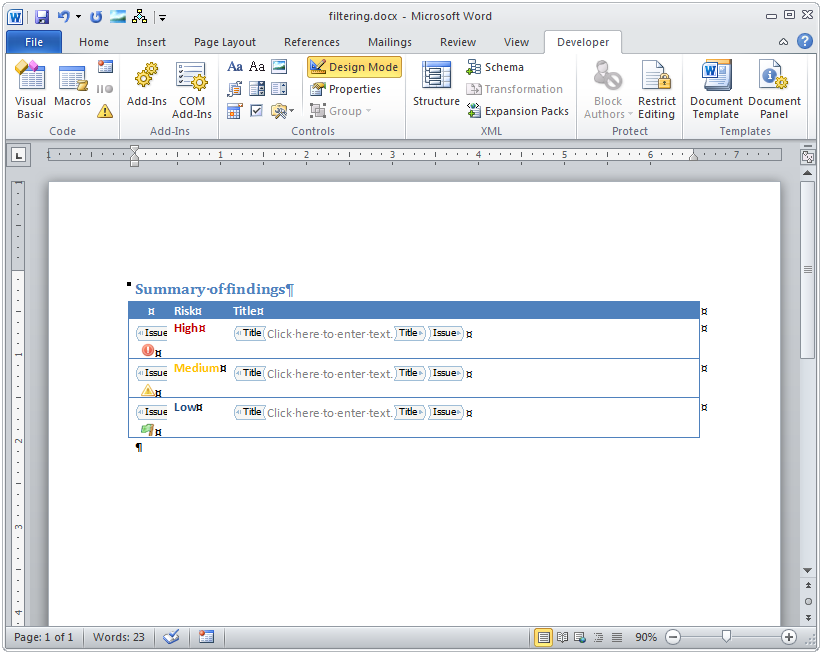
Next, we are going to add a filter to each of the Issue controls, based on the Risk field of our findings.
Defining a filter
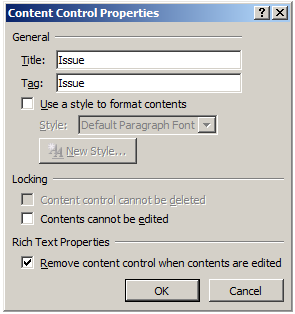
Filters are defined using the Tag property of the content control. Lets start with the first row.
This is what the control's properties look like before applying the filter:
And this is what they look like after:
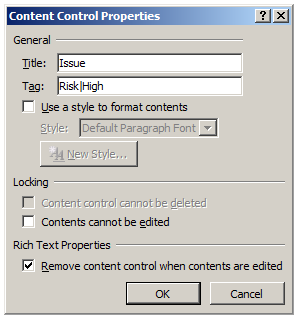
If you remember, the default behavior of the unfiltered Issue control was to repeat the enclosed content for every finding in your project.
Once this filter is applied, the enclosed content will only be repeated for those findings that pass through the filter. In this case, those issues whose Risk field has a value of High.
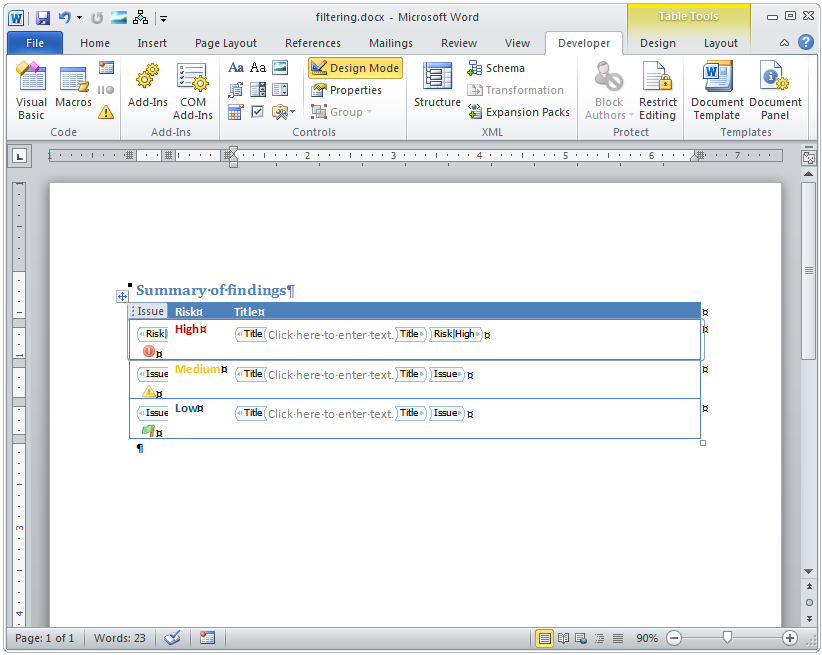
After a filter is applied, Word uses the filter details instead of the control's Title when you are in Design Mode:
For completeness, lets do the other two rows:
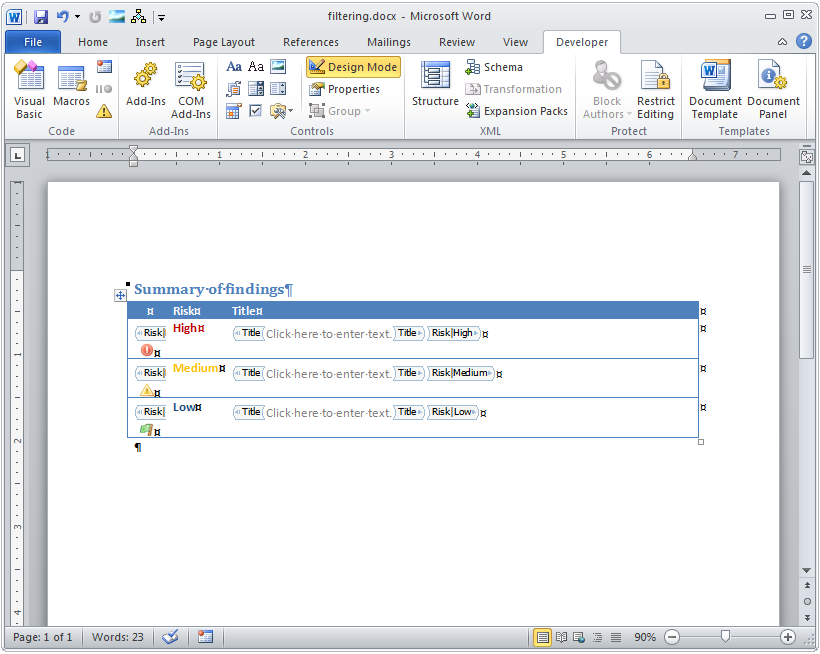
And we're all set. This table will work exactly as we wanted, producing a list of findings sorted by their Risk rating.
Filter types
Simple filters
In the previous section we saw how create a simple filter.
Simple filters inspect the value of a field in your issue and match it against the reference. The follow this pattern:
<Field>|<Value>A few examples:
Risk|HighLevel|3OWASP|A1Note that you cannot filter by either a field or a value with spaces! For example, if you have the following data in Dradis:
#[Risk Rating]#
Very High
You will need to change the field name and the value to remove the spaces like:
#[RiskRating]#
VeryHigh
Filters with spaces
As of Dradis v4.9 you can now have spaces in filters. Use double quotes to define the multi-word fields and/or values you want to use.
For example:
Category|"Web App"
"OWASP Category"|A1
Range of values filter
Sometimes a simple value is not enough. For example, say you want to map between CVSSv2 scores and High / Medium / Low ratings.
Using NIST's own range definitions:
| CVSSv2 | Risk rating |
|---|---|
| 7.0..10.0 | High |
| 4.0..6.9 | Medium |
| 0.0..3.9 | Low |
We'll need a range filter for this. Their pattern:
<Field>|(<Lower boundary>..<Upper boundary>)So, in our CVSSv2 example:
CVSSv2|(7.0..10.0)CVSSv2|(4.0..6.9)CVSSv2|(0.0..3.9)Using these filter definitions in our Summary of findings table:
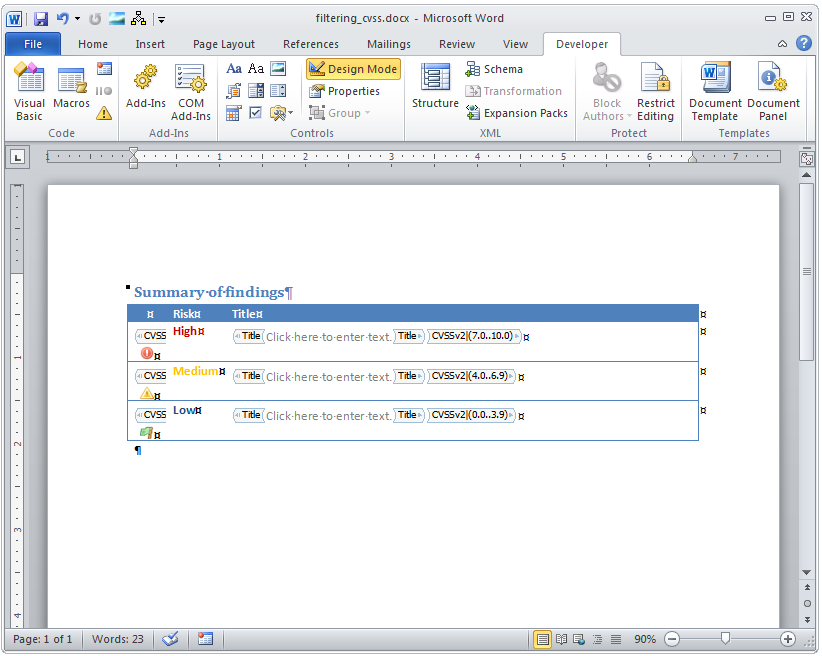
Combining filters with AND
And of course there will be cases where a filter against a single field won't be enough.
For example, if your group is using Impact and Likelihood scores to rate the different findings, you'll need to combine several filters.
You can combine filters with either the & operator or the AND operator, they will work exactly the same way.
The syntax to combine two filters is as follows:
<Filter 1> & <Filter 2><Filter 1> AND <Filter 2>A few examples:
Impact|High AND Probability|MediumRisk|Low & Type|ApplicationType|Infrastructure AND CVSSv2|(4.0..6.9)You can combine all the filters you need:
Impact|Low AND Probability|High & Type|ApplicationCombining filters with NOT
Depending on your use case, you may want to exclude specific values with your filter instead. To do that, you can either use ! or NOT.
The syntax to use NOT is as follows:
NOT <Filter><Filter 1> NOT <Filter 2><Filter 1> ! <Filter 2>A few examples:
NOT Rating|InfoExport|Yes AND NOT Impact|InfoCombining filters with OR
Depending on your use case, you may want to exclude or include specific values by using or logic with your filter. To do that, you can either use OR.
The syntax to use OR is as follows:
<Filter 1> OR <Filter 2>A few examples:
Impact|Medium OR CVSS|(3.0..5.0)Rating|Critical OR Rating|High OR Rating|Medium OR Rating|LowSetting precedence with parentheses
First, a little background into how filters are evaluated without parentheses:
<Filter 1> AND <Filter 2> OR <Filter 3> AND <Filter 4>Is evaluated as:
(<Filter 1> AND <Filter 2>) OR (<Filter 3> AND <Filter 4>)Once you start combining AND, NOT, and OR together into your filtering strings, the result can be a bit complicated to follow! For example, the following will work:
Impact|Critical OR Impact|High AND CVSS|(8.9..9.0) OR CVSS|(5.0..8.9)But, throw some parentheses in there and suddenly the string gets easier to follow:
(Impact|Critical OR Impact|High) AND (CVSS|(8.9..9.0) OR CVSS|(5.0..8.9))The parentheses are optional but will likely make deciphering more complicated logic much easier for you.
If you're using OR as a part of a more complex filter string, make sure to wrap the filter before and after the OR with a parenthesis for readability.
Which content controls can I filter?
You can filter the following content controls:
- Issue content controls
- IssueCounter content controls
- Note content controls
- Evidence content controls
- Methodology content controls
- Node content controls (by Node properties)
You can not filter the following content controls:
Next help article: IssueCounter content control →