From Nessus to Word
In this guide we're going to cover the process of creating a custom Dradis template to display data imported from Nessus. The same concepts apply to any of the other plugins.
You will also learn how to filter and sort the findings in the report by CVSSv3 ranges.
Download the resources including a sample Nessus file and the finished report template used in this guide from the Users Portal.
This guide contains:
- The goal
- A summary of issues affecting each host
- Detailed information
- Summary of issues
- Mini-intro to the Mappings Manager
- Why are only 4 issues exported?
The Goal
We want to create a template with three sections:
- First, a summary section where the issues affecting each host are listed sorted by severity.
- Second, the same list of hosts but this time each issue will be described in full detail.
- Finally, a section that lists all the issues in the environment along with all the hosts affected by them.
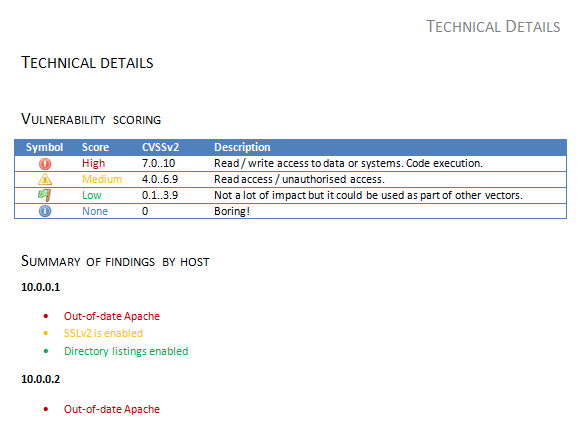
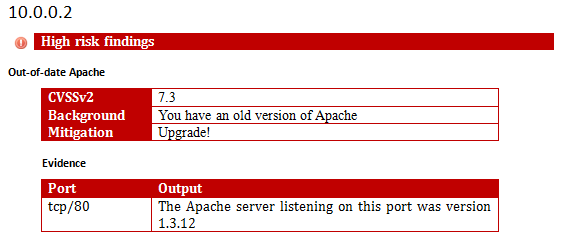
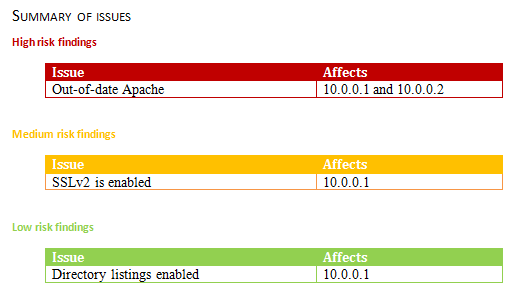
Here are some screenshots of the structure of the final report we are aiming for:
Summary of findings by host
Full details for each host
List of issues, with affected hosts
A summary of issues affecting each host
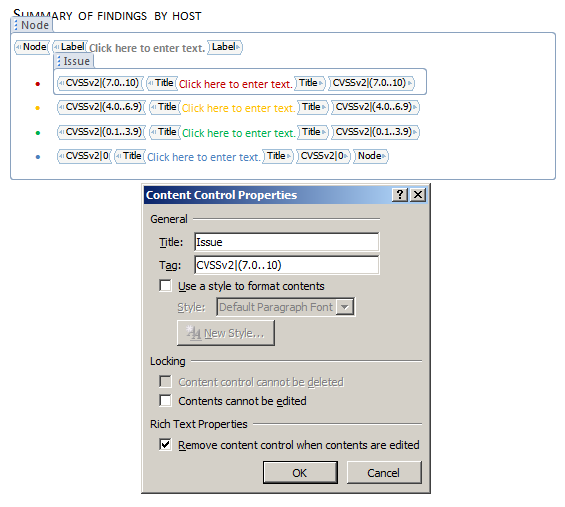
Conceptually, what we're trying to do in this section is easy: list all the hosts and for each of them create display the list of issues that affect it ordered by severity.
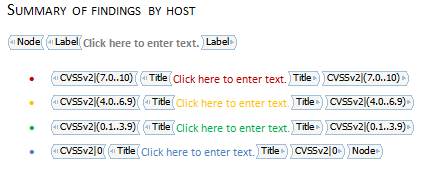
To accomplish this, we are going to need a Node content control (to cycle through all the hosts) and inside it, 4 Issue content controls (one for each risk rating) with the corresponding CVSSv3 filters.
Detailed information
In this case we are listing all the hosts again, but we want to provide full details about each of the issues including the background, solution and plugin output.
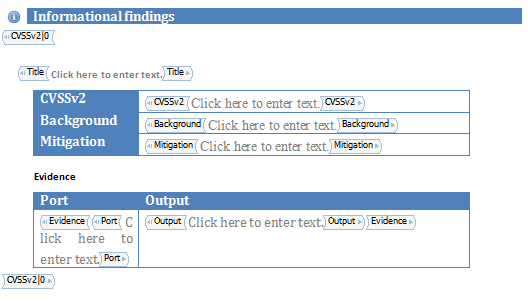
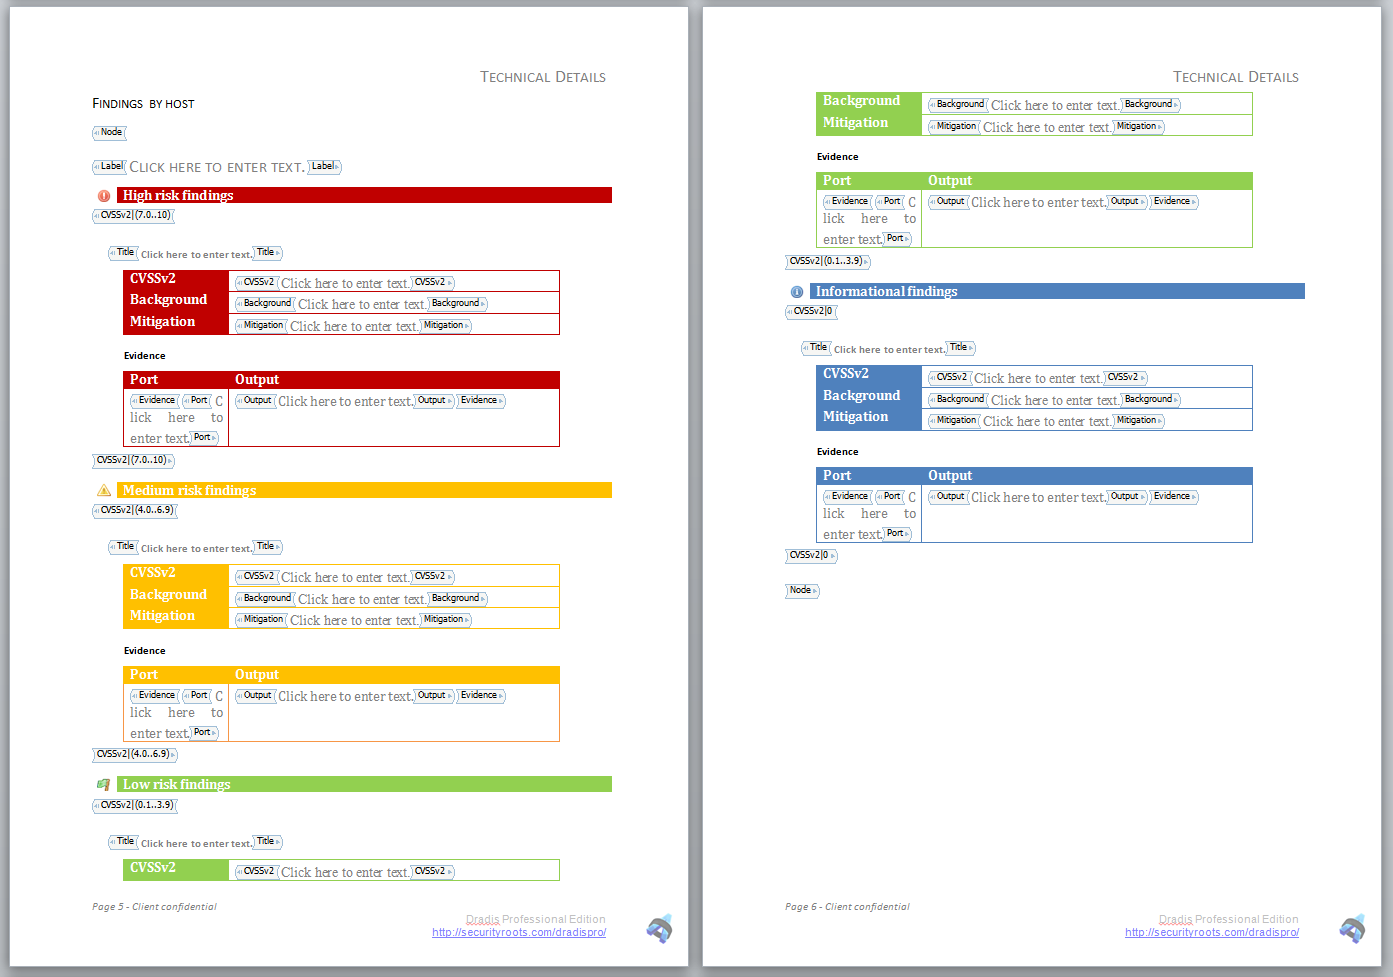
There is nothing special about this section. If you need more information about reporting by Node, or displaying the Evidence associated with a given instance please revisit the earlier pages of this guide.
Summary of issues
This one is another simple section but it is interesting as it provides the information the other way around. Instead of going from each host and displaying all the issues that affect it, we will cycle through the issues and display all the hosts affected by them.
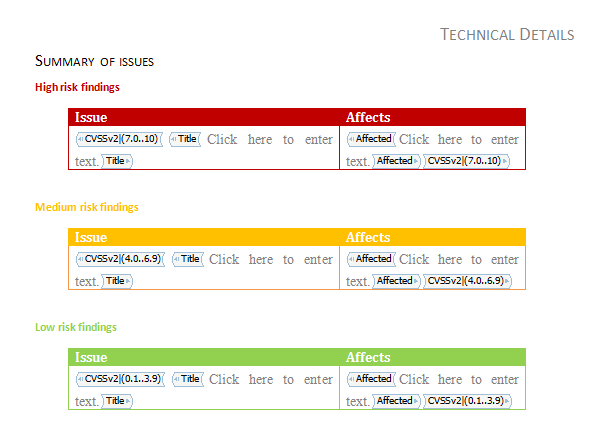
We have different tables for each of the risk ratings and in each table we have three content controls:
- The
Titlefield of the issue. - The
Affectedcontent control. Remember that special content control? It outputs a comma-separated list of all the Nodes affected by an Issue (the Nodes that have a piece of Evidence linking them to the Issue). - The enclosing
Issuetag with the correspondingCVSSv3filter.
Mini-intro to the Mappings Manager
In the interest of keeping things organized, I'm going to ask that you review the following pages for a quick Mappings Manager introduction:
Defining your mapping
Now that you understand the Mappings Manager basics, it's time to configure your Mappings Manager to match this custom report template.
Log into Dradis Pro and navigate to Mappings Manager in the header
Click + New Nessus Mapping. For Nessus Source select Report Item and for Destination Report Template select the custom template you have created and uploaded.
The Dradis Field values should already be defined by the template's Report Template Properties. Fill in the Source Field values that you would like to insert from Nessus into those fields. Alternatively, if you want to apply static text, you can select Custom Text and fill in a custom value in the Content box for that field.
Click Save Mapping.
Navigate to Projects in the header and create a new blank project. Associate the project with your custom template in the Templates section.
Open the project and navigate to Upload output from tool in the header.
Under Choose a tool, select Dradis::Plugins::Nessus. The Validation pane should now list the custom fields you have defined for your template and mapped in the Mappings Manager and show green ticks for each field, indicating that those fields will be created and populated when you upload your Nessus file.
Under Choose a file, select a Nessus file from your local system.
Watch the onscreen log under Output until you see the message:
Worker process completedNavigate to All Issues and check out the Issues that have been added to your project! Confirm that the Issues that have been added to the report in exactly the structure we need for this custom report template.
Why are only 4 issues exported?
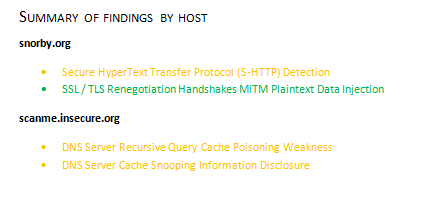
If you are following along with the resources package, you will notices something strange. After uploading the Nessus file you get plenty of issues in Dradis, but when you export, you only get a handful of them in the report:
In the exported report
In your Dradis Project
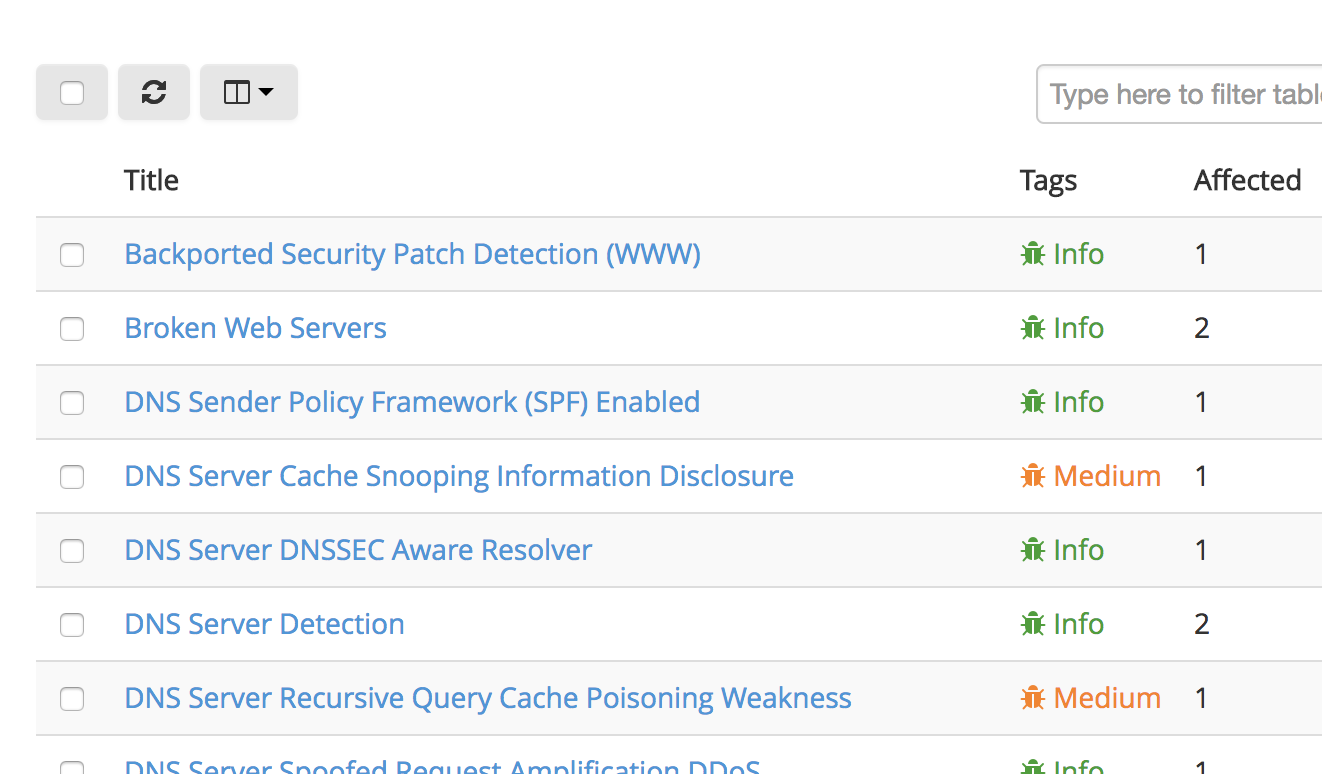
This is the expected result, and it has to do with the way in which we have defined our issue filters. If you remember we defined our informational findings as those having a CVSSv2 score of 0 (e.g. we filtered the Issue controls by CVSSv2|0).
If you open any of the issues that don't appear in the report you will see that they don't have an associated CVSSv2 score. Nessus doesn't assign one to these type of issues. When a field exists in your Mappings Manager template but is not available in the source file, we fall back to provide a n/a (i.e. not available) value. Like this:
#[CVSSv2]#
n/a
To resolve this, we could adjust the filter in our Word template to expect a value of n/a instead of a zero:
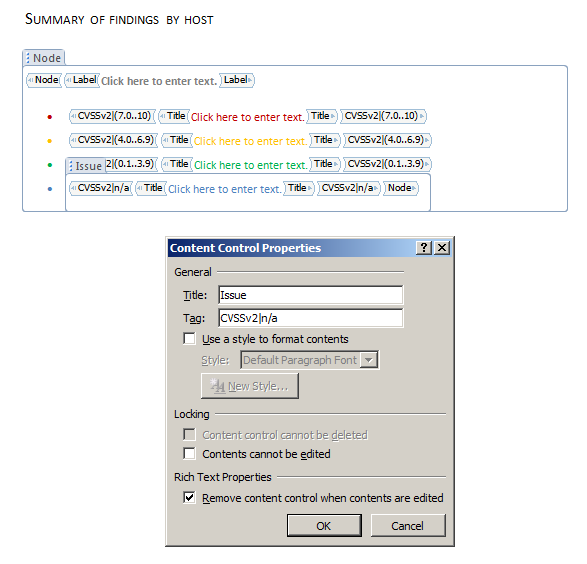
Or, we could create a new Rule in the Rules Engine to automatically change n/a to a zero:
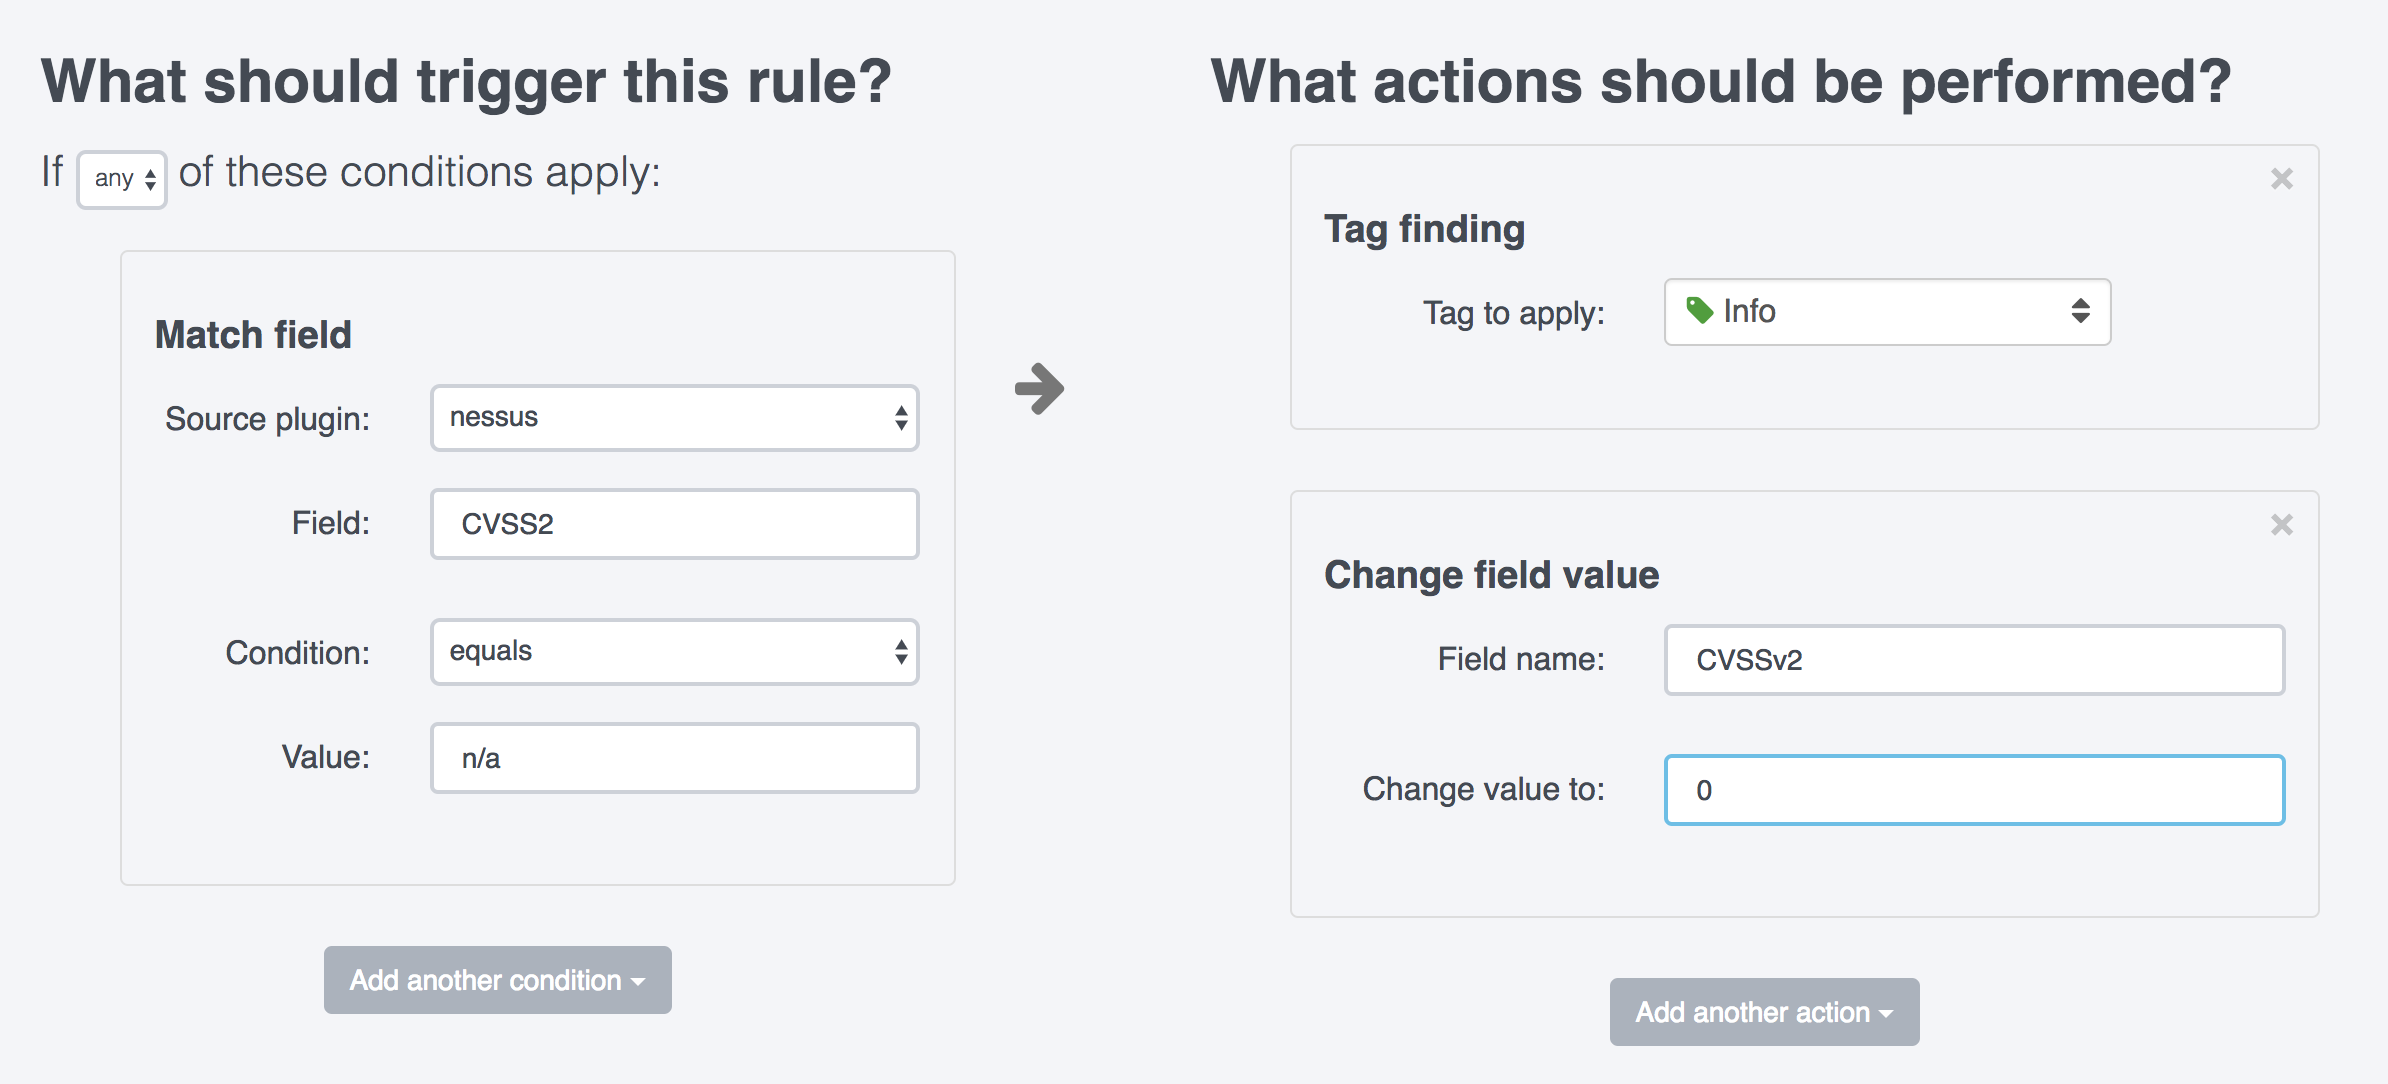
This example rule is an overachiever and tags the incoming Issue at the same time!
If do decide to use a Change Field Value Rule, make sure that you re-upload your Nessus file to a new project so that the Rule can apply! Mappings Manager or Rules Engine changes do not impact already-existing projects.
Before you go, From Nessus to Word video for a visual walk-through of this process from another perspective and using a different report template.
Great job, you reached the end of the guide! Have you read all of them?
