Tickets
This page contains:
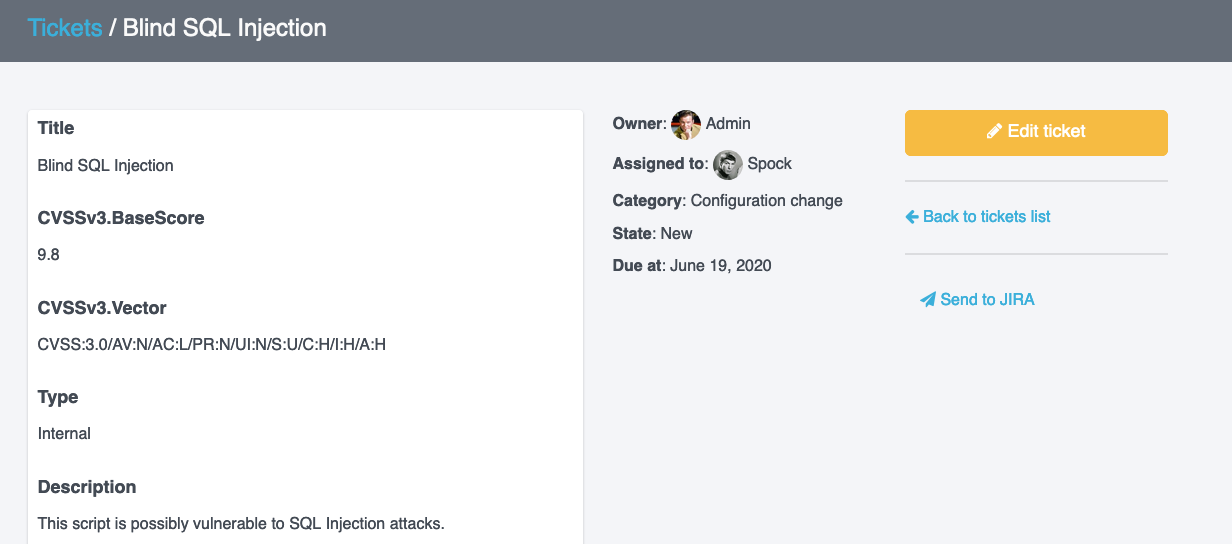
Tickets overview
Each Ticket contains the following fields:
Title: the ticket header (required)
Description: create fields in your Description using the normal
#[Field]#syntax.Owner: can be used to designate the person managing the ticket, the person who created it, etc (required)
Asignee: who is in charge of carrying out the remediation work for this ticket?
Category: associate the ticket with one of your custom categories (required)
State: associate the ticket with one of your custom states (required)
Due at: select the year, month, and day when this ticket is due

Create a new Ticket
Create a new Ticket in the Remediation Tracker manually. If you want to move an Issue from an existing project, skip straight to the Send to instructions below.
In the Remediation Tracker, click + Add new ticket in the right-hand sidebar
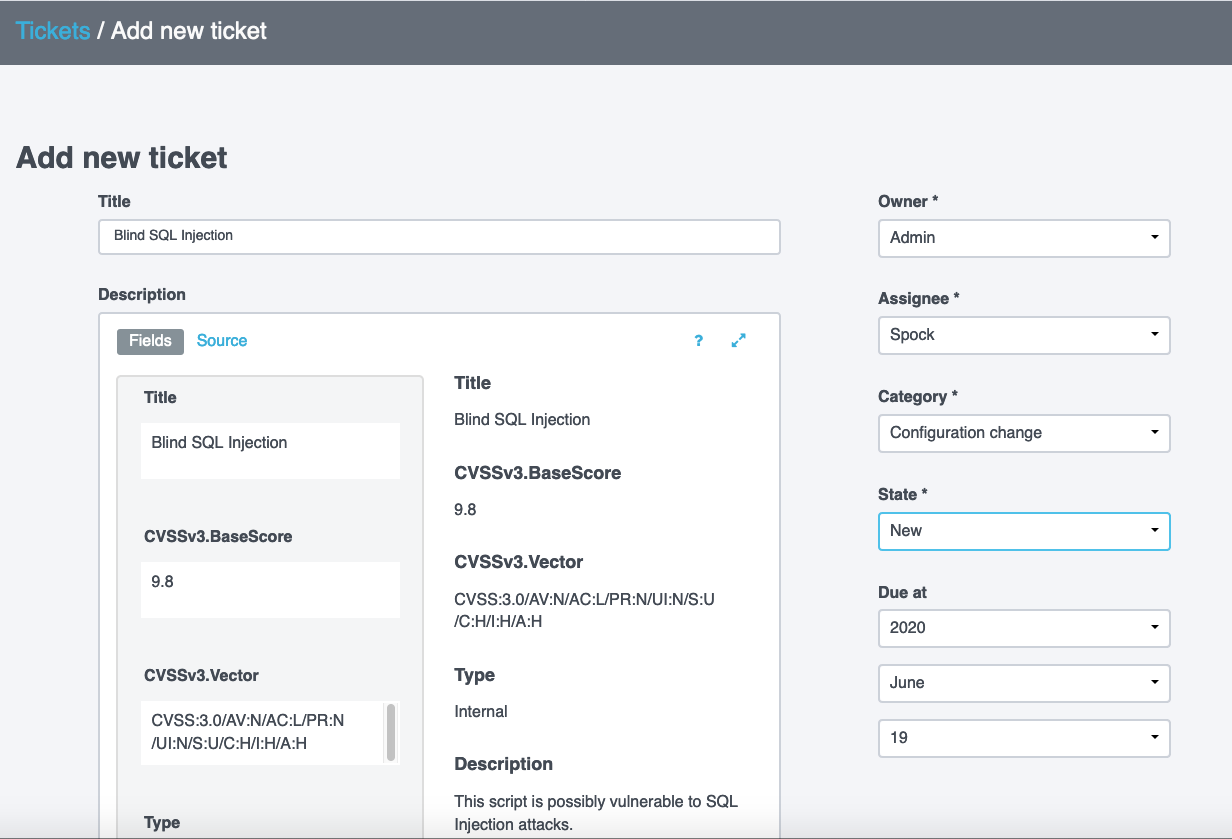
Fill out the form that appears! Make sure that all of the required fields (Title, Owner, Category, and State) are filled out before you click Create Ticket
Send an Issue to the Remediation Tracker
Have you already done the heavy lifting in your project? You've identified the Issues and probably generated a custom report as well. It's time to move from Issues in a project to Tickets on the Remediation Tracker:
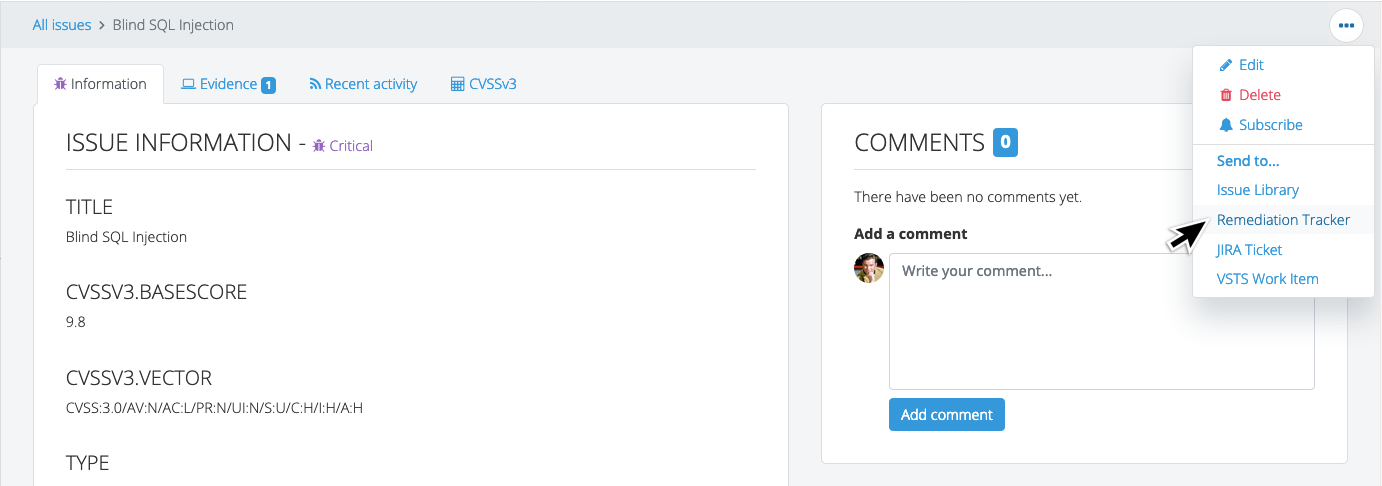
In your Project, open up on an Issue that needs to be moved to the Remediation Tracker
-
In the top right corner of the screen, click the dots menu button, then from the dropdown under Send to... select Remediation Tracker.

-
Make any necessary changes on the Add a new Ticket page (e.g. Assign the ticket to a team member, set a due date), then click Create Ticket

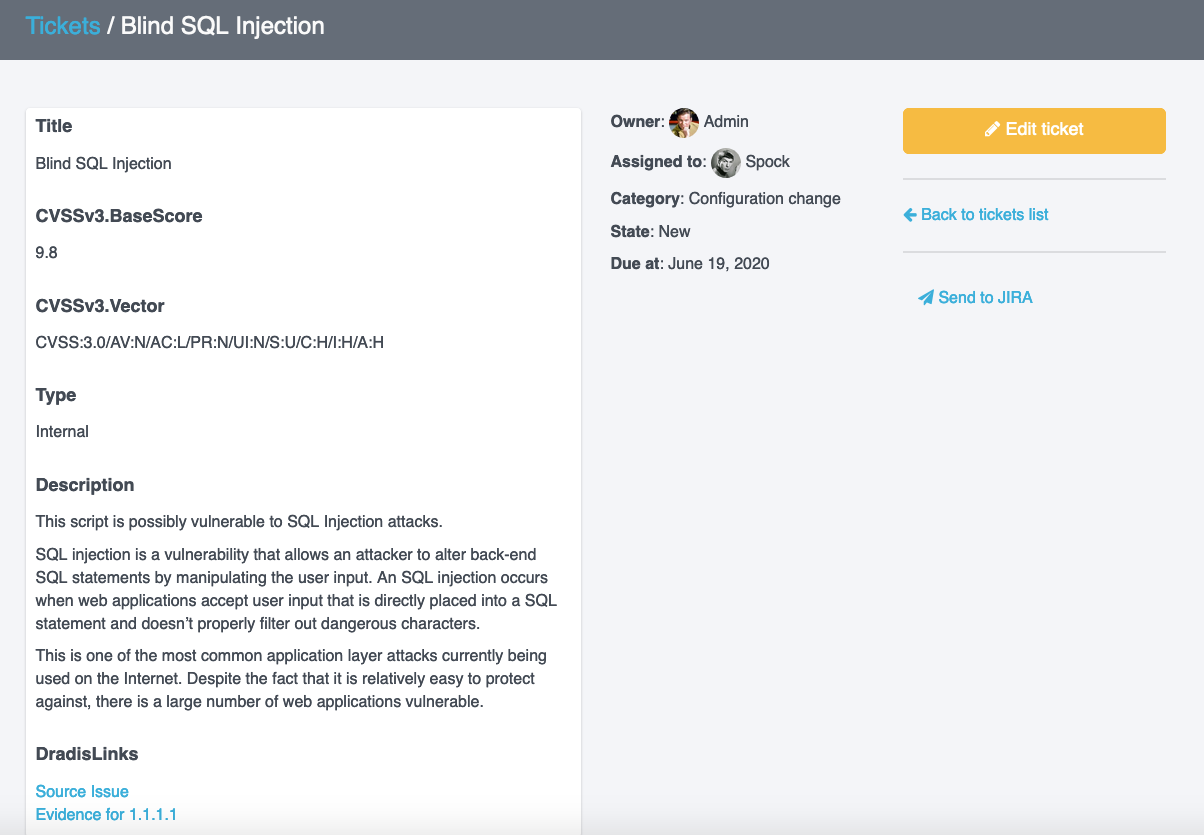
When you send an Issue to the Remediation Tracker, a #[DradisLinks]# field will automatically be created for you along with links back to the source Issue and any instances of Evidence associated with it:

That's it! You've sent an Issue from your Dradis Project to the Remediation Tracker. All that's left now is to remediate it.
Next help article: Categories →