Preparing a plain-text disk
Out of the box, the Dradis VM ships with full-disk encryption enabled.
This is normally fine, but it causes issues when uploading the image to cloud providers like Linode or AWS.
In this article we're going to cover how to prepare a disk image that is not encrypted. Later we'll import this new image into EC2.
Attach a second virtual disk
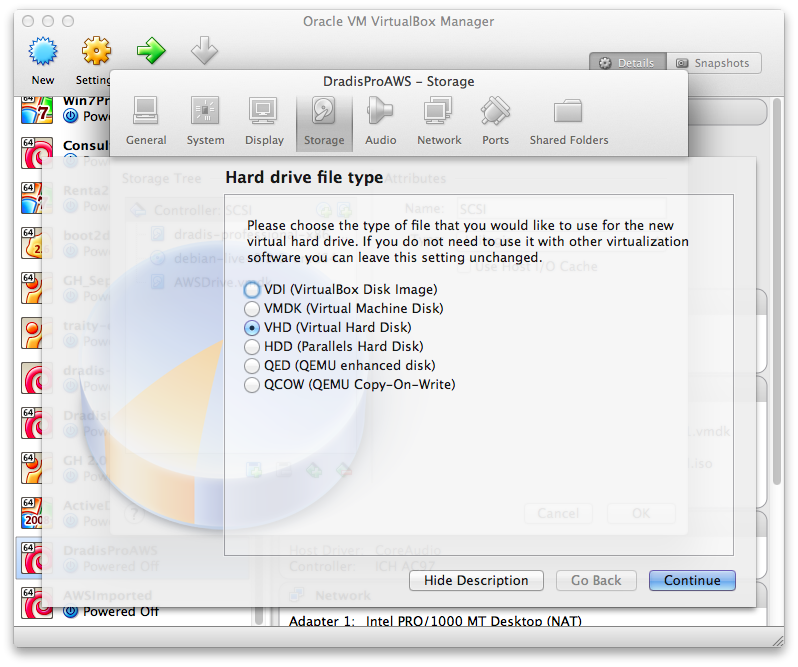
The first thin we will need is a new virtual disk in the appliance:
- Make sure to select the VHD format as it has better support in EC2.
- Don't go crazy on the size 12GB will do.

Boot with a Live CD
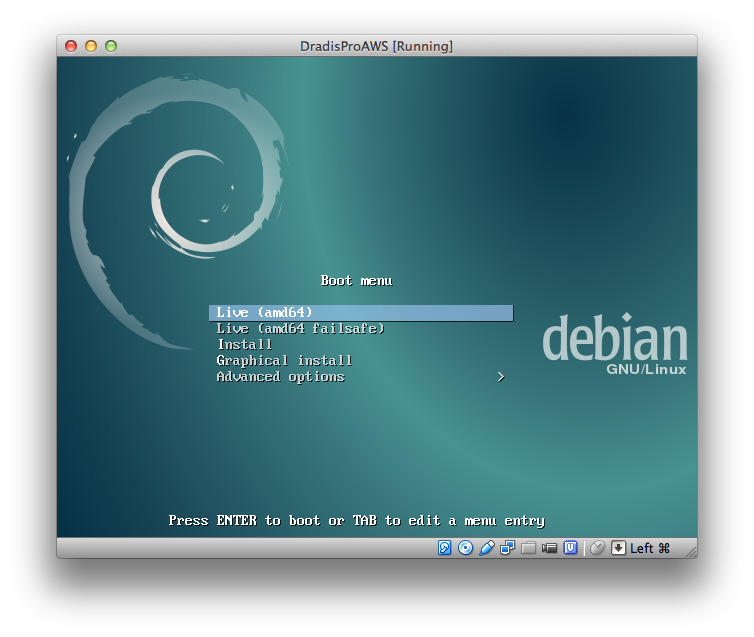
Attach a new CD drive, and mount a live Linux distribution.
In this article we've used Debian x86_64 LiveCD (mirrors, in particular debian-live-9.5.0-amd64.iso).
Warning: Some Live CDs are incompatible with some Dradis Professional OVAs. To make sure you're using the right Live CD, use the same debian version as the appliance OVA you are using. (e.g. Since the default DradisPro v3.0 OVA is using debian 9.5, use a 9.5 Live CD)

Sign in with user / live and su to root:
$ sudo su -
Create partitions
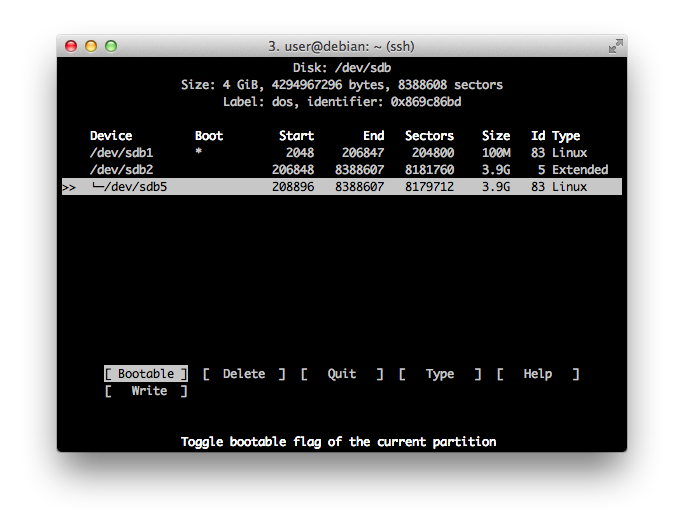
We're going to use cfdisk to partition the new disk (/dev/sdb):
# cfdisk /dev/sdb
- Create one 100Mb
primarypartition. Set thebootableflag. This will be/boot. - Create an
extendedpartition with the rest of the disk. - Inside the extended one, create another partition. This will be
/root.

Format the partitions
We'll use ext2 for /boot and ext4 for /root:
# mkfs.ext2 /dev/sdb1
# mkfs.ext4 /dev/sdb5
Unlock encrypted volume
The main Dradis drive is full-disk encrypted, so we have to unlock it:
# apt-get update
# apt-get install lvm2 cryptsetup
# cryptsetup luksOpen /dev/sda5 dradispro
It is also configured to use a logical volume manager, which we also need to activate:
# pvscan && lvscan && vgscan
And activate:
# vgchange -a y
# vgdisplay
root@debian:~# vgdisplay
  --- Volume group ---
  VG Name               dradispro
  System ID
  Format                lvm2
  Metadata Areas        1
  Metadata Sequence No  3
  VG Access             read/write
  VG Status             resizable
  MAX LV                0
  Cur LV                2
  Open LV               0
  Max PV                0
  Cur PV                1
  Act PV                1
  VG Size               74.75 GiB
  PE Size               4.00 MiB
  Total PE              19137
  Alloc PE / Size       19137 / 74.75 GiB
  Free  PE / Size       0 / 0
  VG UUID               woaPq1-2EI2-O3wt-l6aQ-IYWd-HX1I-lbbCoc
Copy data to non-encrypted volume
First we need to create some mount points:
# mkdir /mnt/drive{1,2}p{1,5}
Mount the drives:
# mount /dev/sda1 /mnt/drive1p1
# mount /dev/dradispro/root /mnt/drive1p5
# mount /dev/sdb1 /mnt/drive2p1
# mount /dev/sdb5 /mnt/drive2p5
First we copy the /boot content:
# rsync -avrh /mnt/drive1p1/ /mnt/drive2p1/
Then we copy the /root content:
# rsync -avrh —exclude={/dev/*,/proc/*,/sys/*,/tmp/*,/run/*,/mnt/*,/media/*,/lost+found} /mnt/drive1p5/ /mnt/drive2p5/
Update boot information
We need to make a couple of changes to the default configuration to boot from the un-encrypted disk.
Unmount the new /boot partition and re-mount inside /root:
# umount /mnt/drive2p1
# mount /dev/sdb1 /mnt/drive2p5/boot/
Before we can chroot to the new disk, we need to mount some other endpoints:
# mount -t proc proc /mnt/drive2p5/proc/
# mount --rbind /sys /mnt/drive2p5/sys
# mount --rbind /dev /mnt/drive2p5/dev
# chroot /mnt/drive2p5 /bin/bash
Now we're effectively seeing the new image.
Partition table
First, is the /etc/fstab file that controls the partitions table.
Get UUID of /dev/sdb1 with:
# ls -l /dev/disk/by-uuid
And update /etc/fstab to point to /dev/sda5 and the UUID for /root and /boot respectively:
# cat /etc/fstab
Example output:
# <file system> <mount point>   <type>  <options>       <dump>  <pass>
/dev/mapper/dradispro-root /               ext4    errors=remount-ro 0       1
# /boot was on /dev/sda1 during installation
UUID=2a5e9b7f-2128-4a50-83b6-d1c285410145 /boot           ext2    defaults        0       2
/dev/mapper/dradispro-swap_1 none            swap    sw              0       0
/dev/sr0        /media/cdrom0   udf,iso9660 user,noauto     0       0
After changes are made:
# <file system> <mount point>   <type>  <options>       <dump>  <pass>
/dev/sda5 / ext4    errors=remount-ro 0       1
# /boot was on /dev/sda1 during installation
UUID=740582aa-e138-4e44-a0b8-10314b70d34b /boot ext2    defaults        0       2
/dev/sr0 /media/cdrom0   udf,iso9660 user,noauto     0       0
You can delete the entry corresponding to the swap partition.
GRUB boot loader
Next, we need to update the Grub configuration file:
vi /boot/grub/grub.cfg
Replace the references to /mapper/dradispro-root with /sda5. From:
linux /vmlinuz-4.9.0-7-amd64 root=/dev/mapper/dradispro-root ro quiet
To:
linux /vmlinuz-4.9.0-7-amd64 root=/dev/sda5 ro quiet
And activate the changes:
# grub-mkconfig -o /boot/grub/grub.cfg
# update-grub
# grub-install /dev/sdb
Initial Ramdisk
And update the initrd image
# mkinitramfs -o /boot/initrd.img-4.9.0-7-amd64 4.9.0-7-amd64
Exit and halt
Now that all the changes have been made to /dev/sdb you can unmount or simply shut down the VM.
Downgrade the linux kernel
At the time we published this guide, the Linux kernel version of the latest Dradis OVA file is not supported in AWS. To deploy on AWS at this time, you'll need to downgrade the machine kernel.
Create a new VM and attach this disk image to it. It should boot up without issues and you should be able to connect to Dradis pointing your browser to the VM's IP.
Edit /etc/apt/sources.list and change stretch for jessie in all uncommented lines, so the file looks similar to:
      deb http://ftp.us.debian.org/debian/ jessie main non-free contrib
      deb-src http://ftp.us.debian.org/debian/ jessie main non-free contrib
      deb http://security.debian.org/debian-security jessie/updates main contrib non-free
      deb http://ftp.us.debian.org/debian/ jessie-updates main contrib non-free
Then run:
      $ sudo apt-get update
      $ sudo apt-get install linux-image-3.16.0-4-amd64 linux-headers-3.16.0-4-amd64
      $ sudo apt-get remove linux-image-4.9.0-6-amd64
Next article in guide: Uploading disk image →